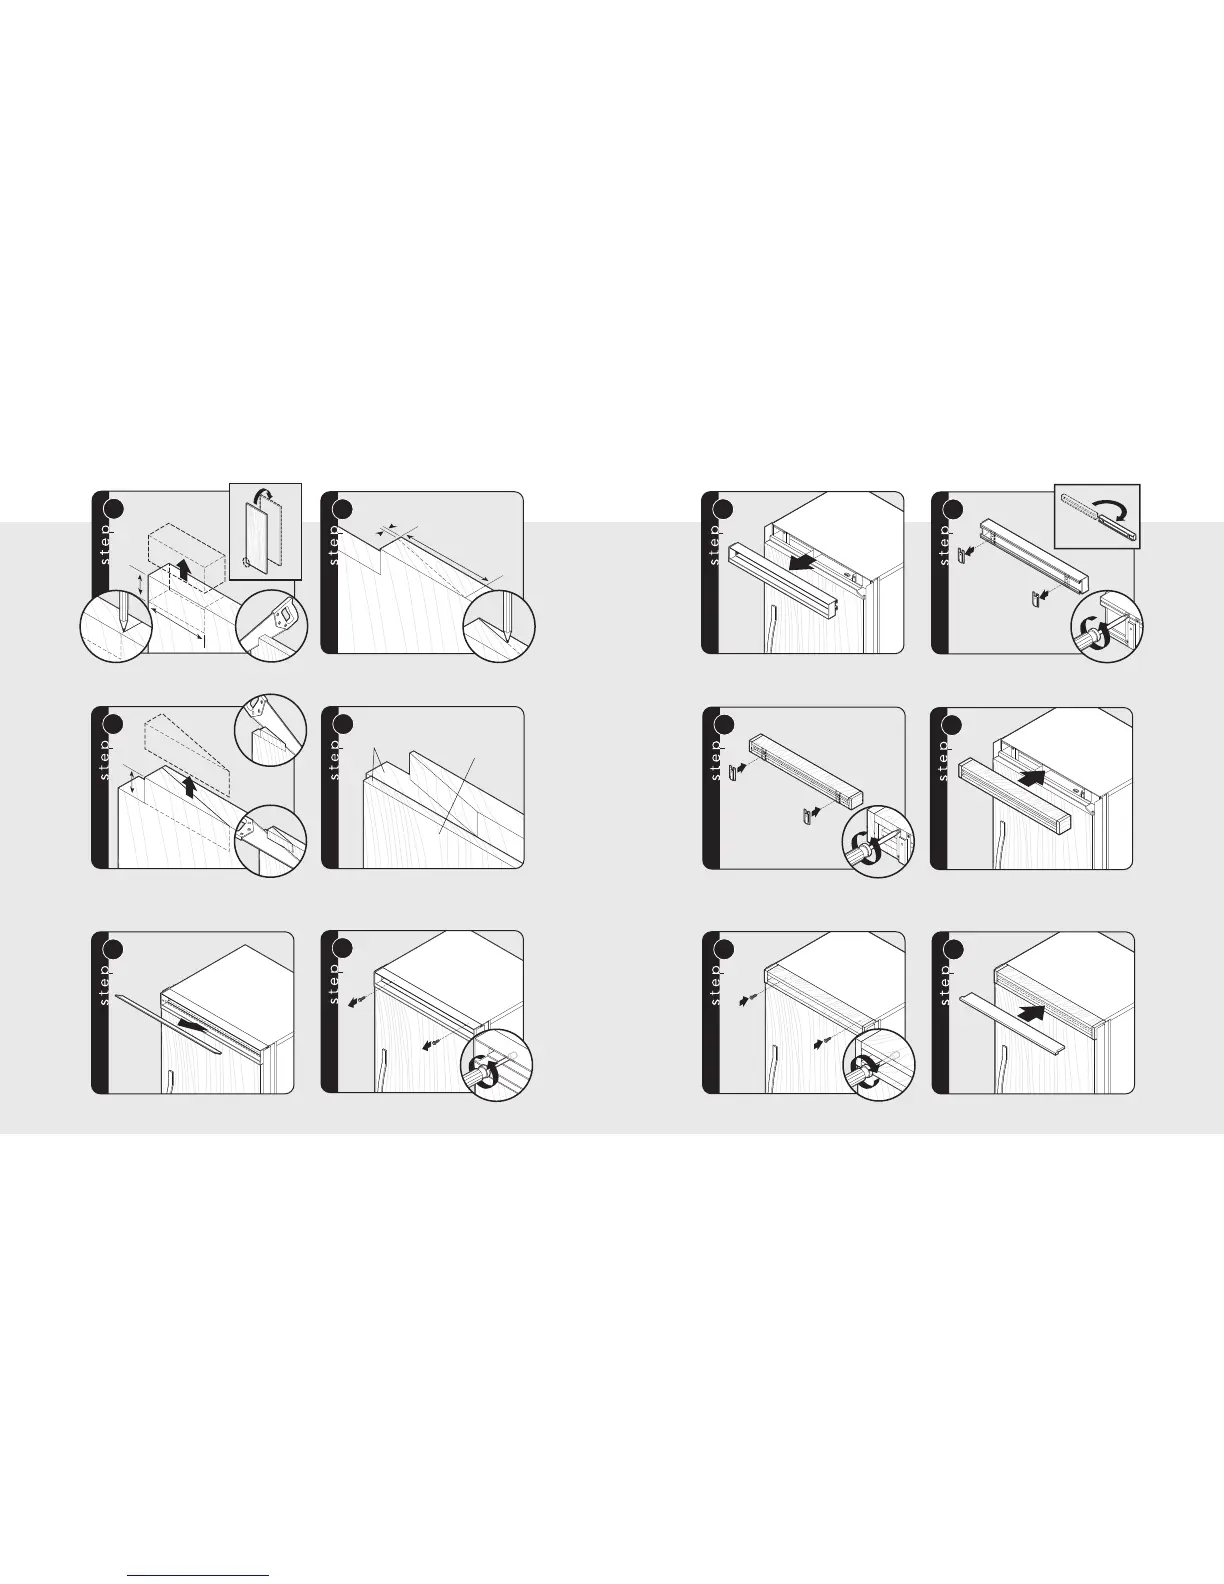
Remove air grille center blade.
Remove two 1/4” (0.6 cm) screws with a magnetic
extended screwdriver at least 8” (20.3 cm) long.
Pull air grille assembly forward.
Remove 2 mounting brackets from
the grille air assembly.
Using eight screws removed from the mounting brackets,
attach mounting brackets to the custom wood grille using
predrilled pilot holes. (See grille overlay specifications for
proper alignment and pilot hole placement.)
Insert custom air grille assembly.
Custom Grille Installation
Install two 1/4” (0.6 cm) screws with a magnetic
extended screwdriver at least 8” (20.3 cm) long.
Install custom air grille center blade.
Custom Grille Installation (cont.)
Measure and cut 2-1/16” diagonal in
lower left corner.
Cut out diagonal in lower left corner.
3
”
(
7
.
6
2
c
m
)
5
/
8
”
(
1
.
6
c
m
)
3
2
1
1
1
-
1
3
/
1
6
”
(
4
.
6
0
c
m
)
2
3
/3
2
”
(
.
2
4
c
m
)
Bottom-Mount Custom Panel Hinge Cutout (if required)
Final view of lower corner
4
1/4” (0.6 cm)
base panel added
Surfaces
are flush
Install two screws but DO NOT tighten all the way.