Do you have a question about the VINCENT PHO-701 and is the answer not in the manual?
Do not open the appliance; no user-serviceable parts inside.
Do not modify or repair; use qualified professionals for service.
Connect/disconnect by plug, avoid damage, do not touch with wet hands.
Ensure ventilation, avoid high temperatures, manage volume, clean carefully.
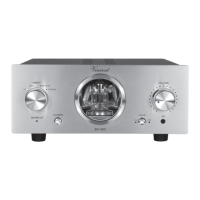
Indicates power status when the device is switched on.
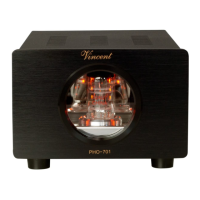
Shows the vacuum tube illumination.
Main switch for turning the unit on and off.
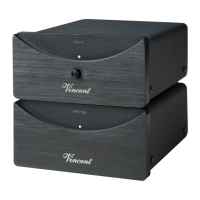
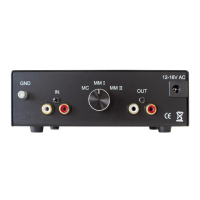
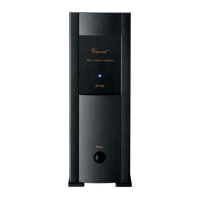
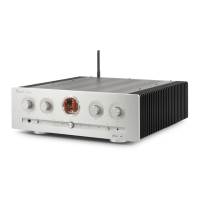
Output for connecting to the PHO-701ps.
For connecting the power cable and accessing the fuse.
Adjusts the brightness of the tube display window.
For connecting to a computer for digitization.
Output sockets for connecting to amplifier line inputs.
Clamp for connecting the record player's ground wire.
Input for connecting the power supply unit's DC OUT.
Selects between MM and MC cartridge types.
Input sockets for connecting the record player's audio output.
Bottom mechanism for fine-tuning MC/MM cartridge impedance.
Remove protective caps from terminals before connecting cables.
Ensure tight connections; avoid noise and malfunctions.
Connect RCA plugs correctly, observe color coding (red=right, black/white=left).
Position away from interference sources like mains cables and phones.
Use only the supplied PHO-701ps power supply.
Explains differences between Moving Magnet and Moving Coil systems.
Four adjustment units on the bottom for channel settings.
Input impedance and capacitance for MM cartridges.
Table showing capacitance settings using DIP switches.
Input impedance and capacitance for MC cartridges.
Table showing impedance settings using DIP switches.
Time needed for audio components to reach peak performance.
Causes and solutions for hum noise from power sources.
Check power connection and fuse if unit does not power on.
Verify connections, input selection, and volume settings.
Check cable connections, cleanliness, and pickup type settings.
Address grounding and connection issues related to noise.
Download and install the Audacity audio editing software.
Link the PHO-701 USB-B port to the PC's USB port.
Select USB AUDIO DEVICE as the sound input in Windows settings.
Launch Audacity and utilize its various menus and functions.
Explanation of label tracks for marking points in audio projects.
| Type | Phono preamplifier |
|---|---|
| Gain MM | 40 dB |
| Gain MC | 60 dB |
| Input Impedance MM | 47 kOhm |
| Output Impedance | 250 Ohm |
| Outputs | 1 x RCA |
| Max. Power Consumption | 10 W |
| Input Impedance MC | 100 Ohm |
| RIAA Equalization | ±0.5dB |
| Frequency Response | 10 Hz - 20 kHz |
| Inputs | 1 x RCA |