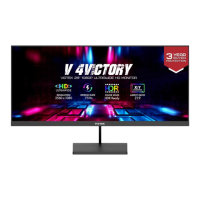
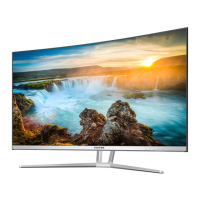
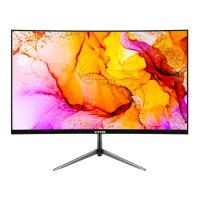
This document is a user manual for the VIOTEK NFI29CB LED Monitor. It provides comprehensive instructions for setting up, operating, and maintaining the monitor, ensuring users can maximize its features and longevity.
The VIOTEK NFI29CB LED Monitor is designed to provide a high-quality visual experience for various applications, including gaming, work, and general entertainment. It features a rocker button for intuitive navigation through its on-screen display (OSD) menu, allowing users to easily adjust settings to their preferences. The monitor supports multiple input sources, including DisplayPort (DP) and HDMI, making it versatile for connecting to different devices such as PCs, laptops, and gaming consoles. An audio output port is also included for connecting external audio devices like headphones or speakers.
Function Description:
The primary function of the VIOTEK NFI29CB is to serve as a display unit for computers and other video sources. It processes incoming video signals from connected devices and renders them on its screen. The monitor is equipped with an OSD menu that allows users to customize various display parameters, enhancing the viewing experience. Key functionalities include adjusting brightness, contrast, color temperature, and display modes. The monitor also incorporates VIOTEK Adaptive Sync technology, which, when enabled and paired with compatible GPUs (AMD FreeSync™ or NVIDIA G-Sync™) and a DisplayPort cable, helps eliminate image tearing, stuttering, and ghosting by synchronizing the monitor's refresh rate with the graphics card's frame rate. This feature is particularly beneficial for gamers, providing a smoother and more immersive experience.
Usage Features:
The monitor offers several features designed to enhance user convenience and display quality:
- Rocker Button Navigation: A single rocker button on the back of the monitor simplifies menu navigation. Users can press and hold it for approximately 6 seconds to turn the monitor on or off. A quick press enters the OSD menu, and subsequent presses confirm operations or settings. Moving the rocker up, down, left, or right allows for menu browsing, value adjustment, and returning to previous menus.
- Gameplus Features: The rocker button provides quick access to Gameplus features. Pushing the rocker up activates a game timer, while pushing it down enables a crosshair overlay. These tools are primarily designed to optimize aim in shooting games but can be used for other purposes as well.
- ECO Modes: Users can switch between various ECO modes (Standard, Movie, Text, Game, FPS, RTS) by pushing the rocker button to the left. These modes optimize display settings for specific activities, with "Standard" mode being suitable for most general use.
- Input Source Selection: Pushing the rocker button to the right allows users to quickly switch between available input sources (DP, HDMI1, HDMI2).
- OSD Menu Functions: The OSD menu offers extensive customization options:
- Picture Settings: Adjust brightness, contrast, dynamic contrast ratio (DCR), and select from various ECO display profiles (Standard, Movie, Text, Game, FPS, RTS). DCR can be turned on or off to automatically adjust image brightness based on content.
- Color Settings: Modify color temperature (Standard, Warm, Cool, sRGB, User Define) and individually adjust Red, Green, and Blue (RGB) elements.
- OSD Settings: Control the OSD's horizontal and vertical position, overall transparency, and the timeout duration for how long the OSD remains open after non-use.
- Setup: Select the input source and reset monitor configurations to factory defaults.
- Other Settings: Adjust display size (Full Screen, Auto, 4:3), enable or disable Low Blue Light filter (Weak, Strong) to reduce harmful blue light, control Over Driver to enhance response time and decrease lag, and toggle FreeSync (Adaptive Sync) and HDR functions.
- Indicator Light: A solid blue light indicates the monitor is powered on and operating normally. A flashing blue light signals no video source, no horizontal or vertical signal, or low voltage, prompting users to check connections and power.
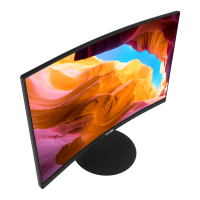
- Stand and Mount Installation: The manual provides clear instructions for both stand installation and VESA mount installation (75 x 75 mm), offering flexibility in how the monitor is set up. The stand allows for tilt adjustment (+5° / -15°).
Maintenance Features:
Proper maintenance is crucial for the monitor's longevity and optimal performance. The manual outlines essential cleaning and troubleshooting steps:
- Cleaning:
- Always unplug the monitor and PC before cleaning.
- Disconnect the power cord from the product.
- Use a dry, non-abrasive cloth to gently remove dust and debris.
- For the exterior, lightly wet a soft cloth in water, wring it out well, and gently wipe the surface.
- Crucially, never use alcohol, solvent, surfactant, or ammonia-based cleaning solutions. Do not spray water or detergent directly on the product or touch cords with wet hands to avoid electric shock.
- Do not press the monitor display with hands or other objects to prevent screen damage.
- Reconnect the power cord and power on the product and PC after cleaning.
- Troubleshooting: The manual addresses common issues:
- Blank Screen: Check power, brightness/contrast settings, indicator light (flashing indicates no signal), and ensure the source device (e.g., laptop) is in mirror/extension mode and powered on.
- Out of Focus Image: Verify the video cable is properly inserted at both ends.
- Flashing Screen: Try an alternative power source, as insufficient current can cause this. Ensure non-shielded speakers, fluorescent lighting, AC transformers, and table fans are kept at a safe distance to avoid magnetic disturbances.
- Color Bleeds or Unusual Visual Effects: Check for properly inserted cables (a loose connection can cause bad signals) and try connecting to another video source for comparison.
- Scrolling, Rolling, or Unusually Moving Screen: Confirm the source frequency is within 75Hz and re-secure the video cable.
- Non-functioning Indicator Light: Check if the power is on and the power line is connected.
- Dim Image: Adjust brightness and contrast ratio.
- Image Jitter/Moire Pattern: Nearby electrical equipment may be interfering with the monitor.
- Light Indicator On but No Image: Check monitor power, graphics card installation, secure signal line connection, and ensure pins in the interface are not curved.
- Color Shortage (Red, Green, or Blue): Inspect cable connectors for curved or damaged pins and replace cables if necessary.
- Image Position Not Centered/Incorrect Size: Adjust Clock or Auto settings.
- Color Difference (Colors Not Optimized): Adjust RGB color or reset color temperature.
- Cannot Plug and Play: Ensure monitor and graphics card compatibility, and check that interface pins are not curved.
The manual emphasizes safety precautions, such as unplugging before cleaning, avoiding blocking ventilation openings, keeping the monitor away from heat sources, and not attempting to disassemble or modify the unit without authorization. It also highlights that the VIOTEK NFI29CB LED Monitor comes with a Three-Year Limited Hardware Warranty, covering defects in materials and workmanship under normal use for original purchasers in the United States and Canada. Disassembling the product voids this warranty.