© 1995,1997 Directed Electronics, Inc. Vista, CA 10 N432 1-98.PM6
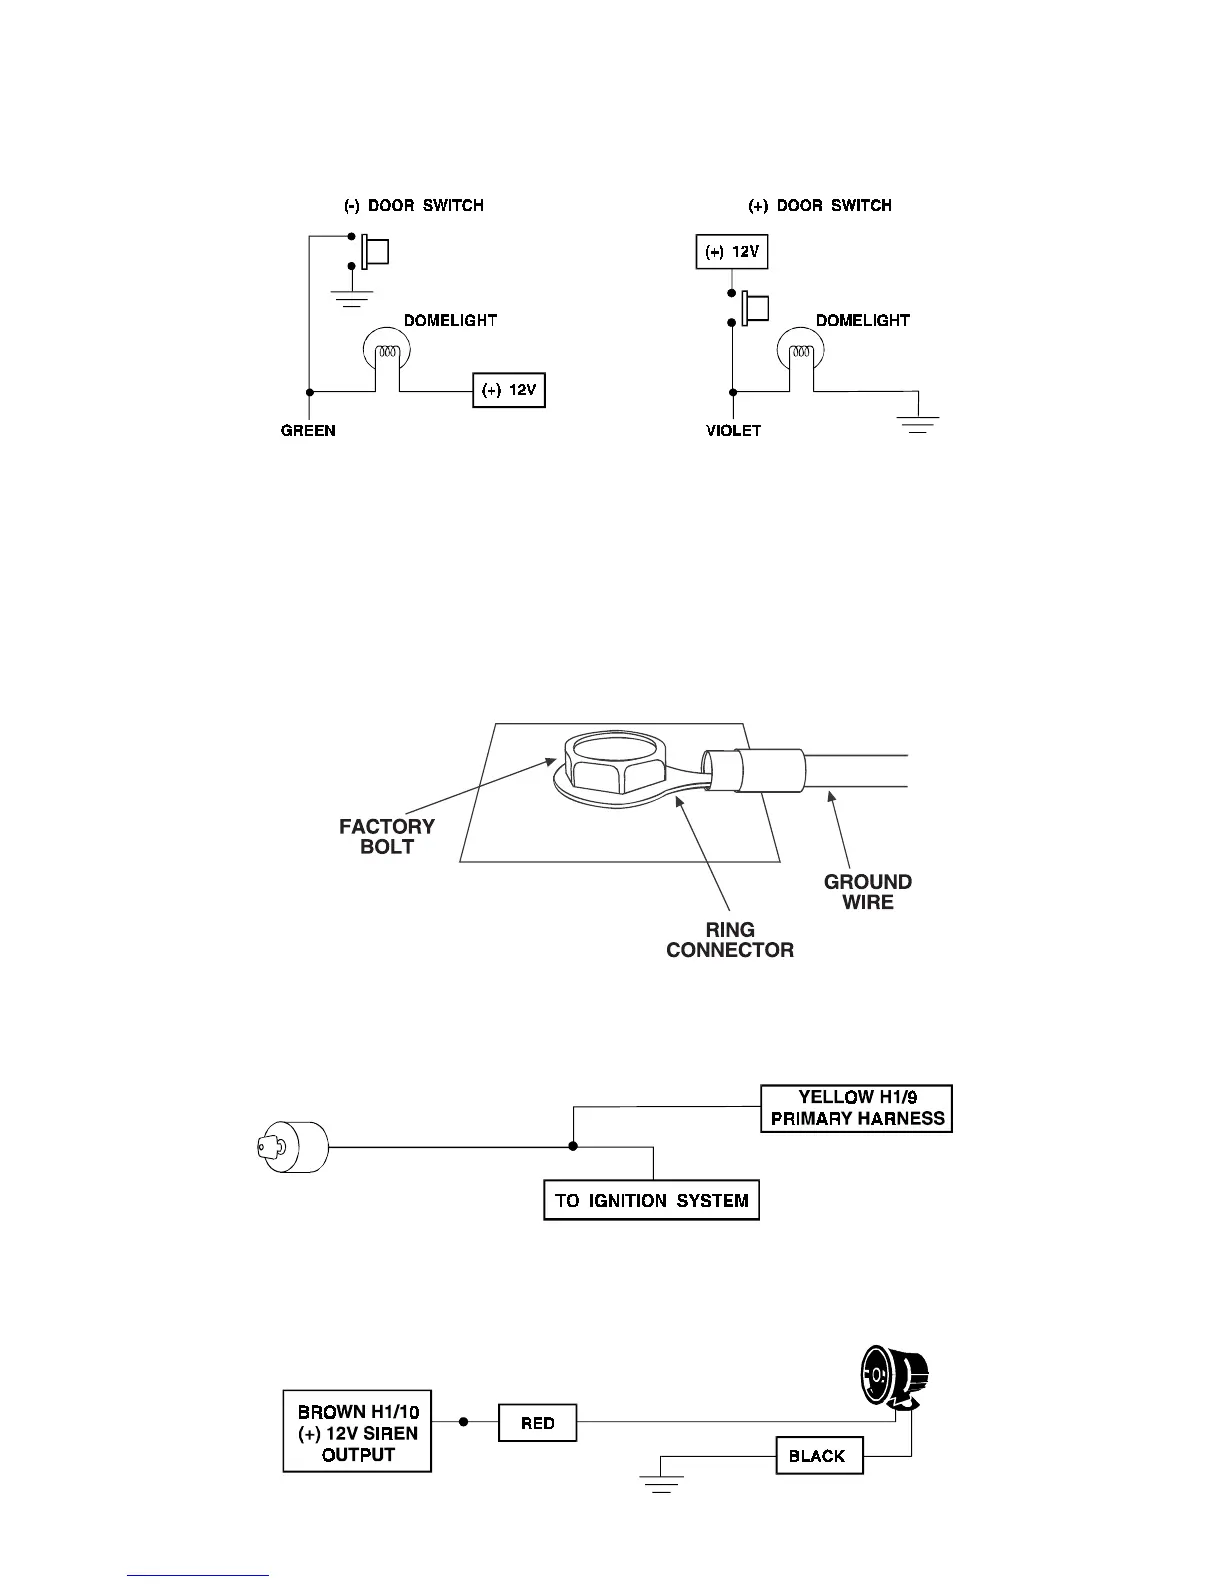
H1/5 GREEN
(-) door trigger
or
H1/7 VIOLET
(+)
door trigger input: If the door switch wire you found is (-) when the
door is open, connect the GREEN wire to it. If the door switch wire you found is (+) when the door is open, use the
VIOLET wire instead.
IMPORTANT! Test to make sure this wire "sees" all doors!
H1/6 BLUE
(-) Multiplex trigger input: This input is capable of triggering either the Warn Away
®
response or the
triggered sequence. Inputs that are shorter than .8 seconds will only trigger the Warn Away
®
response. The first stage
of all DEI
®
dual stage sensors supply this type of pulse. Inputs that are longer than .8 seconds will trigger the full alarm
cycle. The second stage output of DEI
®
dual stage sensors supply this type of pulse. Connecting this input to a hood
or trunk pin switch will also trigger the full alarm response.
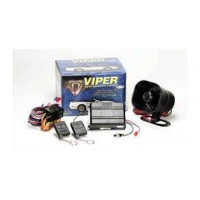
H1/8 BLACK
(-) chassis ground connection. Connect this wire to bare metal, preferably with a factory bolt rather than
your own screw (screws tend to either strip or loosen with time). We recommend grounding all your components to
the same point in the vehicle.
NOTE: Remove any paint below ring connector.
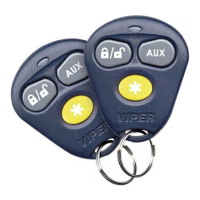
H1/9 YELLOW
(+) ignition input. Connect this wire to an ignition wire as described on page 5. This wire must show
+12V with the key in run position and during cranking. Take great care that this wire cannot be shorted to the chassis
at any point.
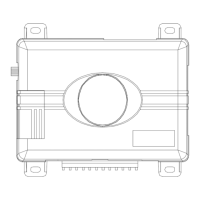
H1/10 BROWN
(+) siren output: Connect this to the red wire of the 514T Revenger™ siren. Connect the black wire of
the siren to (-) chassis ground, preferably at the same point you grounded the control module’s H1/8 BLACK wire.