Issue February 2002
Document Number: 13124
- 3 -
1. Concise Operating Instructions
1.1. Settings
The ESTAmat PFC Controller will be supplied with the following standard setting :
Supply voltage : 230 VAC or 120 VAC
Measuring voltage connection : phase to neutral
Frequency : 50 Hz or 60 Hz
Type of initialization AU1 : fully automatic identification of - measuring voltage connection,
- C.T. location and
- output of the connected capacitor
steps.
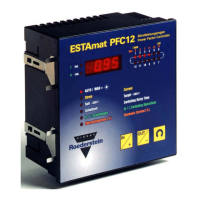
1.2. Mounting and connection of the ESTAmat PFC Controller
A cut-out of 138 by 138mm is required for mounting the Controller. The added springs for attachment
shall be pushed into the slots at the device's rear until they have reached the switchboard and have
locked in place.
Terminals Connection
1
C.T. connection k (S1), X/5 A or X/1 A
2
C.T. connection l (S2), X/5 A or X/1 A
4
Mains connection N, 230 VAC or 120VAC
5
Mains connection L1, 230 VAC or 120VAC
7, 8 Potential-free alarm contact, normally open
10 Measuring voltage L or N
12 Measuring voltage L
15-20 Control terminals for contactors 1-6
21-26 Control terminals for contactors 7-12 (only PFC12)
1.3. Start-up procedure
After the supply voltage has been applied to it, the ESTAmat PFC Controller starts a self-test. The
following data will be displayed for about 2 seconds:
•
The type of program e.g.: 1.2.1.
•
The mode of initialization e.g.: AU1 *)
•
The set target cosϕ e.g.: 1.00
•
The switching delay time e.g.: LOAD
•
with AU1 the type of measuring voltage e.g.: L-0, must be changed to L-L by the operator, if the
measuring voltage is to be connected between
phase to phase. Refer to item 4.4. and 6.3.2.
•
with AU2 and AU3
the connection of measuring voltage e.g.: L1-0, must be adapted to a different connection of
measuring voltage and current transformer
location . Refer to item 4.4. and 6.3.3.
*) with AU3, the additional display of :
•
the switching program and number of engaged relay steps e.g.: 1111 and with LED
zzzzzz
•
the C/k-value e.g.: 0.025
Owing to the basic setting made at the factory, the ESTAmat PFC Controller changes into the fully
automatic initialization AU1. This means that no further settings need to be made by the operator.
In case of standard setting
as per item 1.1 above, the
measuring voltage can be
connected to the mains
supply, i.e. terminal 4 shall
be bridged to terminal 10,
and terminal 5 is to be
bridged to terminal 12.
 Loading...