4. VISUAL INDICATIONS, FIRST KEYPAD
ENROLLMENT AND USING PROX TAG
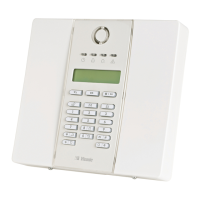
4.1 PowerMaster-33 LED Indications
The following table provides a detailed description of the LED indications on the PowerMaster-33 panel.
Green Local Power indication
STEADY: Indicates that system has mains power
BLINKING: Low battery state
Green Ready / Not Ready
Indication
STEADY: All partitions are ready
NO LIGHT: Not Ready / at least one partition is Not Ready
Red System Arming State
Indication
STEADY: AWAY / At least one partition is AWAY
BLINKING: HOME / At least one partition is HOME and no
partitions are in AWAY
NO LIGHT: The system is presently in the disarmed state
Orange System Not Online
Indication
STEADY: System is unavailable (Sync/Updating/In-menu)
NO LIGHT: System is available
Orange System Trouble indication
STEADY: System has trouble
NO LIGHT: No trouble – all is well
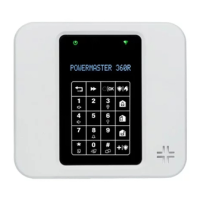
4.2 Enrollment of the First KP-250 PG2 Keypad
The PowerMaster-33 G2 is designed to operate wirelessly with the KP-250 PG2 keypad installed anywhere within the
protected premises. The first keypad is always enrolled as Keypad no. 1.
Note: The enrollment procedure described here is for the first KP-250 PG2 keypad only. The enrolment of additional
keypads is performed via the first enrolled KP-250 PG2 keypad (for instructions, refer to the KP-250 PG2 Installer’s
Guide, section 3.4.2).
Press the ENROLL button for 2 seconds. The Enroll button is physically located inside the front panel of
the PowerMaster-33 G2 control panel, see Figure 3.1.1 or 3.1.2 symbol D. If no keypad exists in the first
location, the ENROLL LED on the PowerMaster-33 G2 blinks slowly for 1 minute (go to step 3).
If a keypad already exists in the first location, the ENROLL LED on the PowerMaster-33 G2 control panel
lights steady for 10 seconds (go to step 2).
Note: Pressing the ENROLL button takes the system out of any menu mode (Installer Mode, User Settings
and Periodic Test).
2
Press the ENROLL button again within the timeout period (10 seconds). Any keypad that was enrolled in
keypad no. 01 is deleted from the system.
The ENROLL LED on the PowerMaster-33 G2 blinks slowly for 1 minute.
3
During this 1 minute period, hold the button for 5-7 seconds, until the LED on the keypad lights red,
and release
4
. The ENROLL LED on the PowerMaster-33 G2 will indicate the result of the enrollment
procedure.
PowerMaster-33 G2 ENROLL LED indication Result
Blinks fast for 5 sec. Successful enrollment of keypad
Lights steadily for 5 sec. Wrong device type
For V19.3 and up: upon completion of the enrolling procedure, the keypad will get the corresponding update
to the current PM SW version. This procedure will take several minutes, and will be automatically skipped if
the KP SW version is compatible. Do not turn off or reset the PM or KP during this procedure. In order to
perform this procedure, good batteries must be inserted into the KP unit. KP in LOW BAT state will not enter
this procedure and will not be able to operate the system.
5
Upon completion of the enrolling procedure and SW versions adjustment procedure (starting V19.3), the
keypad is ready for immediate use even if the system is currently in the Armed state.
4
If the KP-250 PG2 unit is battery-powered: first press any button on the KP-250 PG2 keypad momentarily to take the KP-250 PG2
keypad out of sleep mode and then hold the button for 5-7 seconds, until the LED on the keypad lights red, and release.
D-306917 PowerMaster-33 G2 Installer's Guide 21

 Loading...