EasyManuals Logo

Visonic POWERMAX+ Installation Instructions

Visonic POWERMAX+
12 pages
To Next Page IconTo Next Page
To Previous Page IconTo Previous Page
Page #4 background imageLoading...
Page #4 background image
4 DE5465
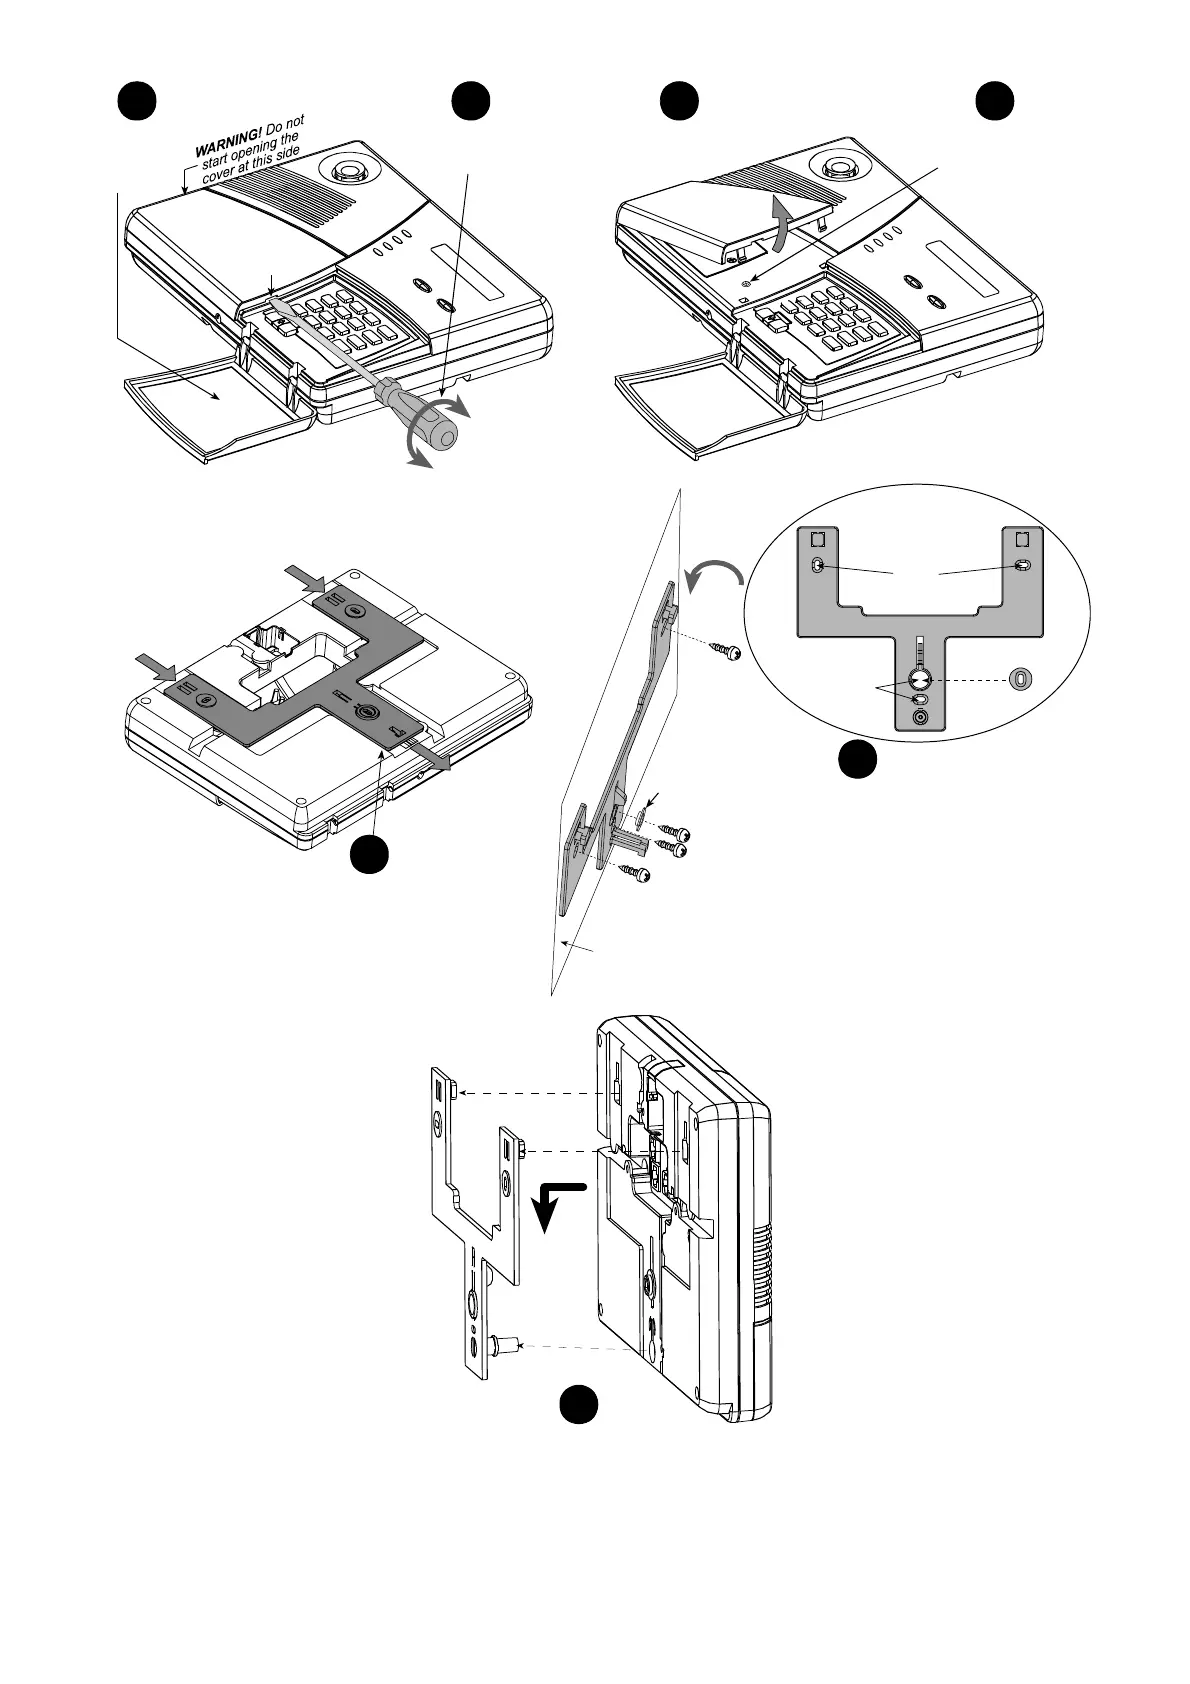
Push the bracket as shown
and then remove it
5
BATTERY
AREA
COVER
Open
keypad
cover
Release battery
area cover
1
2
SLOT
Mounting
surface
Screw
holes
Screw
holes
Special
plastic
washer
Mark and drill 4 holes in
mounting surface. Insert
wall anchors and fasten the
bracket to the mounting
surface with 4 screws
NOTE
Verify that there is 3 cm (1.25 in.)
free space around the bracket
Special plastic
washer
6
Remove battery
area cover
Remove bracket
locking screw
4
3
Locate the panel on the bracket
projections, pull down and lock the
bracket with locking screw (see step 4).
7
Figure 2 - Mounting

Other manuals for Visonic POWERMAX+

Questions and Answers:

Question and Answer IconNeed help?

Do you have a question about the Visonic POWERMAX+ and is the answer not in the manual?

Visonic POWERMAX+ Specifications

General IconGeneral
TypeWireless Security System
Zones30
CommunicationPSTN
KeypadYes
SirenBuilt-in
Remote ControlYes
Wireless Frequency868 MHz
KeypadsUp to 8
HumidityUp to 85% non-condensing

Related product manuals