EN - 4
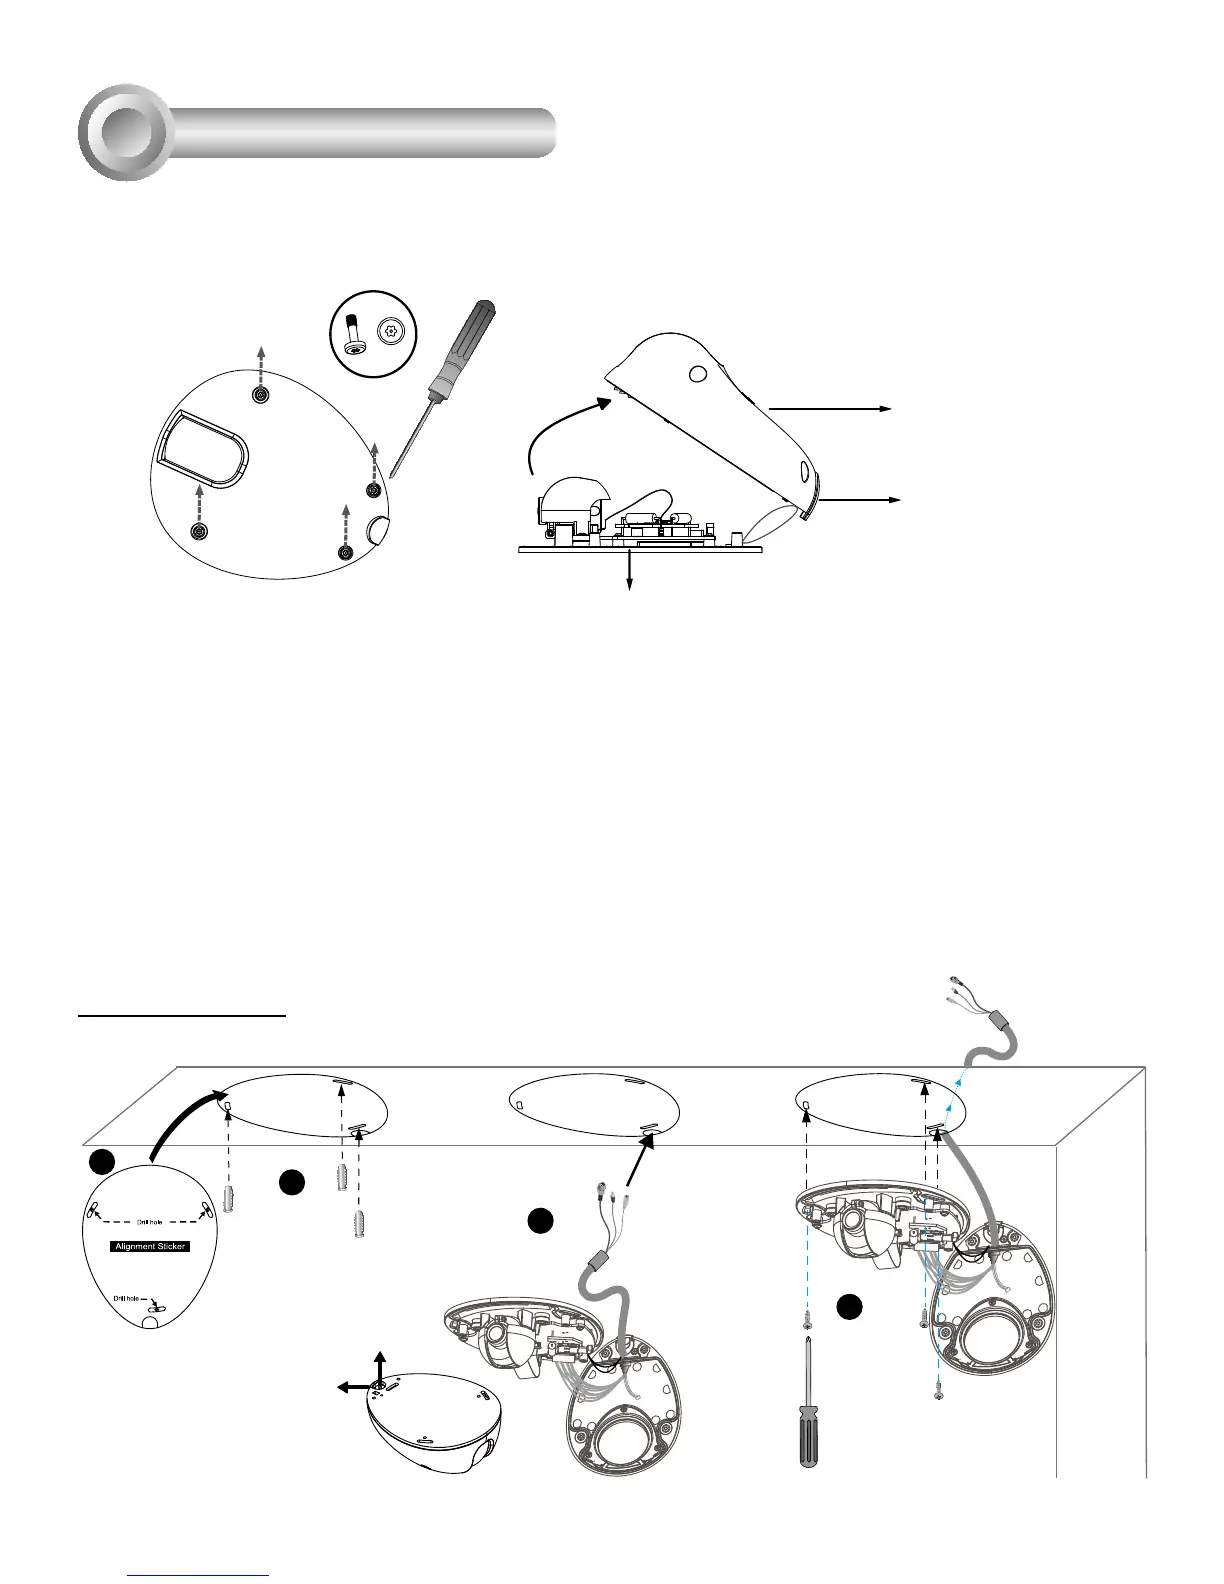
First, use the supplied screwdriver to detach the dome cover from the camera base. Insert your
MicroSD/SDHC Card if necessary.
Then, follow the steps below to install the camera to either a ceiling or wall:
1. Attach the supplied alignment sticker to the ceiling/wall.
2. Using the 3 screw circles on the sticker, drill 3 pilot holes into the ceiling/wall. Then hammer the
plastic anchors into the holes if necessary.
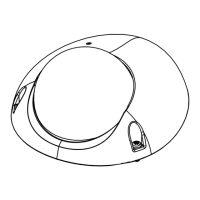
3. This Network Camera can be mounted with the cable routed through the ceiling/wall or from the
side. If you want to feed the cable through the ceiling/wall, drill a cable hole A as shown in the
picture. If the cable goes through the rear opening of the dome cover, please remove the plastic
cover (B).
4. Through the 3 holes on the camera base, insert the screws to corresponding holes and secure
the camera base with a screwdriver.
1
2
3
4
A
B
A
Dome Cover
Hardware Installation
3
Tamper-proof Screw
Camera Base
Plastic Cover
Ceiling Mount