EN - 6
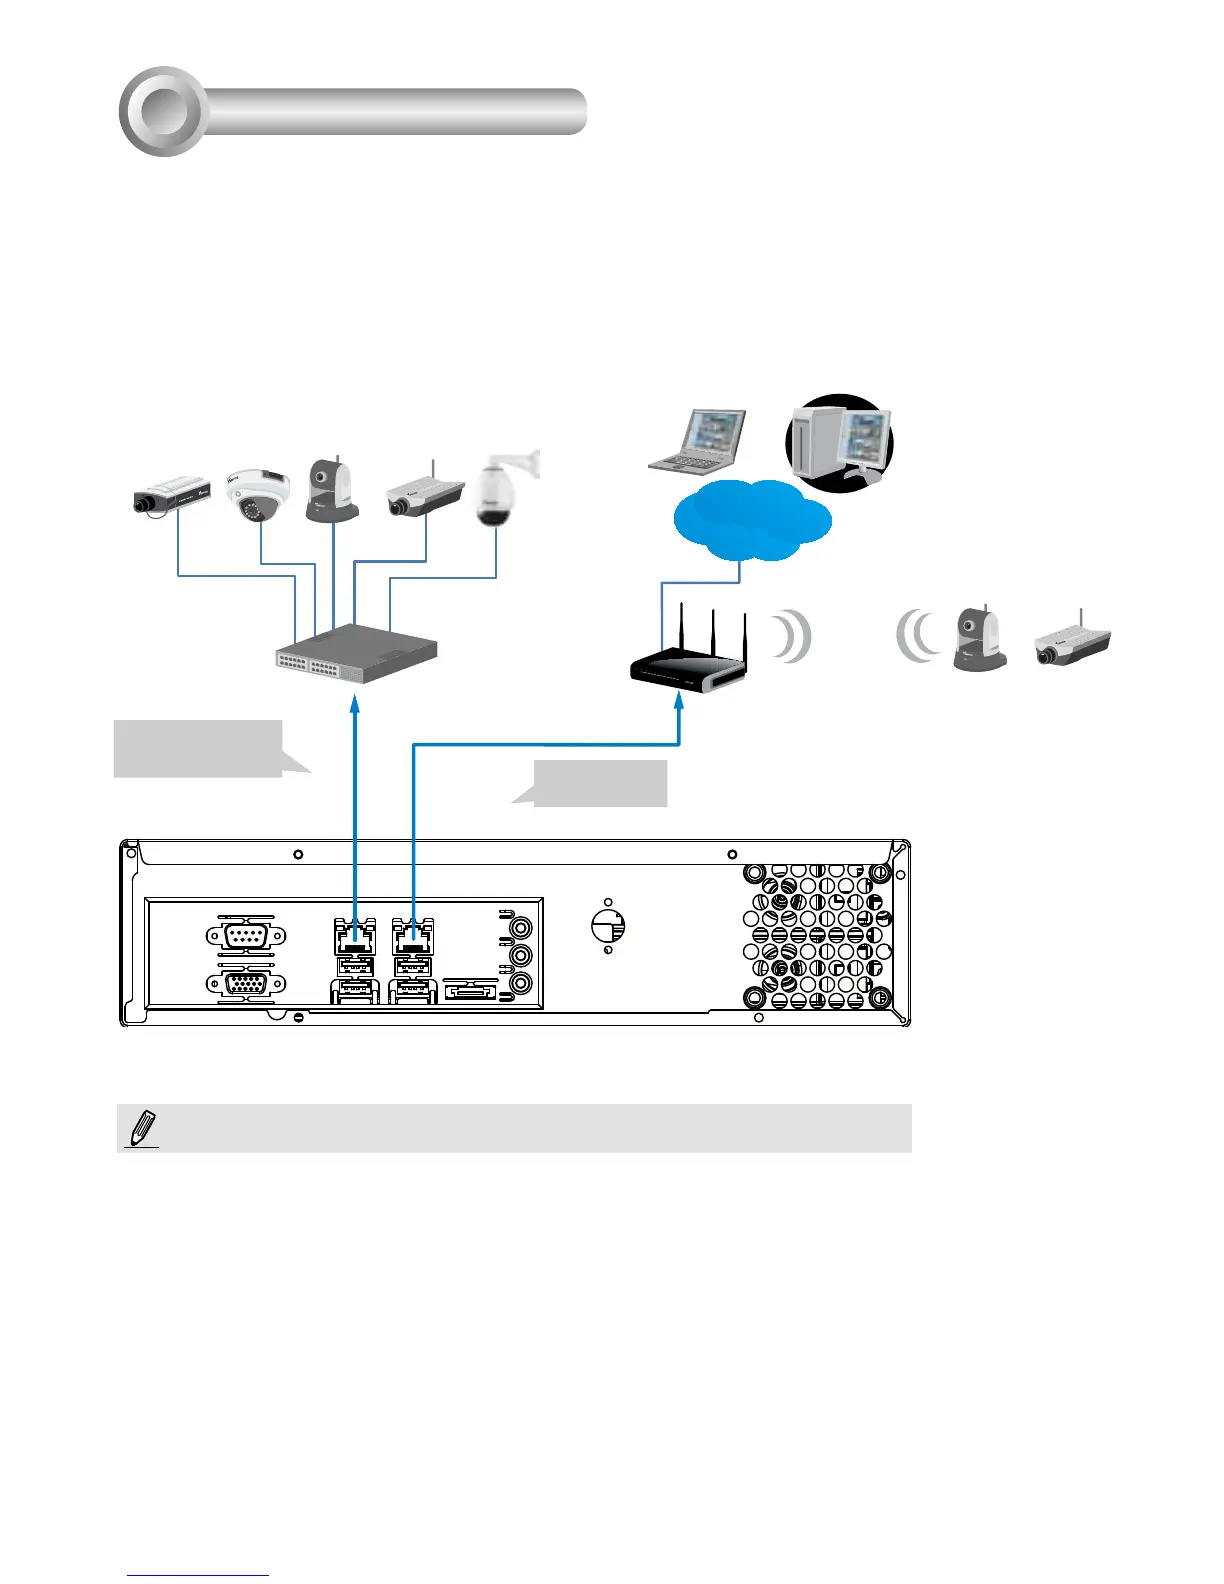
1. Connect the supplied power adapter to a power outlet.
2.
Connect network cameras to the NVR’s LAN ports.
3. If you want to access NVR over the Internet, connect the NVR to the Internet via the
WAN port. A web console can be established from a remote PC by keying http://<public
IP>:3454 in a browser’s URL address eld. However, port forwarding on the router for
the TCP port will be necessary.
4. Push the power button to run the NVR.
Router
Internet
Router
Network Deployment
4
Default Fixed IP:
192.168.1.10
LAN WAN
Switch
Wireless AP / Router
Clients
The LAN and WAN ports can be congured into the same or different subnets.
If you have cameras connected via the WAN port, make sure the WAN port
acquires an IP address from a DHCP server on router or AP. If not, the cameras
detected through the WAN port will use the default IPs, e.g., 169.254.xx.xx, and the
LiveClient software will not be able to detect their presence.
NOTE:
Default: DHCP