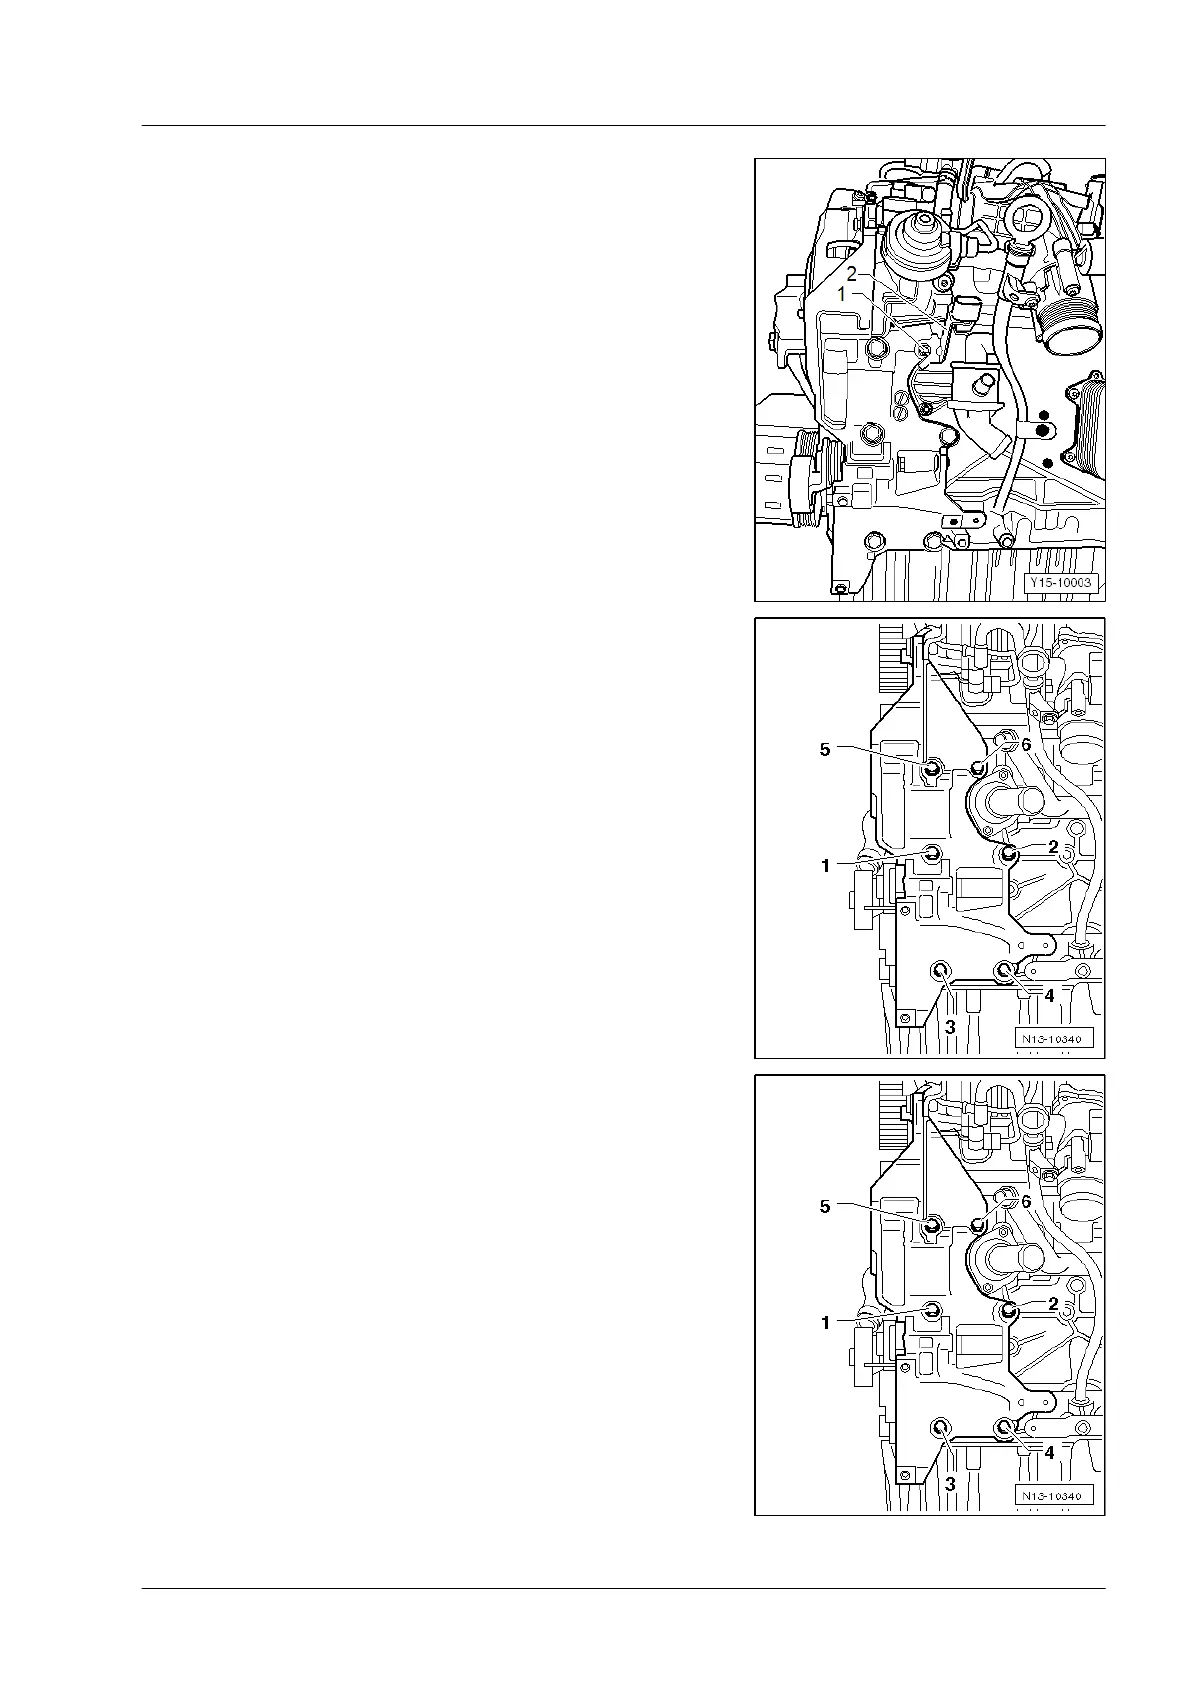
– Unscrew nut -1-, and remove retainer for connector of Hall
sender —G40– -2-.
Continuation for all engine codes
– Unscrew bolts -6…1- and remove ancillaries bracket.
Installing
Install in reverse order. In the process, note the following:
◆ Take note of any dowel sleeves in ancillary bracket. Replace
missing ones if necessary.
◆ Renew all bolts that must be tightened with specified tighten-
ing angle.
– Insert securing bolts for ancillary bracket as follows:
◆ Bolts -1- and -2-
◆ Bolts -3- and -4-
◆ Bolts -5- and -6-
– Tighten securing bolts for ancillary bracket in sequence
-1 … 6- in 2 stages as follows:
1. Screw all bolts in to stop by hand.
2. Tighten all bolts to 40 Nm.
3. Turn bolts -1, 2, 5 and 6- 90° further.
4. Turn bolts -3- and -4- 45° further.
– Install connector retainer at position -6-. Specified torque
20 Nm.
– Install high-pressure pump ⇒ Page 380.
Industriemotoren - Industrial Engines 2009 ▶
Workshop Manual for Diesel Engine (2.0 l/36-75 kW_EA 189) 05.2015
3
1 Dismantling and assembling engine
145
 Loading...