Do you have a question about the Vortex Diamondback HD 2000 and is the answer not in the manual?
Explains how to install and replace the CR2 battery.
Details how to turn on the rangefinder and its auto power-down feature.
Instructions on how to navigate and change operating modes.
Explains how to select between Horizontal Component Distance (HCD) and Line of Sight (LOS) modes.
Guide to selecting one of five brightness levels for the display.
Explains how to switch between Normal and Last targeting modes.
Details the default Normal target mode and its recommended use.
How to activate and use the continuous scan feature for ranging.
Instructions on how to properly clean the exterior lenses and unit.
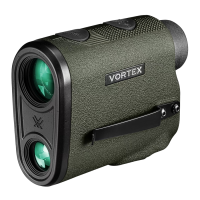
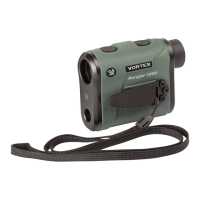
The Vortex Diamondback™ HD 2000 Laser Rangefinder is an essential companion for hunters, archers, and shooters, designed to provide accurate distance measurements in various environments. This rangefinder features angle compensation and offers two target modes (Normal and Last) and two range modes (Horizontal Component Distance (HCD) and Line of Sight (LOS)).
To begin using the rangefinder, a CR2 battery must be installed. The battery cap is located on the bottom of the unit and can be removed by flipping up the finger tab and unscrewing it counterclockwise. The CR2 battery should be inserted with the positive side (+) facing outwards. After insertion, the battery cap should be reinstalled and tightly closed.
Once the battery is installed, the Diamondback™ HD 2000 is in a ready, power-off condition. To power up the unit, simply press and release the "Measure" button. The HCD or LOS ranging screen will then display. The rangefinder is designed to power down automatically after 20 seconds of non-use to conserve battery life.
A low battery icon will appear on the display when the battery level reaches 25% and will remain visible until the battery is fully depleted or replaced.
For clear viewing, the diopter needs to be adjusted to bring the image into focus. This is done by rotating the diopter clockwise or counterclockwise. Users may need to make slight adjustments when ranging objects at different distances.
The rangefinder comes with a wrist lanyard for secure carrying. The lanyard can be looped through the attachment socket located on the unit, providing a convenient way to keep the device accessible and prevent accidental drops.
The Diamondback™ HD 2000 includes a utility clip on the unit's left-hand side. This clip can be switched to the right-hand side by unscrewing the two 2mm hex screws on the left side and the two 2mm hex screws on the right side. The utility clip is then reinstalled on the desired side, and the plate and 2mm hex screws are replaced on the opposite side.
The Diamondback™ HD 2000 is factory set to the angle-compensating HCD range mode, Normal target mode, yards as the unit of measurement, and brightness level 3.
To change modes, power on the unit by pressing and releasing the "Measure" button. Then, press and hold the "Menu" button for approximately 2 seconds until the Mode Selection screen appears. Users can scroll through the mode options by clicking the "Menu" button. To adjust a specific mode, click the "Measure" button. To save the settings and exit the Mode Selection screen, press and hold the "Menu" button for at least two seconds.
The rangefinder offers two primary ranging modes: Horizontal Component Distance (HCD) and Line of Sight (LOS). After activating the Range Mode Selection, pressing the "Measure" button toggles between the HCD and LOS displays. The "Menu" button is used to save the desired choice and proceed to the Brightness Selection screen.
The HCD (Horizontal Component Distance) display is the primary mode for most rifle and archery shooting applications. The yardage number displayed in this mode represents the critical HCD. This displayed HCD yardage is automatically corrected for shot angle, eliminating the need for additional user input. Shooters simply use the appropriate level ground bullet drop for the displayed range, and archers use the corresponding level ground sight pin.
The HCD mode is recommended for:
It's important to note that for correctly accounting for wind, knowing the Line of Sight distance to the target is crucial, as it's based on how far the bullet travels. This can be achieved using the LOS mode.
The LOS (Line of Sight) Mode is designed for rifle shooters who use a slope-correcting ballistic drop data card or ballistic solvers, especially when shooting at distances beyond 500 yards with slopes greater than 15 degrees. In LOS Mode, the displayed range number is the actual line of sight range without any ballistic correction for slope. Most ballistic solvers require actual line of sight range input to provide independent slope correction for bullet drop data. Using LOS range when calculating bullet wind drifts under steep slope/long-range conditions offers a higher degree of accuracy compared to using the HCD range.
To use LOS mode, simply input the LOS range number into the ballistic solver or use it when referencing ballistic drop cards with slope correction. When in LOS mode, an additional number is displayed above the range number, indicating the slope incline in degrees.
Users can choose between Yards and Meters for distance display. Pressing the "Measure" button toggles between these two units. To save the preferred unit and move to the Brightness Selection screen, press the "Menu" button.
The Diamondback™ HD 2000 offers five brightness settings for the display. To adjust the brightness, press the "Measure" button to cycle through the available settings. To save the desired brightness level, press and hold the "Menu" button for at least two seconds. The unit will then return to the power-up condition.
The rangefinder offers two targeting modes: Normal and Last. To switch between these modes, power on the unit by pressing the "Measure" button, then press and release the "Menu" button. When in Last targeting mode, "Last" will appear in the upper right-hand corner of the display. In Normal targeting mode, this area will be blank.
The Diamondback™ HD 2000 is preset to Normal target mode. This is the standard mode and is recommended for most situations, as it provides the target's range with the strongest range result.
Last Mode is ideal for ranging specific targets located behind a group of objects such as rocks, trees, or brush, especially when panning and scanning. In this mode, the rangefinder displays the farthest distance measured, helping to isolate the intended target.
To range an object, power up the Diamondback™ HD 2000 and position the reticle on the target. Then, press and release the "Measure" button to obtain the distance measurement. If the laser is unable to range the target due to its reflectivity or if the target is too close, a "No Range Returned" message will appear on the display. To range a new target, simply re-aim and press the "Measure" button again.
The Scan Feature allows for continuous measurement as the user pans across target objects. To activate it, press and hold the "Measure" button. While scanning, "Scan" will flash in the upper right-hand corner of the display. This feature is useful for quickly getting ranges on multiple objects or tracking moving targets.
Rangefinders operate by emitting a brief pulse of light and measuring the time it takes for the light to return to the internal receiver. Several factors can affect the laser's ability to read range, primarily related to the target object:
The Diamondback™ HD 2000 requires minimal routine maintenance, primarily focusing on cleaning the exterior lenses. The exterior of the unit can be cleaned by wiping it with a soft cloth. When cleaning the lenses, it is crucial to use products specifically designed for coated optical lenses.
All components of the Diamondback™ HD 2000 are permanently lubricated, meaning no additional lubricant should be applied. Users should not attempt to disassemble any components of the rangefinder, other than removing the battery cap and utility clip, as disassembling the rangefinder may void the warranty.
To ensure the longevity of the rangefinder, it is advisable to avoid storing it in direct sunlight or any very hot location for extended periods.
| Magnification | 7x |
|---|---|
| Max Range | 2000 yards |
| Ranging Distance (Reflective) | 2000 yards |
| Ranging Distance (Tree) | 1600 yards |
| Max Angle Reading | ±60 degrees |
| Eye Relief | 16 mm |
| Height | 3.1 inches |
| Waterproof | Yes |
| Battery Type | CR2 |
| Fogproof | Yes |
| Tripod Adaptable | No |
| Accuracy | ±1 yard |
| Display | Red OLED |