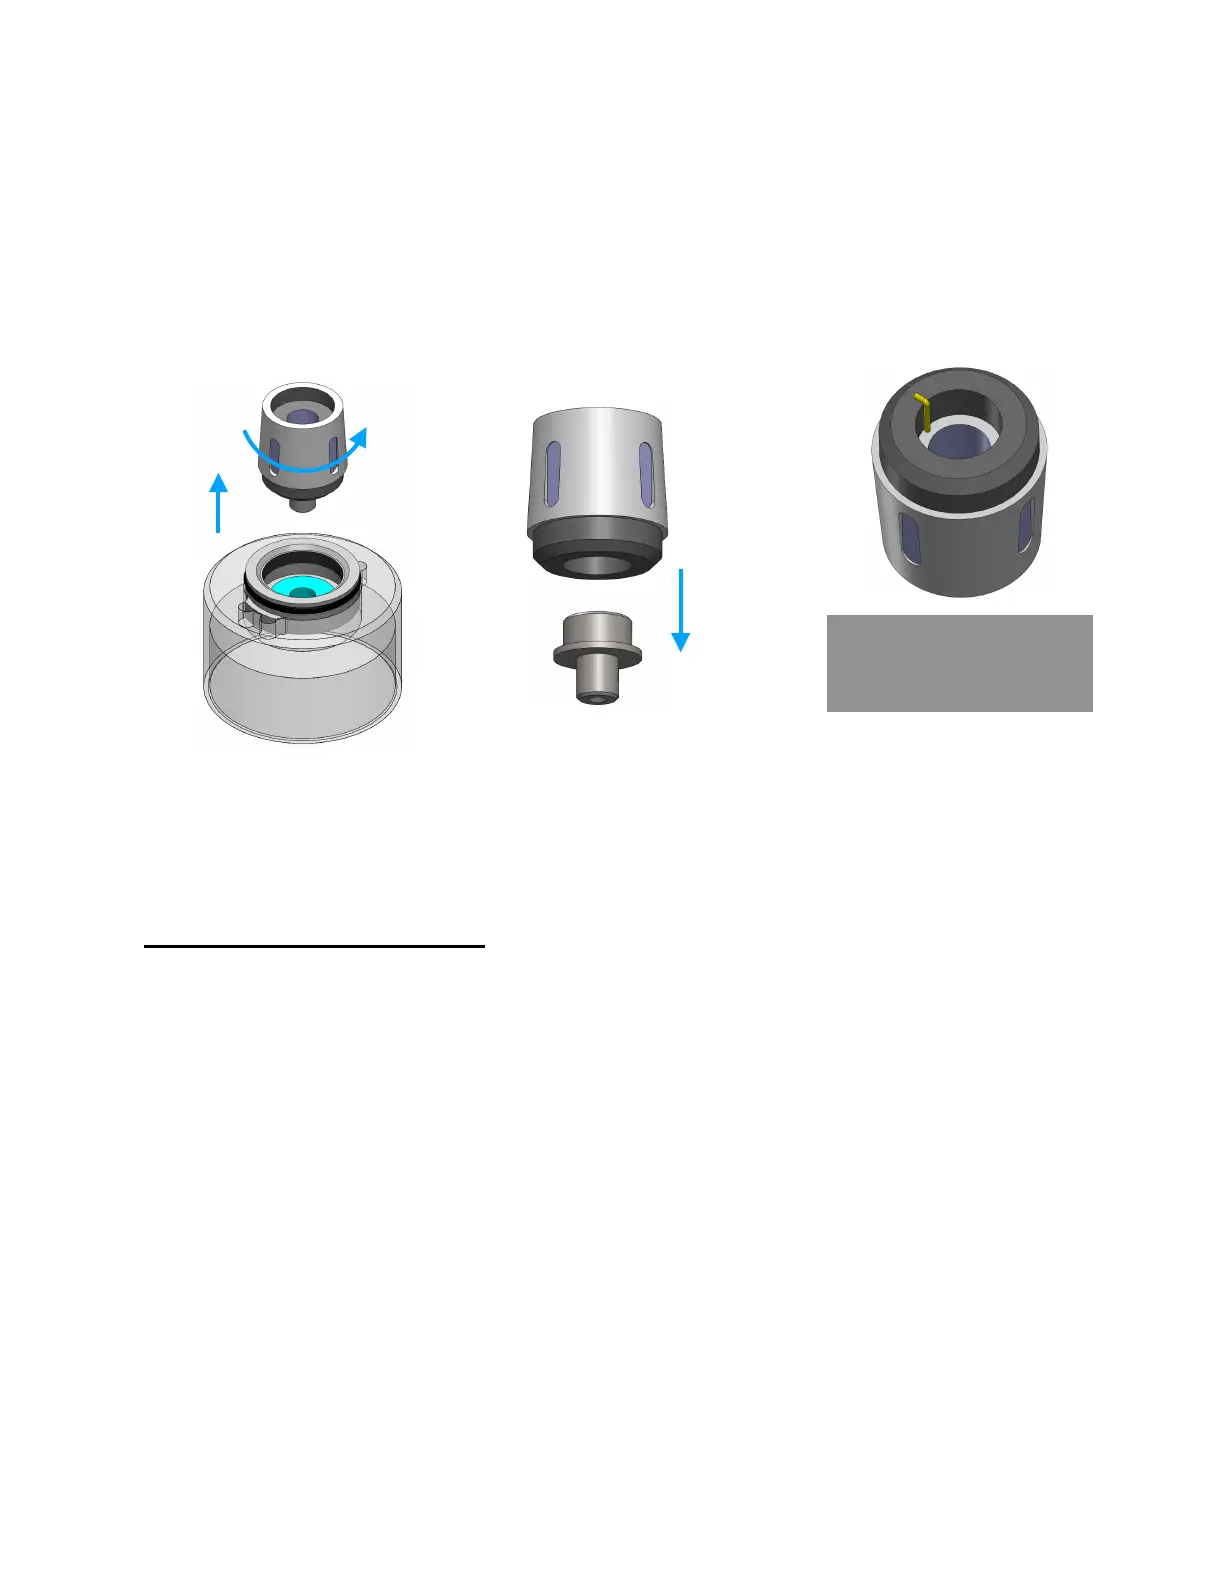
4. Use fingers or a gripping tool to unscrew the heating coil, while it is held in the clear
housing as shown
5. Remove and save metal nozzle from bottom of worn coil. Discard worn coil
6. Install saved nozzle into new heating coil, ensuring the wire marked in yellow is
wedged between the rubber gasket and nozzle.
7. Screw new coil back in, and re-assemble tank. Ensure O-rings are fitted properly
After installing a brand new coil, remember to let it soak in liquid for 15 minutes.
Tip: A worn out heating coil will have a black, charred interior while a new one is white
Storage and maintenance
To store the MicroFogger, fully charge it and turn it off using the switch. Ensure fluid
tank is unscrewed and apply storage caps if available. Place it in a cool, dry place that
is away from direct sunlight and any potentially flammable materials. The battery can be
left inside the device.
If LEAK is displayed on the screen, you’ll need to check the inside of the housing for
leaks. You’ll need a small Philips-head screwdriver to complete this maintenance.
1. Remove the safety cap and unscrew the fluid tank
2. Unscrew the 3 screws holding the front metal bulkhead
3. Slide top cover (with screen) forwards about 2 cm and then back in place
4. Remove the front bulkhead and observe inside of the housing
5. Use paper towel to wipe away any liquid if required
6. For more significant leaks, please consult disassembly manual