Basic Operation
Smart Wizard
When the TV is initially powered on, a sequence of on-screen prompts will assist in
configuring basic settings.
NOTE: Make sure that the antenna or cable TV system connection is made.
■ Set you desired language.
Press the arrow buttons to select the Menu Language, and then press the ENTER
button.
Press the ▼ button to select “Next” go to next step.
■ Select your time zone.
Press the arrow button to select a time zone, and then press the ENTER button.
Press the ▼ button to select “Next” go to next step.
■ Select your TV environment.
Press the arrow button to select an Environment, and then press the ENTER button.
Press the ▼ button to select “Next” go to next step.
※Store mode is intended for in-store display.
■ Network connection (Wired/Wireless)
Press the up / down key to select “LAN” or “WiFi”, and wired and wireless network is
enabled respectively. (for details on connection, please refer to the“Network
settings”.)
NOTE:
If you select exit the network connection, follow the menu prompt to operate, the TV
will begin automatically scans and store all available channels.
1. You can select the input source by pressing the SOURCE button on the remote
control.
Press the◄/►button to cycle through the input source, and press the ENTER button
to confirm your choice.
2. You can also press button to open “Home” interface, press▲/▼button to select
the Source, then press ENTER button to enter.
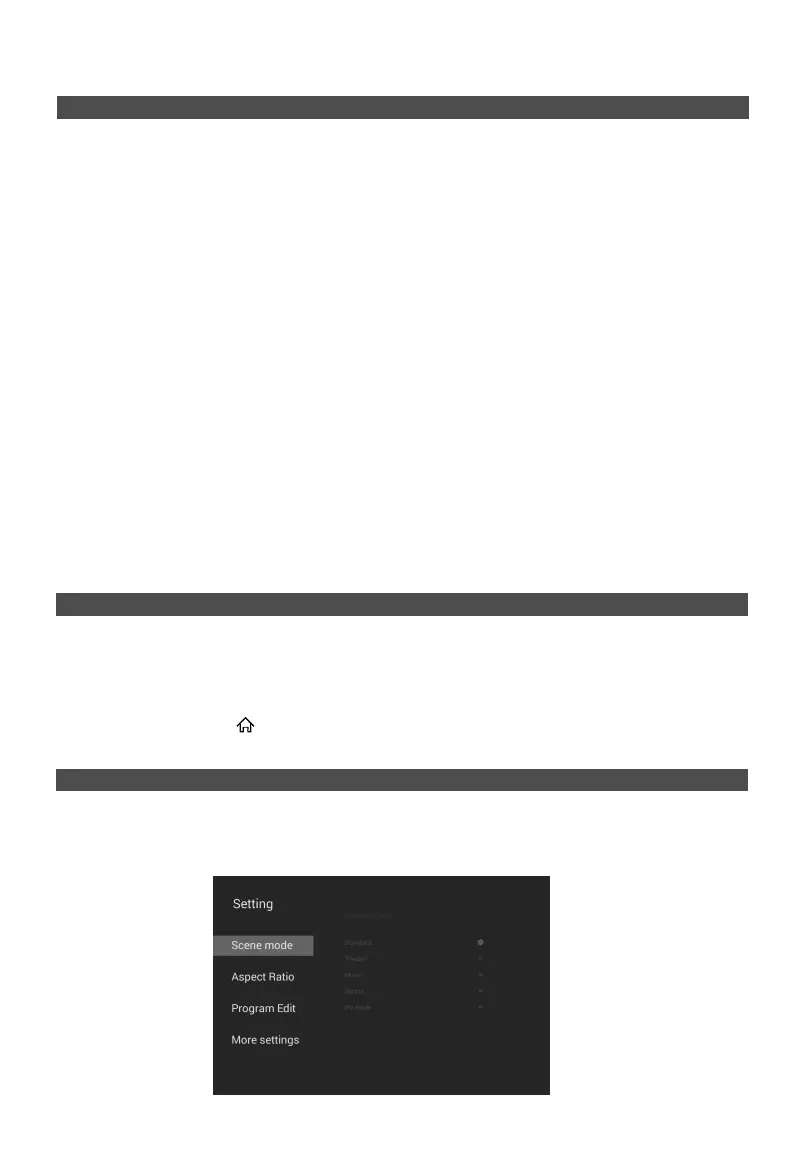
User Interface Introduction
Setting and tuning of many functions of this machine start from user interface.
Press MENU button on ATV signal source to open “Setting” menu, press ▲/▼ button to
select the desired sub item , press the ENTER or ► button to access the menu of the
next level.
Changing the Input Source