13
English
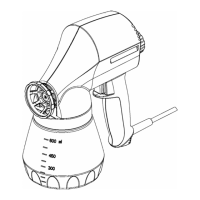
Using the Quick-clean feature (latex materials only)
Cleaning the Suction Extension
Y
ou will need a garden hose to complete the steps below. If you do not have a garden hose available, or if you used oil-
based materials, follow the Cleanup for Oil-Based Materials
instructions on pages 14-15.
1. To purge any remaining material
left in the suction hose, remove the
s
uction set from the material
container and place into a waste
c
ontainer.
3. Unplug the sprayer. Press the
Lock-N-Go™ buttons on both sides
of the sprayer with one hand, grab
t
he pump with your other hand, and
slide the spray cartridge out.
2. Point sprayer into the side of the
waste container. Trigger the
sprayer until nothing more comes
f
rom the spray tip.
4. Remove piston, spring, spray tip
and swirl valve from the pump
housing assembly. Place all
removed parts into the fluid
container.
6. Fit the quick-clean cap into place on
the pump housing ring as shown.
5. Unlock dual hose fitting (with hoses
still attached) from pump assembly
ring.
7. Push the dual hose fitting
(a) into
the intake and return openings on
the bottom of the quick-clean cap.
The fitting with the ridge
(b) goes
into the return opening.
9. SLOWLY turn on the garden hose.
Let the water run for approximately
30 seconds. Turn the water off.
8. Thread a garden hose into the quick-
clean cap. Place hoses (with suction
set attached) into an empty bucket.
10.
Remove the dual hose fitting from the
quick-clean cap.
12. Perform steps 4-8 in Cleaning the
Fluid Container (previous page) in
order to clean the components of
your sprayer
.
11. Remove the suction set and dual
hose fitting from the suction hoses.
Place suction set into the fluid
container
.
 Loading...