EasyManua.ls Logo

W&H Lyla - User Manual

W&H Lyla
122 pages
Print Icon
To Next Page IconTo Next Page
Loading...
RIN-210-17 RIN-210-22
Instructions for Use
RIN-210 - ENG - Rev02

Table of Contents

Questions and Answers

  • S
    Sean NguyenAug 19, 2025
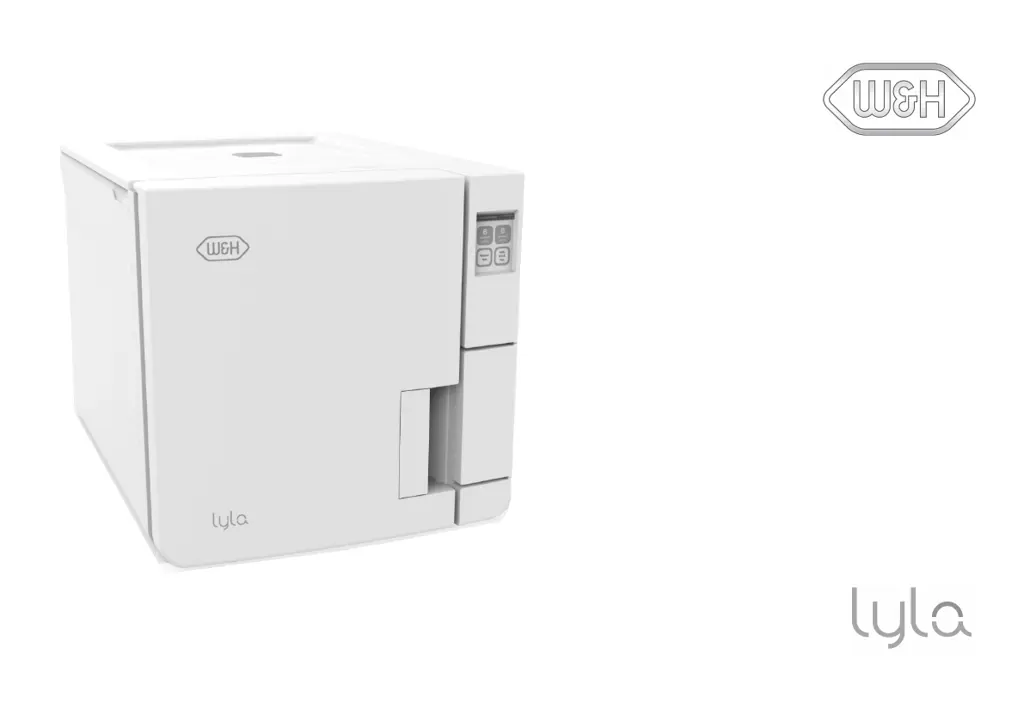
    How to fix a W&H Laboratory Equipment sterilizer that remains switched OFF?
    • H
      Heather ScottAug 19, 2025
      If your W&H Laboratory Equipment sterilizer remains switched off, first, ensure the main switch or network circuit breaker is turned on. Then, check the socket for voltage and verify that the power cord is correctly and securely connected.
  • J
    Jennifer RobinsonAug 21, 2025
    What to do if water is leaking at the front of my W&H Lyla sterilizer?
    • J
      Joshua HartAug 21, 2025
      If you see water leaking from the front of your W&H Laboratory Equipment sterilizer, it could be due to leaks through the chamber door gasket. Try cleaning or replacing the door gasket and cleaning the chamber face side. If the issue persists, it may be an internal leak, and you should call technical service.
  • J
    Jennifer GibsonAug 25, 2025
    What to do if my W&H Laboratory Equipment sterilizer displays “Open the door” but I can't open it?
    • D
      dennisteresaAug 25, 2025
      If your W&H Laboratory Equipment shows “Open the door” but opening the door is impossible, it may be in vacuum due to an internal malfunction. Refer to "Emergency door opening" on the next page. Switch the sterilizer OFF: this releases any internal pressures allowing the chamber door to be opened. If the problem persists, call technical service. Alternatively, the bacteriological filter might be blocked. Remove it to release the pressure and then replace it. Note that these filters need replacing every 400 cycles.
  • T
    Timothy PruittAug 26, 2025
    What to do if the chamber door of my W&H Laboratory Equipment sterilizer locks but re-opens immediately?
    • K
      Kathryn GonzalezAug 27, 2025
      If, when starting a cycle, the chamber door of your W&H Laboratory Equipment locks but immediately re-opens, displaying the “Open the door” message, first check that the door gasket is evenly inserted around its entire circumference. Also, ensure that no external objects or the load itself are jamming the door.
  • S
    Stephanie ReedAug 28, 2025
    Why is there residual water in the chamber of my W&H Lyla sterilizer after a cycle?
    • K
      Kevin FarmerAug 28, 2025
      If, at the end of a cycle, you find residual water in the chamber of your W&H Laboratory Equipment sterilizer, make sure the sterilizer is properly leveled. Also, check that you have not overloaded the chamber, complying with the maximum load weight limits for each load type. Ensure that you always use the chamber rack for trays and cassettes. A clogged chamber filter could also be the cause, so remove and clean it. Finally, ensure the chamber filter cap is correctly positioned. Check that the load is correctly placed.
  • J
    johnsonsarahAug 30, 2025
    Why are instruments turning brown or black in my W&H Lyla Laboratory Equipment sterilizer?
    • J
      Jason WolfeAug 30, 2025
      If instruments are turning brown or black in your W&H Laboratory Equipment sterilizer, it could be due to an incorrect temperature selection. Select a sterilization cycle featuring a lower sterilization temperature and follow the instrument manufacturer's instructions.
  • R
    riverajustinSep 1, 2025
    Why is there corrosion or spots on instruments after using my W&H Laboratory Equipment sterilizer?
    • W
      Wesley ArnoldSep 1, 2025
      If you notice corrosion or spots on instruments after using your W&H Laboratory Equipment sterilizer, ensure that instruments are dry before placing them in the sterilizer. Also, drain both water tanks and use water of good quality. Clean, rinse, and dry instruments to remove any organic or chemical residues before sterilization. Clean the chamber, trays, and chamber rack. Ensure that instruments made of different materials do not touch each other by placing them on separate trays or in pouches. Finally, clean the chamber to remove any scale deposits and use water of good quality.
  • K
    Kelly HurstSep 3, 2025
    What to do if my W&H Lyla Laboratory Equipment sterilizer cycle starts but there is no pressure or temperature rise?
    • J
      janeelliottSep 3, 2025
      If your W&H Laboratory Equipment sterilizer cycle commences but there is no pressure or temperature rise, the safety thermostat switch might be open. Reset the safety thermostat switch. If the problem persists, it may be an electric or electronic fault, and you should call technical service.
  • W
    wwattsSep 5, 2025
    How to fix a W&H Laboratory Equipment cycle report printer that does not work?
    • D
      Dr. Charles Velazquez IISep 5, 2025
      If the cycle report printer is not working with your W&H Laboratory Equipment, check the data and power connections to the printer.
  • C
    Crystal MitchellSep 7, 2025
    What to do if my W&H Laboratory Equipment sterilizer's automatic water filling system is not working?
    • J
      Joyce BondSep 8, 2025
      If your W&H Laboratory Equipment sterilizer is connected to an automated water supply system and there is no clean water in the tank, but the automatic water filling is not working, first, ensure that the water fill system is properly connected to the sterilizer. If it is connected, switch the sterilizer off and then on again. Check the external water supply system and check for water leaks from the sterilizer. If the problem persists, it may be due to a faulty MIN water level sensor in the clean water tank, and you should call service.

Summary

Conformity

CONFORMITY TO EUROPEAN REGULATIONS, STANDARDS AND DIRECTIVES

Lists regulations, standards, and directives the sterilizer complies with.

Symbols and messages

SAFETY SYMBOLS USED IN THIS MANUAL

Explains warning and caution symbols used in the manual for hazard identification.

SYMBOLS DISPLAYED ON THE PRODUCT

Details symbols found on the sterilizer for user guidance and safety.

Introduction

About this manual

Provides context about the manual's content and purpose.

FOR YOUR SAFETY AND THE SAFETY OF YOUR PATIENTS

Outlines the manual's purpose for safe and reliable operation.

Use restrictions

INTENDED USE

Specifies the sterilizer's intended applications for medical devices.

USER QUALIFICATION

Defines the required qualifications for operating the sterilizer.

Safety information

Safety warnings

Details thermal hazards associated with the sterilizer's operation.

ELECTRICAL RISKS

Outlines potential electrical hazards and precautions.

IMPROPER USE OF THE STERILIZER

Lists unsafe practices and restrictions for sterilizer operation.

Responsibility

USER RESPONSIBILITY

Defines user obligations for proper installation, use, and maintenance.

MANUFACTURER RESPONSIBILITY

States manufacturer's liability regarding safety, reliability, and performance.

Getting started

Unpacking

Provides instructions and warnings for unpacking the sterilizer.

WARNINGS

Advises checking for damage during transport and handling packaging.

CONTENTS OF THE PACKAGING

Lists the items included in the sterilizer packaging.

ITEMS NOT PROVIDED WITH THE STERILIZER

Lists accessories and items not supplied with the sterilizer.

Handling

HOW TO RELOCATE THE STERILIZER

Provides steps for safely relocating the sterilizer before transport.

Product description

FRONT VIEW AND UPPER INTERNAL STRUCTURE

Details the components of the sterilizer's front and upper internal structure.

COMPONENTS BEHIND THE SERVICE DOOR

Identifies components located behind the service door.

REAR VIEW

Identifies components on the rear view of the sterilizer.

CHAMBER ACCESSORIES

Describes chamber racks and their capacity for trays and cassettes.

Installing the sterilizer

LOCATION REQUIREMENTS

Specifies environmental and placement requirements for the sterilizer.

ELECTRICAL CONNECTIONS

Details requirements for connecting the sterilizer to the power supply.

WATER CONNECTIONS

Explains requirements for clean water supply and warranty implications.

WI-FI CONNECTION (OPTIONAL)

Provides steps for establishing a Wi-Fi connection for the sterilizer.

INSTALLING THE STERILIZER

Step-by-step guide for the physical installation of the sterilizer.

Operating the sterilizer

POWER THE STERILIZER ON;OFF

Instructions for turning the sterilizer on and off.

HOMEPAGE DESCRIPTION

Explains the elements and layout of the sterilizer's homepage.

User interface menu

MAIN MENU FUNCTIONS

Lists and describes the primary functions accessible from the main menu.

SETTINGS MENU FUNCTIONS

Details functions available within the sterilizer's settings menu.

Guided Configuration

Guided Configuration

Guides the user through initial setup of language, network, date/time, and name.

SET THE LANGUAGE

Instructions for changing the sterilizer's display language.

SET THE DATE AND TIME

Steps to adjust the date, time, and time zone settings.

SET THE STERILIZER NAME

Guide to setting or changing the sterilizer's name.

Sterilizer setup

SET THE DISPLAY BRIGHTNESS

Instructions for adjusting the brightness of the sterilizer's display.

CONNECT TO A NETWORK

Steps for connecting the sterilizer to a network via Ethernet or Wi-Fi.

User authentication (optional)

FUNCTION AVAILABILITY

Explains the requirement for an activation code for user management.

PIN MANAGEMENT

Details how to manage PINs, including changing and resetting them.

USB pen drive

DESCRIPTION

Explains the purpose and use of the USB pen drive for cycle reports.

FORMAT THE USB PEN DRIVE

Provides instructions for formatting the USB pen drive.

Standby mode

DESCRIPTION

Explains the sterilizer's standby mode and its energy-saving function.

ENTER THE STANDBY MODE MANUALLY

Steps to manually activate the sterilizer's standby mode.

EXIT THE STANDBY MODE

How to exit the sterilizer's standby mode.

CHANGING STANDBY MODE DELAY TIME

Instructions for adjusting the delay time before entering standby mode.

Administrator

User management (optional)

Details features and procedures for managing user accounts.

Traceability options (optional)

SET THE TRACEABILITY OPTIONS

Guides on setting traceability options and requested user information.

Managing printers

Printer selection (optional)

Guide to selecting and configuring available printers for the sterilizer.

Label printer selection (optional)

Instructions for selecting and setting up a label printer.

Label printer usage (optional)

Details how to use the label printing functionality, including automatic and manual options.

Label content description

Label content description

Explains the structure and content of printed labels.

Sterilizer tests

Sterilizer performance tests

Overview of tests to validate sterilizer performance.

Bowie and Dick test

Details the Bowie and Dick test for textile load sterilization.

Helix test

Helix test

Explains the Helix test for validating performance on hollow items.

INTERPRET THE TEST RESULT

Explains how to interpret the results of the Helix test.

WHAT TO DO NEXT

Guides on documenting the Helix test results.

Vacuum test

Vacuum test

Details the Vacuum test for pneumatic circuit tightness.

WHAT TO DO WHEN THE TEST FAILED

Provides troubleshooting steps if the Vacuum test fails.

Sterilization cycles

Load maintenance and preparation

Covers cleaning, lubrication, and packaging of instruments for sterilization.

Prepare the sterilizer

Steps to prepare the sterilizer before starting a cycle, including water filling.

HOOKING AND REMOVING THE STEAM DIFFUSER PLATE

Instructions for attaching and detaching the steam diffuser plate.

FILLING THE CLEAN WATER TANK

Steps for filling the sterilizer's clean water tank.

INSERTING THE CHAMBER RACK INTO THE STERILIZER

Guide on how to insert the chamber rack into the sterilizer.

GENERAL RECOMMENDATIONS

Tips for optimizing drying and cycle times.

Sterilization cycle description

AVAILABLE STERILIZATION CYCLES

Lists available sterilization cycles and their purposes.

Sterilization cycle management

ECO-B MODE (AVAILABLE ONLY WITH ACTIVATION CODE)

Details the ECO-B mode for reduced cycle duration and energy consumption.

B-TYPE CYCLES ACTIVATION

Procedures for activating B-type cycles using an activation code.

RUN A STERILIZATION CYCLE IMMEDIATELY

Step-by-step guide to start a sterilization cycle immediately.

SET THE STERILIZATION CYCLE START

How to schedule the start date and time for sterilization cycles.

SET THE DRYING TIME

Instructions for setting the drying time for sterilization programs.

VIEW THE CYCLE PARAMETERS

VIEW THE CYCLE PARAMETERS

How to check real-time and end-of-cycle parameters.

STERILIZATION CYCLE PAGE

STERILIZATION CYCLE PAGE

Explains the information displayed during a running sterilization cycle.

END OF A STERILIZATION CYCLE

END OF A STERILIZATION CYCLE

Procedures for completing a cycle and unloading the sterilizer.

STOP A STERILIZATION CYCLE

STOP A STERILIZATION CYCLE

Instructions on how to safely stop a running sterilization cycle.

Sterilization cycle report

WHERE CYCLE DATA ARE STORED

Specifies where summarized and analytical cycle reports are stored.

STORED REPORT FORMAT

Details the format (HTML, SCL) of stored sterilization reports.

WHAT HAPPENS WITH UNSAVED CYCLES

Explains behavior when cycles cannot be saved to USB.

VIEW CYCLE HISTORY

How to access and view the history of sterilization cycles.

PRINT OR SAVE A CYCLE REPORT ON THE USB PEN DRIVE

Steps to print or save cycle reports to a USB drive.

SET THE REMOTE FOLDER FOR SAVING THE REPORTS (OPTIONAL)

PRINT LABELS FOR A SPECIFIC CYCLE

Instructions for printing traceability labels for specific cycles.

SAVE ALL THE CYCLE REPORTS ON THE USB PEN DRIVE

Procedure to save all cycle reports to the USB pen drive.

Procedure

Guides on setting remote storage for saving sterilization cycle reports.

TEST THE DATA STORAGE (OPTIONAL)

TEST THE DATA STORAGE (OPTIONAL)

How to test the functionality of remote data storage.

SAVE ALL THE CYCLE REPORTS IN A REMOTE FOLDER (OPTIONAL)

SAVE ALL THE CYCLE REPORTS IN A REMOTE FOLDER (OPTIONAL)

Instructions for saving all cycle reports to a remote folder.

CYCLE REPORT STRUCTURE

CYCLE REPORT STRUCTURE

Details the structure and data fields found in a cycle report.

Maintenance

Warnings for maintenance operations

Safety warnings and precautions before performing maintenance.

Ordinary maintenance

MAINTENANCE BY THE USER

Outlines routine maintenance tasks to be performed by the user.

EXPIRED MAINTENANCE

Explains how the sterilizer monitors and alerts for expired consumables.

REPLACE THE CONSUMABLE BEFORE THE MAINTENANCE DUE DATE

Procedure for manually resetting counters after replacing consumables.

Monthly or 50-cycle maintenance

CLEANING THE DOOR GASKET AND THE CHAMBER FACE SIDE

Step-by-step guide for cleaning the door gasket and chamber face.

CLEANING THE CHAMBER AND THE CHAMBER ACCESSORIES

Instructions for cleaning the sterilizer chamber and its accessories.

CLEANING THE CHAMBER FILTER

Step-by-step guide for cleaning the chamber filter.

CLEANING THE EXTERNAL SURFACES OF THE STERILIZER

Instructions for cleaning the external covers of the sterilizer.

400-cycle maintenance

REPLACING THE BACTERIOLOGICAL FILTER

Guide for replacing the bacteriological filter.

REPLACING THE DUST FILTER

Guide for replacing the dust filter.

800-cycle or biannual maintenance

SEQUENCE OF PROCEDURES TO CLEAN THE WATER TANKS

Overview of steps for cleaning the water tanks.

PREPARE THE STERILIZER FOR CLEANING THE WATER TANKS

Initial steps to prepare the sterilizer for water tank cleaning.

ACCESS TO THE WATER TANKS

Instructions on how to access the sterilizer's water tanks.

CLEAN THE WATER TANKS

Detailed steps for cleaning the internal surfaces of the water tanks.

800-cycle maintenance

REPLACING THE DOOR GASKET

Guide for replacing the door gasket.

4000 cycle or five-year maintenance

GENERAL CHECK AND SERVICE REQUIRED

Outlines the general check and service required for 4000 cycles or five years.

ACTIONS REQUIRED FOR EACH ELEMENT

Specifies actions (Replace, Clean, Check) for various sterilizer elements.

Extraordinary maintenance

DRAINING THE USED AND CLEAN WATER TANK

Instructions for draining the water tanks when the sterilizer is not in use.

Disposal

DISPOSAL RESPONSIBILITY

Outlines responsibilities and regulations for sterilizer disposal.

Diagnostics

Errors

Lists error codes and corresponding actions for troubleshooting.

MESSAGES AND ALERTS

MESSAGES AND ALERTS

Explains system messages and alerts, and the required actions.

Troubleshooting

MANAGING ERRORS

Steps to manage errors that occur during sterilization cycles.

VIEW AND SAVE THE ERROR LOG

How to view and save the list of past errors.

ERROR PAGE

ERROR PAGE

Describes the information displayed on the error page after a reset phase.

WARNING MESSAGES

WARNING MESSAGES

Lists warning messages and their implications.

RESET THE SAFETY THERMOSTAT

RESET THE SAFETY THERMOSTAT

Procedure to reset the safety thermostat after it has operated.

TROUBLESHOOTING TABLE

TROUBLESHOOTING TABLE

A table listing common problems, their causes, and solutions.

Emergency door opening

WARNING ABOUT OPENING THE DOOR IN EMERGENCY

Critical warnings regarding high pressure and temperature during emergency opening.

OPENING TOOL

Explains the need for 9V batteries for the auxiliary unlocking procedure.

OPEN THE DOOR IN EMERGENCY

OPEN THE DOOR IN EMERGENCY

Step-by-step guide for opening the door in an emergency.

Technical data

Sterilization cycles

Information on available sterilization cycles and their specifications.

STANDARD STERILIZATION CYCLES AVAILABLE

Lists and categorizes the standard S-type and B-type sterilization cycles.

STERILIZATION CYCLE DATA (S-TYPE CYCLES)

Presents technical data for S-type sterilization cycles.

STERILIZATION CYCLE DATA (B-TYPE CYCLES - AVAILABLE ONLY WITH ACTIVATION CODE)

Presents technical data for B-type sterilization cycles.

TOTAL CYCLE DURATION (200-240 V AC VERSION)

Table showing total cycle times for different loads and versions.

TOTAL CYCLE DURATION (100-125 V AC VERSION)

Table showing total cycle times for different loads and versions.

MAXIMUM LOAD FOR INSTRUMENTS

Specifies the maximum load weights for various instruments and cycles.

Sterilization cycle phases

Defines codes and descriptions for various sterilization cycle phases.

TYPE S STERILIZATION CYCLE PHASES

Illustrates the pressure profile for S-type sterilization cycles.

TYPE B STERILIZATION CYCLE PHASES (OPTIONAL)

Illustrates the pressure profile for B-type sterilization cycles.

WATER SUPPLY SYSTEM

WATER SUPPLY SYSTEM

Details specifications for the water supply system.

POWER SUPPLY SYSTEM

POWER SUPPLY SYSTEM

Details specifications for the power supply system.

INSTALLATION REQUIREMENTS

INSTALLATION REQUIREMENTS

Specifies environmental and spatial requirements for installation.

STERILIZER CHAMBER

STERILIZER CHAMBER

Provides technical specifications for the sterilizer chamber.

DISTILLED OR DEMINERALIZED WATER

DISTILLED OR DEMINERALIZED WATER

Details water quality requirements and consumption.

Recommendations for validation

TEST VALIDATION POINTS

Identifies validation points (hottest/coldest) for sterilizer performance.

Diagrams

CONNECTION DIAGRAMS

Illustrates data communication and water system connection diagrams.

Water quality

FEED WATER SPECIFICATIONS (EN 13060)

Lists maximum content of minerals and water specifications according to EN13060.

Accessories, spare parts, consumables

LIST OF ACCESSORIES AND SPARE PARTS

Lists various chamber racks and trays with their specifications.

CONSUMABLES

CONSUMABLES

Lists consumables, their part numbers, and replacement frequency.

ACTIVATION CODES

ACTIVATION CODES

Lists activation codes, their descriptions, and part numbers.

Authorized W&H service partners

Authorized W&H service partners

Information on finding authorized service partners.

Documentation forms

W&H installation check-list

A checklist for verifying proper installation and user training.

INSTALLATION INFORMATION

Fields for recording serial number, purchase, and installation details.

ADDRESSES FOR SENDING THE INSTALLATION CHECK-LIST

ADDRESSES FOR SENDING THE INSTALLATION CHECK-LIST

Provides fax and mail addresses for submitting the installation checklist.

Helix test documentation form

Helix test documentation form

A form for logging Helix test results and effectiveness over time.

W&H Lyla Specifications

General IconGeneral
ModelLyla
ManufacturerW&H
InterfaceTouch screen
Sterilization Temperature134°C
Power Supply220-240V, 50/60Hz
ApplicationDental and medical sterilization

Related product manuals