Plumbing
1. Check that the incoming water pressure is within the lter’s recommended working pressure and
ensure that a pressure limiting valve is installed if using mains water or a high pressure pump.
2. Ensure that a foot valve / non return valve is installed if the pump is installed 500mm / 20” above the
water level.
3. If the lter is installed below the water level or connected to mains water, isolation valves should
be installed at the inlet and outlet of the lter. This will prevent water ow during any routine
maintenance.
4. Minimise the length of pipe and the number of ttings to minimise restrictions to water ow.
5. Connect all plumbing to the Multiport Valve taking care that all plumbing connections are glued and
tightened securely to prevent leaking.
6. Ensure solvents are not excessively applied to ttings as this could run into o’rings and create sealing
problems.
7. Do not over tighten ttings or adapters.
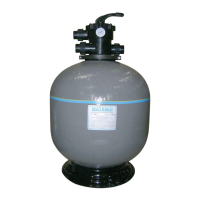
Installation of the Multiport Valve
Top Mount Fibreglass Filters are supplied with either a Top Mount screw down Multiport Valve or clamp
down Multiport Valve.
Side Mount Fibreglass Filters are supplied with the option of a Side Mount Multiport Valve with a
plumbing kit designed to be connected to the side ports of the lter.
Each Multiport Valve is supplied three threaded barrel unions.
1. Check that the top of the lter is free from any lter media or debris and if there is a valve o’ring,
please check that the valve o’ring is in place.
2. Check the label of each valve port and position the valve accordingly. Pump port must be plumbed
to the pump discharge, waste port must be plumbed to the waste line and the return port must be
plumbed to the return line
3. Top Mount Screw Down Multiport Valve - Rotate the Multiport Valve into the lter vessel’s threaded
connection.
Top Mount Clamp Down Multiport Valve – Align the valve with the top of the tank ange. Place the
clamp half over the valve ange and the tank ange. Insert the clamp screws and nuts in the clamp,
making sure that the nuts are located in the retainer slots on the clamps. Tighten the clamp screws
rmly and check that the valve and clamp are correctly assembled.
Side Mount Multiport Valve – Align the Multiport Valve’s plumbing kit with the lter’s threaded
connection ports. Screw the plumbing kit’s barrel unions onto the lter connection ports and hand
tighten. Do not over tighten the barrel unions as this can lead to damage and void warranty.
4. Screw the Multiport Valve barrel unions onto the threaded connection ports of Multiport Valve and
hand tighten. The barrel union should be rmly threaded into the Multiport Valve and there should be
no play between the thread. Do not over tighten the barrel unions as this can lead to damage and
void warranty.
5. Glue the PVC pipe to the barrel unions and Allow 24 hours for glue (solvent) to set before starting the
lter.
6. Test the lter and check for leaks around the threads.
 Loading...