Page 8
Connect 3/8” Black Tube from Faucet to the Drain
Measure the 3/8” black tube from faucet to the drain saddle on the
drain pipe and make a straight cut to the correct length.
Remove black plastic nut from drain saddle. Slip black tube through
black nut. Insert black tube into the opening in the drain saddle and
hand tighten the black nut, and add 1/4 turn with a wrench.
The black 3/8” drain tube must be as SHORT and STRAIGHT as possible to the drain
s
a
ddle, making a downward slope from faucet to drain saddle to allow for proper
drainage. This is a gravity fed line and if there is any bend or dip in the tube, the rinse
water will not flow into the drain properly. Water may back up and come out the air
gap hole in the back of the faucet.
Step 17
IMPORTANT:
Step 16
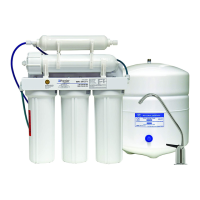
Reverse Osmosis Module Mounting
Step 18 Determine best location for the RO module to be mounted to
allow for future system maintenance. The parts bag has 2 self
tapping screws. Using a Phillips screwdriver, screw them into
the cabinet wall 6” apart and 16” from the bottom of the cabinet.
Do not cut any RO system tubes at this timeNote:
Step 20
Green Tube Connection
Step 19
Adapt-a-Valve - Part # 560070
R
e
move a brass nut, plastic sleeve and brass insert from the parts
bag. Place nut on the green tube first, then the sleeve (Small
tapered end of sleeve must point to the end of tube) and then insert
the brass insert all the way into the end of the tube.
Insert
the
green tube into the ¼” opening on the adapt-a-valve
until it stops. Slide nut and sleeve down and thread onto the
male pipe threads. Use a ½” wrench to securely tighten the nut.
Leave enough tube so it is not kinked and cut the tube to desired
length.