6
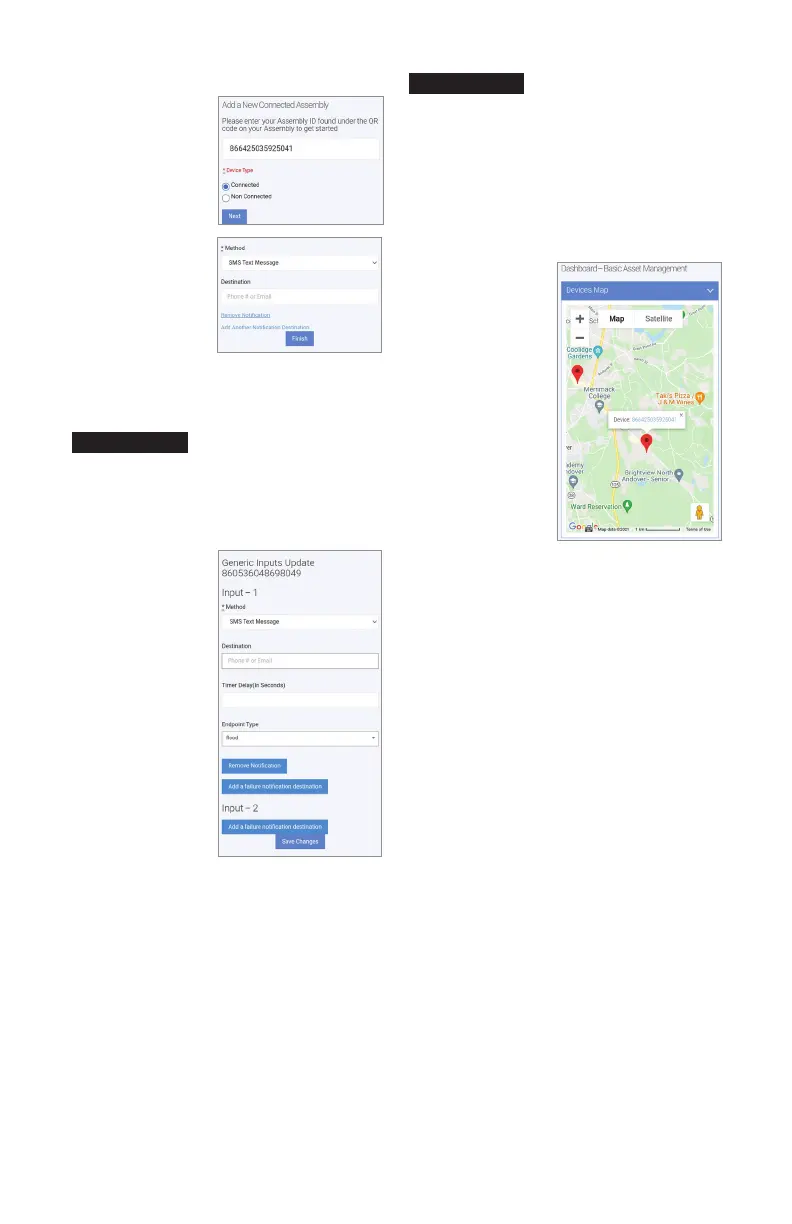
To set a notification alert
1. In the Actions field,
select Input 1 & 2 to
set up alerts.
2. Choose notification
type from the Method
drop-down list: Email
Message, SMS Text
Message, or Voice Call.
3. Depending on the
notification type
selected, enter
phone number or
email address in the
Destination field.
4. Skip the Timer Delay
field. For use with
SentryPlus Alert
Control Box only.
5. For the endpoint type,
select ‘Flood’ for the
flood sensor from the
drop-down list. This
value indicates the type of event the connected
device is reporting.
6. To set up the same alert for another notification method,
select Add a failure notification destination and repeat
steps 2 to 5 for that method.
7. Configure Input 2 in the same manner, if a second flood
sensor is in use.
8. Select Save Changes.
9. Return to the dashboard, locate the device, and select
TEST to verify the connections.
10. Check for the test notification in your email inbox or
mobile device, depending on the configuration entered.
In general, fill in all the fields on the Syncta app pages to
create complete and accurate records of devices deployed,
users, and alerts history. Edit the entries as required to
maintain up-to-date records.
Start at the dashboard to add equipment or to take action
on specific equipment, such as view alerts, change settings
to receive notifications, and test notifications.
NOTICE
If the Cellular Gateway is wired for two flood sensors, configure
alerts for both sensors. Configure Input 1 for the first or only
flood sensor; configure Input 2 for a second flood sensor.
NOTICE
To use the map locator
Tap a marker to see the
assembly ID. Tap the ID
link to modify assembly
information and notification
settings on the Update
Assembly Information page.
To activate an assembly
1. On the dashboard,
select Activate New
Assembly.
2. Enter the assembly
ID, select Connected,
and tap Next. Syncta
checks for the installa-
tion of a valid device.
(Connected applies
to devices requiring
internet access;
Nonconnected to
manual devices.)
3. Choose notification
type from the Method
drop-down list: Email
Message, SMS Text
Message, or Voice Call.
4. Depending on the noti-
fication method selected, enter a phone number or
an email address in the Destination field.
5. Tap Finish.

 Loading...