42 43
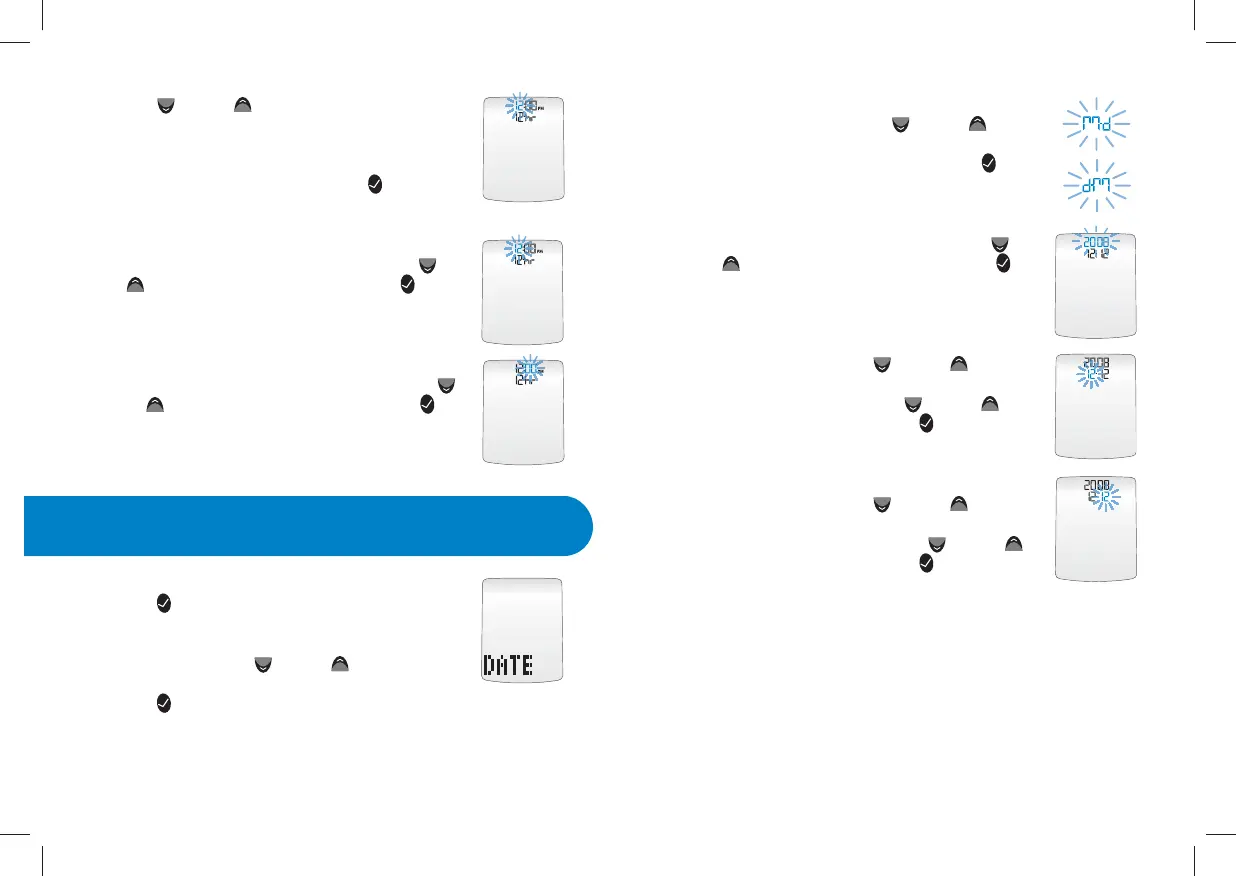
[1] When your meter is deactivated press the
CHECK (
) button once to enter menu mode.
The word “MEM” is displayed.
[2] Press the DOWN ( ) or UP ( ) arrow buttons
until the word “DATE” is displayed. Press the
CHECK (
) button to enter and edit the date settings.
[3] You should see a display with the message blinking “M-d”
or “d-M”, this means you are ready to set the meter’s date.
Select the M-d (Month-Day) or d-M (Day-Month)
date format with the DOWN (
) or UP ( ) arrow
buttons. Your selection will be highlighted by the
blinking of the symbol. Press the CHECK (
) but-
ton to confirm your selection and move on to the
year setting.
[4] Set the year (flashing) with the DOWN ( )
or UP (
) arrow buttons. Press the CHECK ( )
button to confirm your selection and move on
to the month or day setting.
[5] If in M-d (Month-Day) format, set the month
(flashing) with the DOWN (
) or UP ( ) arrow
buttons. If in d-M (Day-Month) format, set the
day (flashing) with the DOWN (
) or UP ( )
arrow buttons. Press the CHECK (
) button to
confirm your selection.
[6] If in M-d (Month-Day) format, set the day
(flashing) with the DOWN (
) or UP ( ) arrow
buttons. If in d-M (Day-Month) format, set the
month (flashing) with the DOWN (
) or UP ( )
arrow buttons. Press the CHECK (
) button to
confirm your selection and return to the menu.
DOWN ( ) or UP ( ) arrow buttons. The 12 hour
clock display option is indicated by a 12hr. The 24
hour clock display option is indicated by a 24hr.
Your selection will be highlighted by the blink-
ing of the symbol. Press the CHECK (
) button
to confirm your selection and continue on to the
hour setting.
[4] Set the hour (flashing) with the DOWN ( ) or
UP (
) arrow buttons. Press the CHECK ( ) but-
ton to confirm your selection and continue on to
the minute setting.
[5] Set the minute (flashing) with the DOWN ( )
or UP (
) arrow buttons. Press the CHECK ( ) but-
ton to confirm and return to the menu.
Setting the Date
14
CHAPTER