10 11
About the WaveSense Jazz Meter
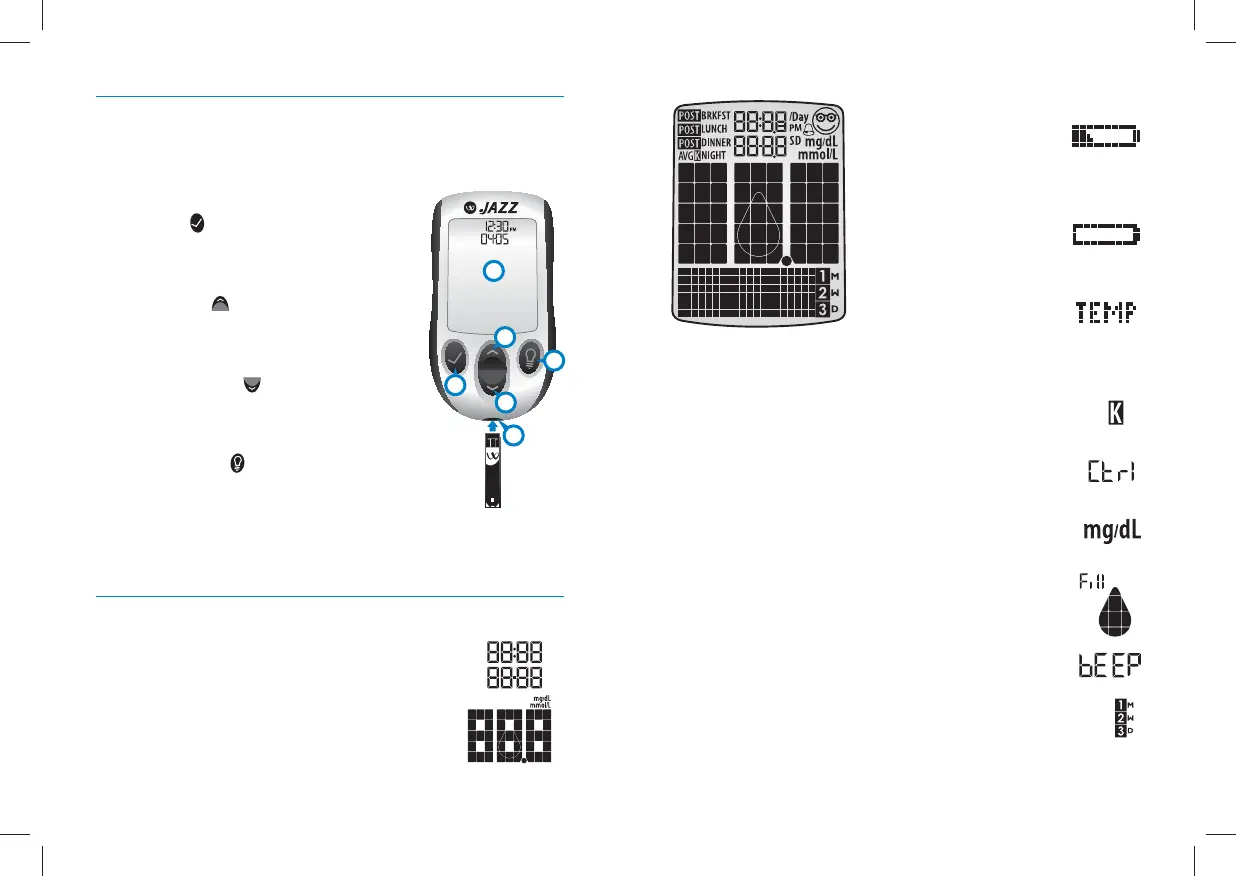
(1)
Display: Glucose test results, symbols, messages and
graphs appear here.
(2) CHECK ( ) Button: Use the CHECK
button to confirm an option or make a
selection in a menu.
(3) UP Arrow ( ) Button: Use the UP
arrow button to scroll backward through
options.
(4) DOWN Arrow ( ) Button: Use the
DOWN arrow button to scroll forward
through options.
(5) BACKLIGHT ( ) Button: Use the
BACKLIGHT button to turn the backlight
ON and OFF.
(6) Strip Port: Insert the WaveSense Jazz Test Strip, with the
contact bars facing up, into the strip port.
About the WaveSense Jazz Meter Display Symbols/Messages
(1) Date and Time: Appears here, including
when the meter is deactivated.
(2) Glucose Test Results
(3) Low Battery Message:
Appears when battery #2
in your meter is running
low.
(4) Dead Battery Message:
Appears when battery #2
in your meter is dead.
(5) Temperature Symbol:
Appears when the meter
is outside its operating
temperature range of 50 °F to
104 °F (10 °C to 40 °C).
(6) Ketone Symbol: Appears when your glucose
test results are higher than 240 mg/dL.
(7) Control Solution message: Appears after
you have performed a control solution test.
(8) Units of Measurement symbol: Results will
be displayed in mg/dL.
(9) Apply Sample to Test Strip message: The
flashing droplet symbol and the word “fill” will
signal you to apply a sample to the test strip.
(10) Volume Message: Can be set to ON or OFF.
(11) 1 Month, 2 Week, 3 Day Indicators: The
appropriate number of days will appear when viewing
graphical averages.
4
3
2
6
1
5