15
Please Do Not Return This Product To The Store. Contact your local Wayne-Dalton dealer. To find your local Wayne-Dalton dealer, refer to your
local yellow pages/business listings or go to the Find a Dealer section online at www.wayne-dalton.com
Tools Needed:
INSTALLATION
6
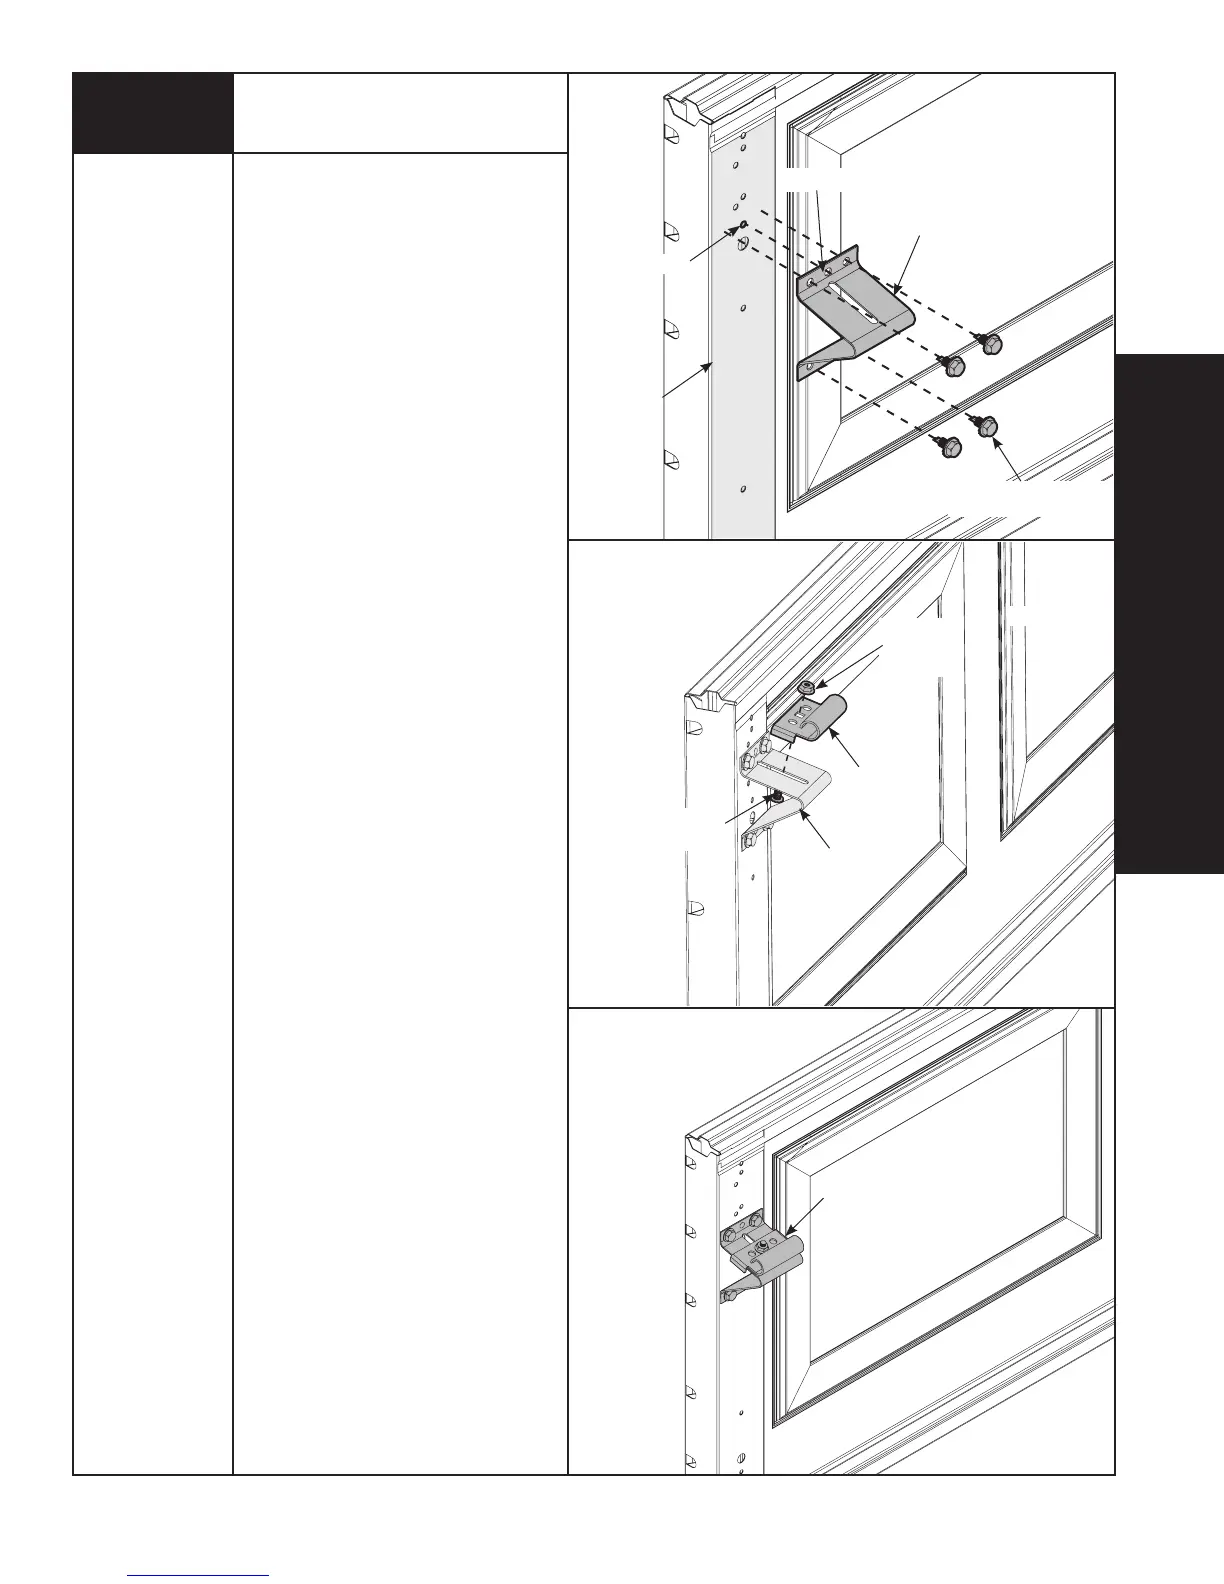
Top Bracket
Power Drill
7/16” Socket
Driver
Align upper-center hole of top bracket
with #6 hole in the end stile (See End
Stile Hole Pattern on page 14). Ensure
top bracket is level and aligned with
edge of section. Secure with
(2) 1/4”- 20 x 11/16” self drilling
screws, one in each top corner of the
top bracket.
Ensure top bracket is level and aligned
with edge of section. Secure with
(2) 1/4”- 20 x 11/16” self drilling
screws, one in each bottom corner of
the top bracket.
Loosely fasten top bracket slide with
(1) 1/4”- 20 x 5/8” carriage bolt and
(1) 1/4” x 20 flange hex nut. Insert roller.
Repeat for other side.
NOTE: For doors with a glazed top
section (windows). Top strut may be
mounted between #2 and #6 holes
before top bracket is installed. See
Step 8 for U-Bar installation
(4) 1/4”- 20 X 11/16”
SELF DRILLING SCREW
TOP BRACKET
BASE
END STILE
TOP SECTION
TOP SECTION
TOP
BRACKET
BASE
TOP SECTION
TOP
BRACKET
ASSEMBLY
1/4” X 20
FLANGE HEX
NUT
1/4”- 20 X 5/8”
CARRIAGE BOLT
TOP
BRACKET
SLIDE
#6 HOLE
CENTER HOLE