16
Please Do Not Return This Product To The Store. Contact your local Wayne-Dalton dealer. To find your local Wayne-Dalton dealer, refer to your
local yellow pages/business listings or go to the Find a Dealer section online at www.wayne-dalton.com
Tools Needed:
7
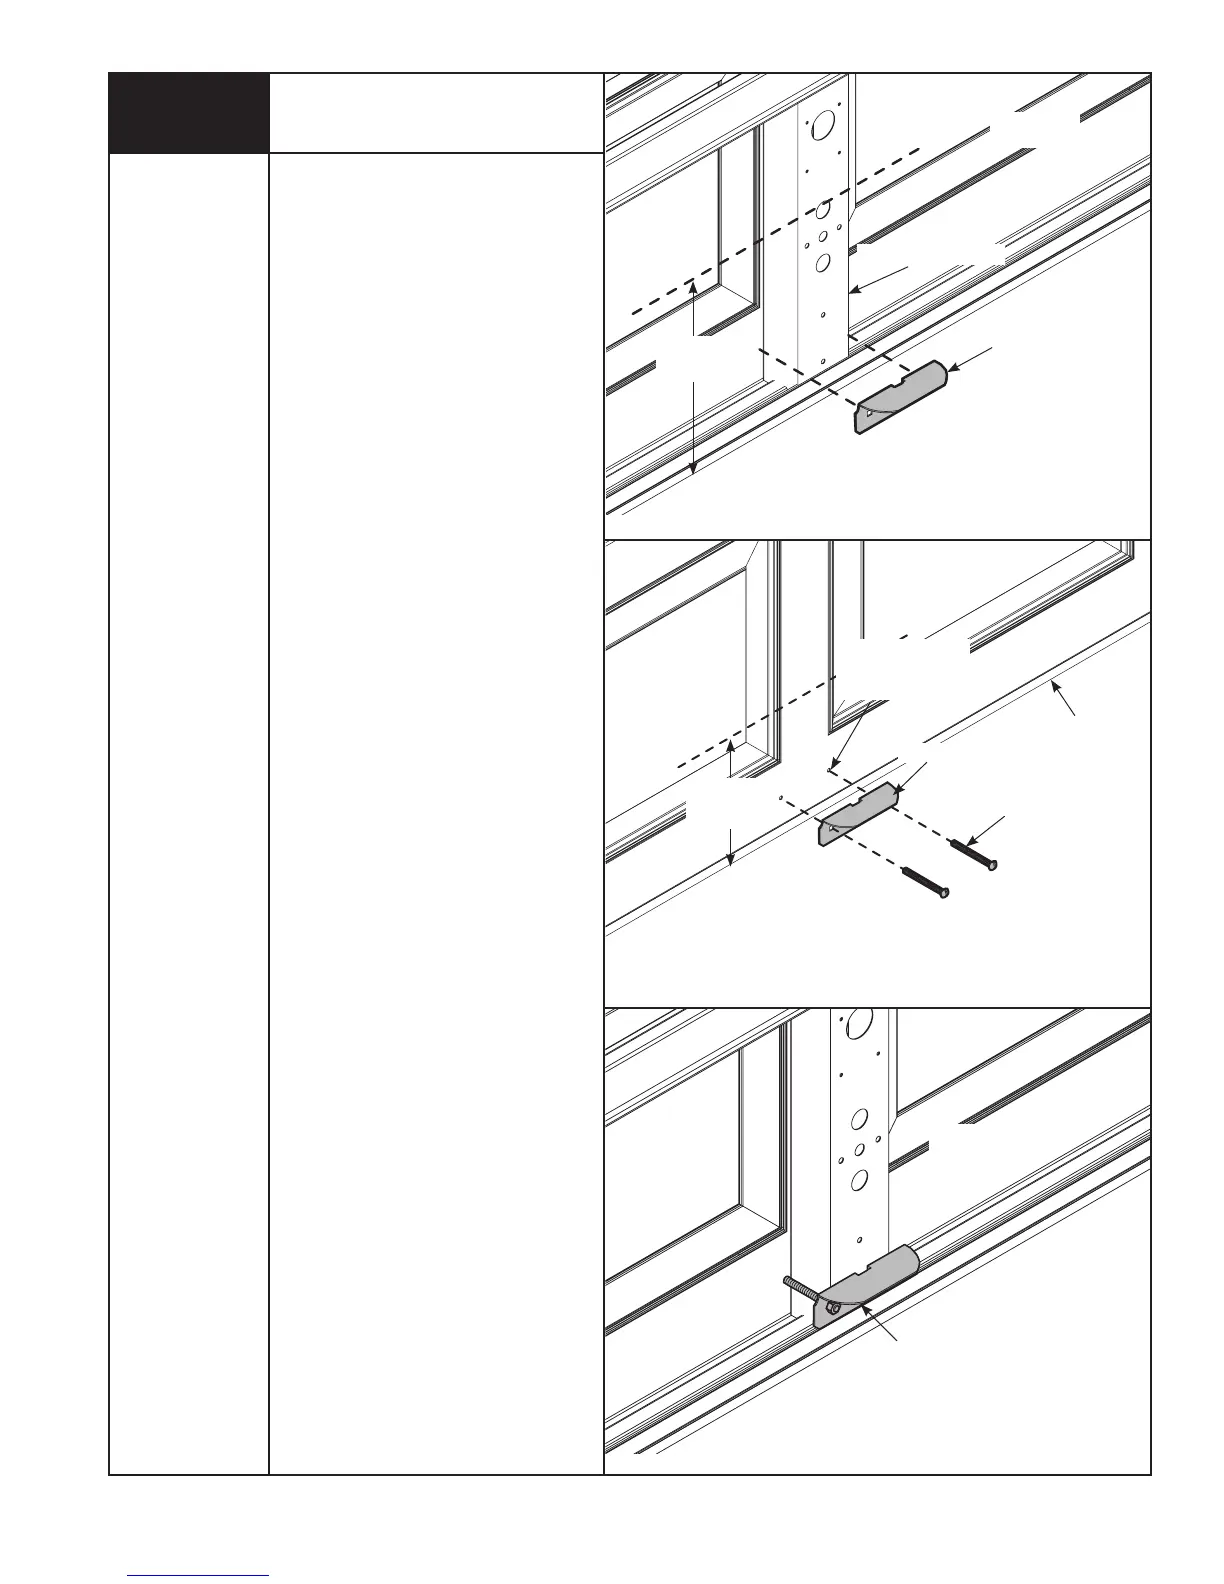
Step Plate
Locate the center most stile of the
bottom section of the door.
On the inside of the door, center the
step plate/lift handle on the center
most stile no higher than 6” from the
bottom of the door. Using the step
plate/lift handle holes as a guide, drill a
5/16” dia. hole along each side of the
stile through the face of the door. (Drill
through insulation and door’s face on an
insulated door.) Be extremely careful to
keep drill straight.
Mount step plates/ lift handles back to
back, straddling stile. Secure with (2)
1/4” x 2-3/4” carriage bolts and
1/4”-20 hex nuts.
STEP PLATE
ASSEMBLY
BOTTOM
SECTION
INSIDE STEP PLATE INSTALLATION
OUTSIDE STEP PLATE INSTALLATION
(2) 1/4” X 2-3/4”
CARRIAGE BOLTS
STEP PLATE
BOTTOM
SECTION
DRILL (2) 5/16” DIA.
HOLES THROUGH
DOOR FACE
ASTRAGAL
6” MAX
MOUNTING
HEIGHT
STEP PLATE
INSIDE STEP PLATE INSTALLATION
BOTTOM
SECTION
CENTER MOST STILE
6” MAX
MOUNTING
HEIGHT
Tape Measure
Pencil
5/16” Drill Bit
Power Drill
7/16” Wrench