28
6 Components
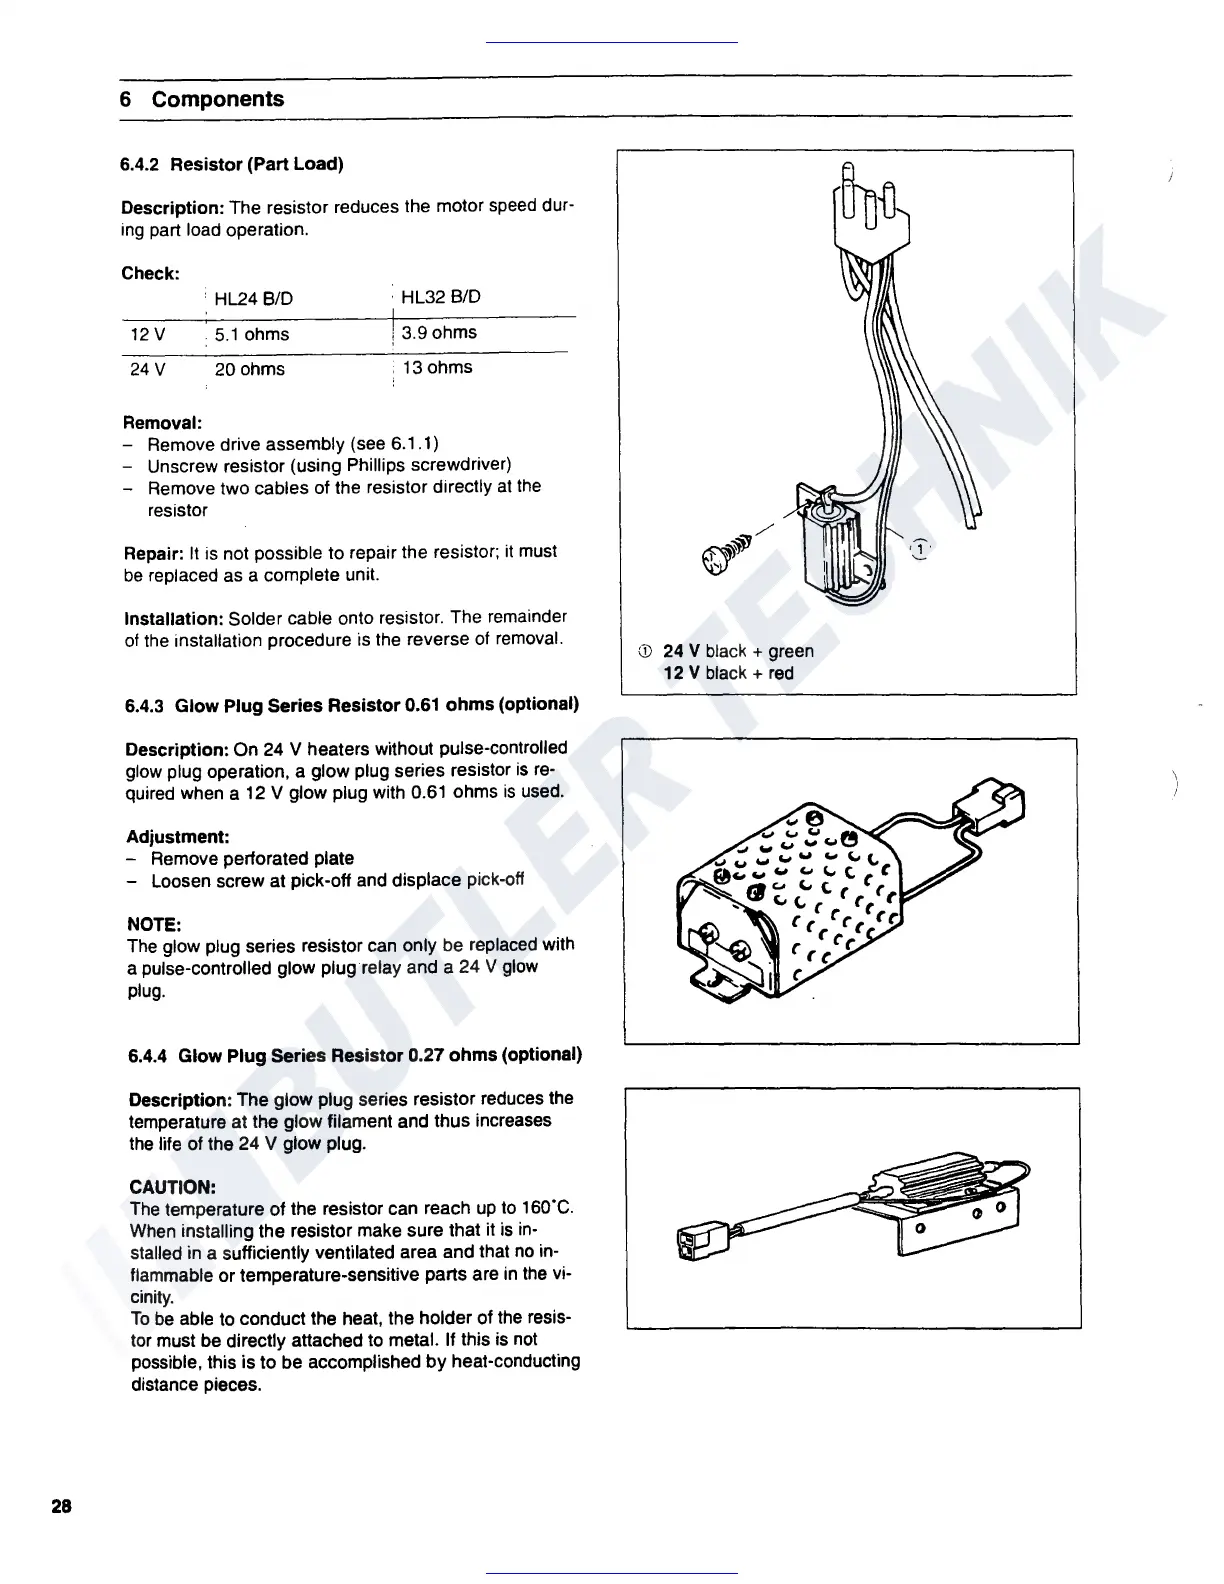
6.4.2 Resistor (Part Load)
Description: The resistor reduces the motor
speed
dur-
ing
part load operation.
Check:
• HL24 8/D
, HL32 8/D
12
V
.
5.1
ohms
! 3.9 ohms
24
V 20 ohms
•
13
ohms
Removal:
- Remove drive assembly (see
6.1
.1)
- Unscrew resistor (using Phillips screwdriver)
- Remove two cables of the resistor directly
at
the
resistor
Repair:
It
is
not possible to repair the resistor;
it
must
be
replaced as a complete unit.
Installation: Solder cable onto resistor. The remainder
of
the installation procedure is the reverse
of
removal.
6.4.3 Glow Plug Series Resistor 0.61 ohms (optional)
Description:
On
24
V heaters without pulse-controlled
glow plug operation, a glow plug series resistor
is
re-
quired when a
12
V glow plug with 0.61 ohms
is
used.
Adjustment:
- Remove perforated plate
- Loosen screw at pick-off and displace pick-off
NOTE:
The glow plug series resistor can only be replaced with
a pulse-controlled glow plug relay and a 24 V glow
plug.
6.4.4 Glow Plug Series Resistor 0.27 ohms (optional)
Description:
The glow plug series resistor reduces the
temperature at the glow filament and thus increases
the
life of the 24 V glow plug.
CAUTION:
The
temperature of the resistor can reach
up
to
160"C.
When installing the resistor make sure that it
is
in-
stalled in a sufficiently ventilated area and that
no
in-
flammable or temperature-sensitive parts are
in
the
vi-
cinity.
To
be
able to conduct the heat, the holder of the resis-
tor must be directly attached to metal. If this is not
possible, this is to be accomplished
by
heat-conducting
distance pieces.
CD
24 V black + green
12 V black+
red




 To Next Page