11
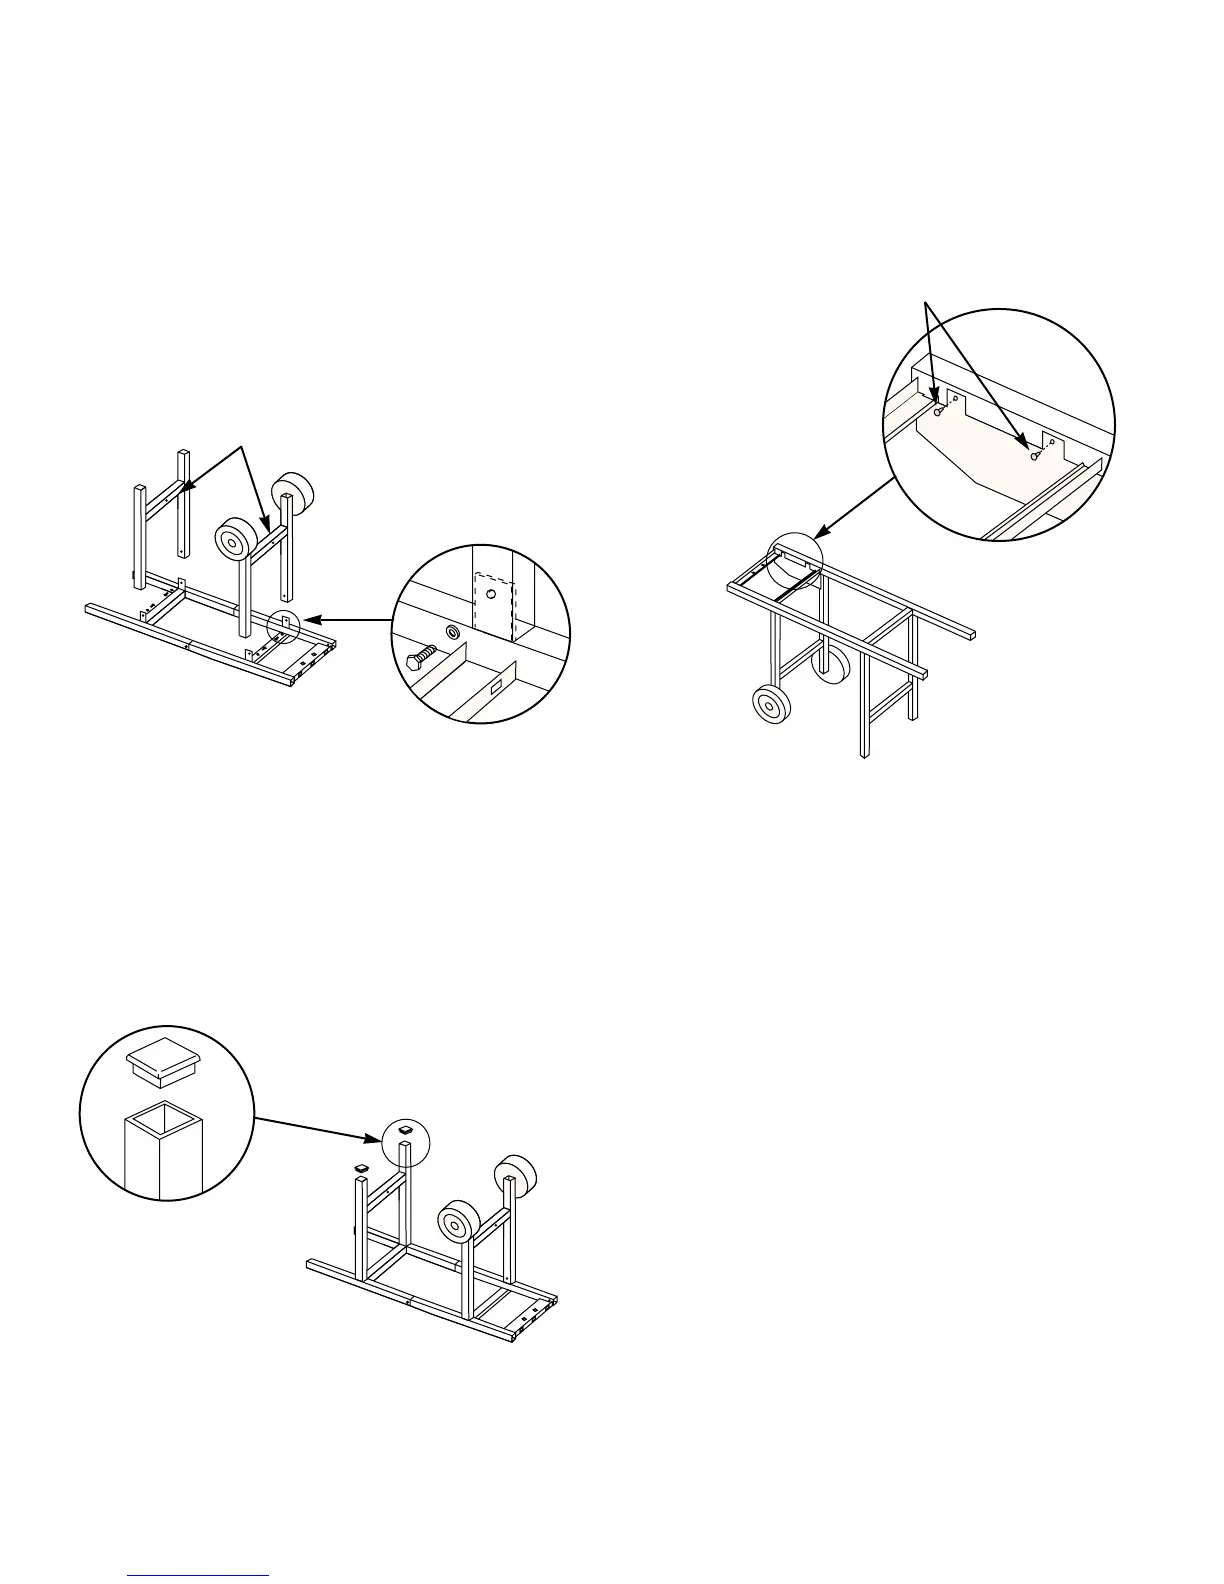
Figure 3
Step 4
Continue frame assembly
You will need: leg frame, wheel frame, four 1/4-20 x 1/2 inch
bolts, four nylon washers and a 7/16 inch wrench.
Place the leg frame onto the tabs of the left frame with the
dimple to the inside. Figure 3. Place the wheel frame onto
the tabs of the right frame with the dimple to the inside.
Figure 3.
The leg tabs must be on the inside of the frames.
Add the washers to the bolts, insert in the holes as shown
and tighten with the wrench. Figure 3.
Figure 4
Step 5
Install tubing plugs
You will need: two tubing plugs and a hammer.
Insert tubing plugs into the ends of the leg frame. Figure 4.
To fully seat the plugs, you may have to tap them lightly
with a hammer.
Figure 5
Step 6
Add front panel
You will need: front panel and two plastic buttons.
Turn frame assembly right side up.
Align the panel with the holes in the frame and insert the
plastic buttons through the front panel and frame. Figure 5.
View from rear
of barbecue
Dimples to
the inside
Plastic buttons
 Loading...