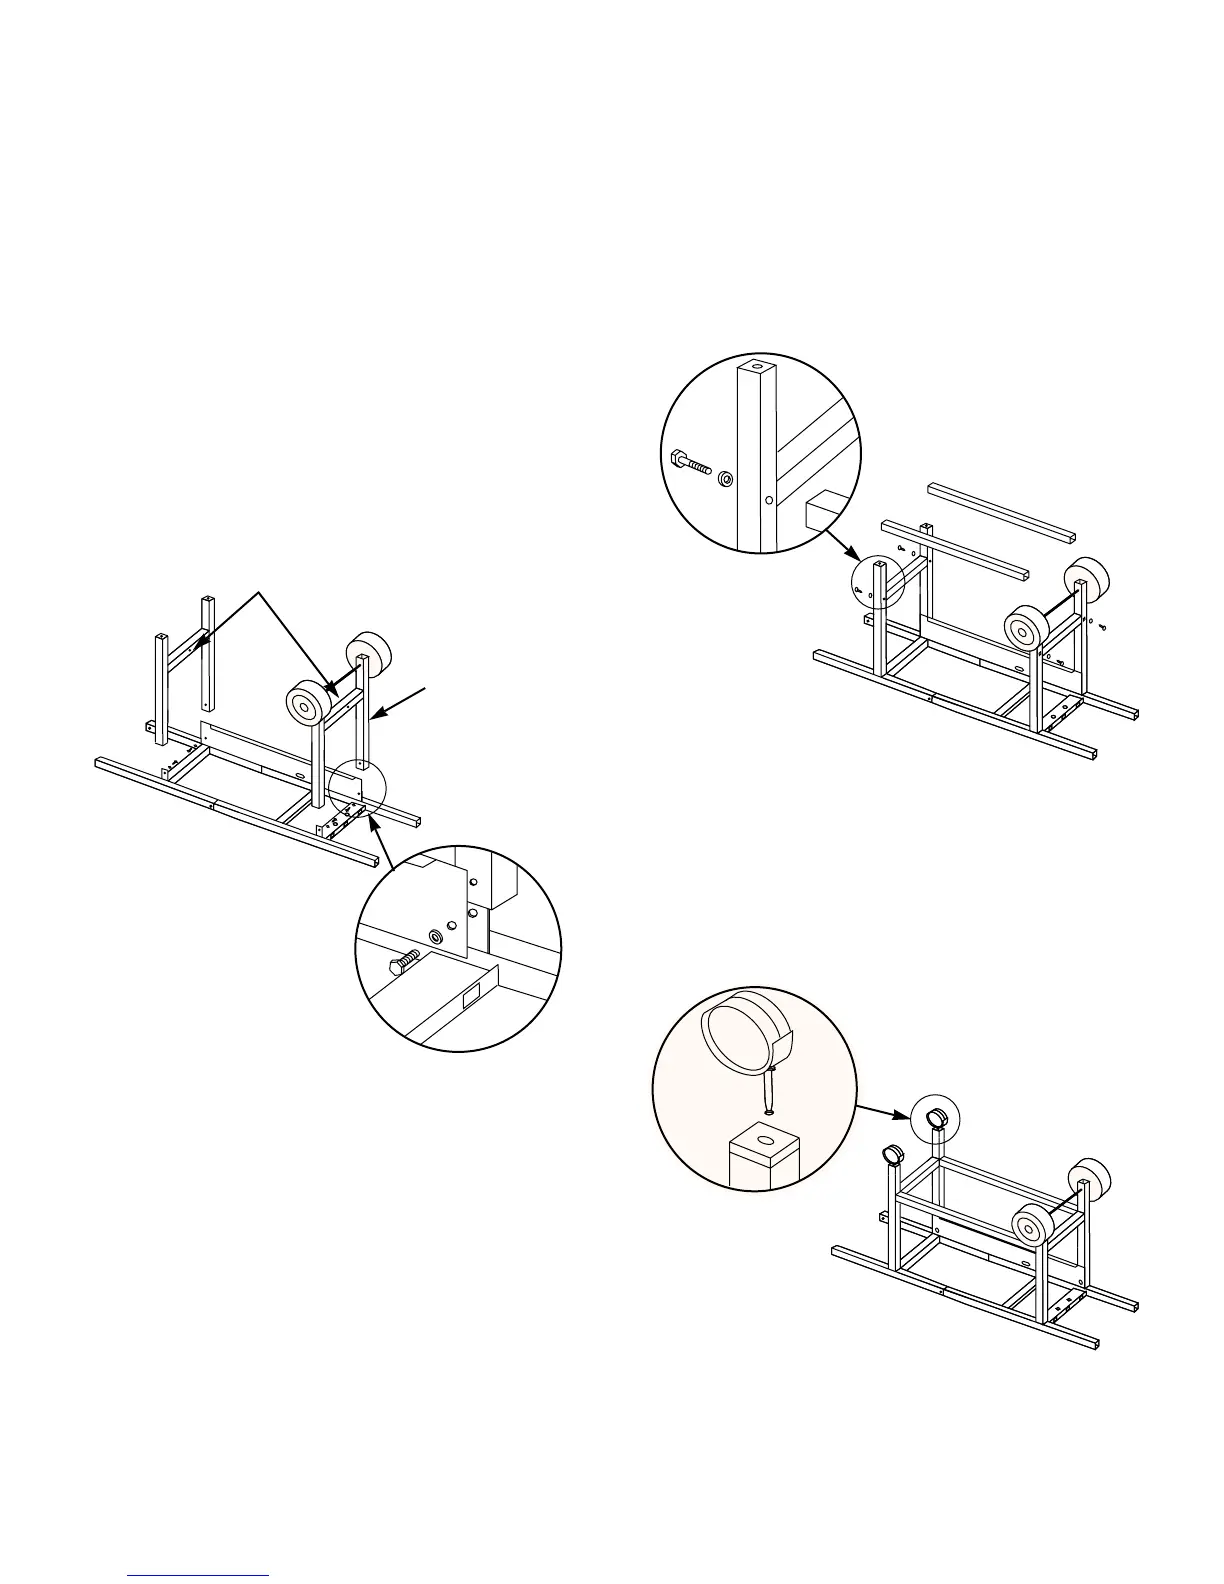
11
Step 4
Continue frame assembly
You will need: frame assembly, wheel frame assembly,
front panel, caster frame, four 1/4-20 x 1/2 inch bolts, four
nylon washers and a 7/16 inch wrench.
Place the caster frame onto the tabs of the left frame with
the dimple to the inside. Figure 3. Place the wheel frame
onto the tabs of the right frame with the dimple to the
inside. The fuel scale decal should face away as shown.
Figure 3.
The leg tabs must be on the inside of the frames.
Add front panel with large hole down and to your right.
Add the washers to the bolts, insert in the holes as shown
and tighten with the wrench. Figure 3.
Note - Fuel scale decal on wheel frame must be on the
same side as the front panel.
Dimples to
the inside
Fuel scale
decal
Figure 3
Step 5
Complete frame assembly
You will need: partial frame assembly, two frame
connectors, four 1/4-20 x 2 inch bolts, four nylon
washers and a 7/16 inch wrench.
Hold one frame connector between the caster and wheel
frame. Add nylon washers to the bolts. Put the bolt through
the frame and screw into frame connector. Tighten.
Repeat procedure with the other frame connector. Figure 4.
Figure 4
Step 6
Insert casters
You will need: frame assembly and two casters.
Push the casters firmly into the inserts in the ends of the
caster legs. Figure 5.
Figure 5