Do you have a question about the Weber GENESIS E-335 and is the answer not in the manual?
Download the BILT app for 3D step-by-step assembly instructions to improve the user experience.
Essential instructions, safety precautions, and preparation steps before beginning assembly.
Guide to unpacking the grill from its box and initial handling of major parts.
Instructions on saving hardware and positioning the main grill body correctly.
Identifies and quantifies components A through F for Genesis 335 and 435 models.
Identifies and quantifies components G through J for Genesis 335 and 435 models.
Identifies and quantifies component K for Genesis 335 and 435 models.
Details components for select models and additional parts F and K for assembly.
Details the contents and quantities of hardware bags A, C, D, and E for assembly.
Steps 1 and 2 for assembling the initial frame structure of the grill.
Steps 3 and 4 for continuing the frame assembly, attaching side panels.
Steps 5 and 6 for attaching the main side panels to the grill frame.
Step 7 for attaching the remaining side panel to the grill frame.
Step 8 for installing an internal shelf or support structure.
Step 9 for attaching additional side panels to the grill structure.
Steps 10 and 11 for attaching the wheels to the grill base.
Step 12 for attaching the remaining wheels and securing them with locks.
Step 13 for installing the main cookbox onto the grill assembly.
Steps 14 and 15 for further securing the cookbox to the grill frame.
Steps 16 and 17 for connecting the main gas lines to the grill components.
Steps 18-20 for installing the igniter and making electrical wiring connections.
Steps 21 and 22 for attaching outer side panels to the grill.
Steps 23 and 24 for attaching components and connecting the gas manifold.
Steps 25 and 26 for attaching specific components to the grill structure.
Step 28 for making specific wiring connections for the grill's electronic components.
Step 29 for making the final connection of the gas line to the manifold.
Steps 30 and 31 for attaching additional exterior panels to the grill.
Steps 32 and 33 for installing the heat deflector and outer panels.
Steps 34 and 35 for managing and securing internal wiring.
Steps 36 and 37 for attaching the side panels to the grill body.
Step 38 involves using extra fasteners and ensuring the lid is closed properly.
Steps 39 and 40 for installing the cooking grates into the grill.
Steps 41 and 42 for installing grates and control knobs onto the grill.
Steps 43 and 44 for installing side shelves and the drip tray.
Steps 45 and 46 for attaching the final side panels to the grill.
Steps 47 and 48 for attaching remaining side panels and protective covers.
Steps 49 and 50 for installing specific components, potentially side shelves or covers.
Step 51 for installing the batteries for the grill's ignition system.
Ensure all parts are assembled and tightened before operating the grill for the first time.
Information on how to register your grill to receive exclusive WEBER content and updates.
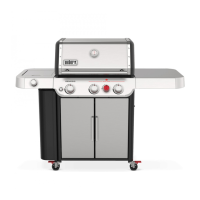
| Main Burners | 3 |
|---|---|
| Side Burner | Yes |
| Sear Station | Yes |
| Main Burners BTU | 39, 000 |
| Sear Burner BTU | 13, 000 |
| Side Burner BTU | 12, 000 |
| Burners | Stainless steel |
| Primary Cooking Area | 513 sq in |
| Fuel Type | Liquid Propane |
| Grates | Porcelain-enameled, cast iron |
| Grill Material | Porcelain-enameled |
| Ignition System | Electronic |
| Warranty | 10 years |
| Dimensions - Lid Closed | 48.5"H x 62"W x 27"D |
| Warming Rack Area | 156 sq. in. |