Do you have a question about the Weber Genesis 2000 and is the answer not in the manual?
Includes proper storage, safe operation, and handling of gas leaks.
Covers installer instructions, outdoor use, and initial lighting preparation.
Details safe practices for LP tanks, including storage, handling, and emergency procedures.
Covers safe use, burner operation, prohibited materials, and fire prevention.
Outlines covered defects, duration, and required proof of purchase for warranty claims.
Specifies conditions not covered, like misuse, improper maintenance, and consequential damages.
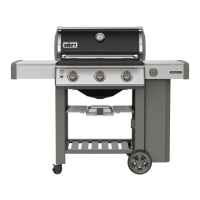
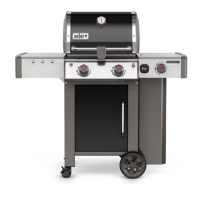
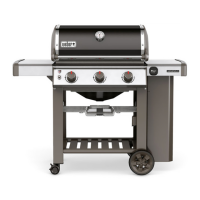
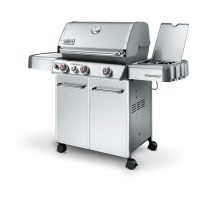
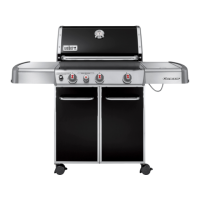
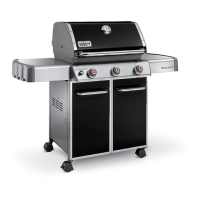
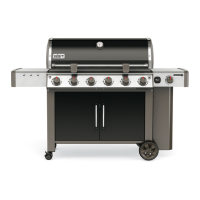
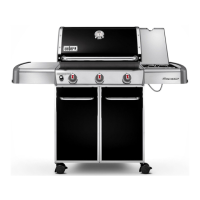
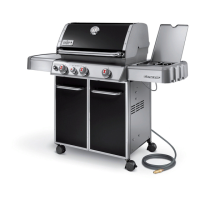
Highlights convenient tables, lid seal, thermometer, Flavorizer Bars, and ignition system.
Details safety features of the LP tank connection, including tool-free and auto shut-off.
Emphasizes outdoor use, clearance from combustibles, and proper ventilation.
Mandates outdoor storage for LP tanks, disconnection for indoor storage, and tank security.
Lists necessary tools, supplies, and customer service contact for missing parts.
Ensures all components are present before proceeding with the assembly process.
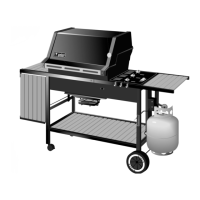
Identifies components like frames, wheels, casters, and panels that form the barbecue's base.
Lists parts related to cooking, including grates, Flavorizer bars, and warming rack.
Details various bolts, nuts, screws, washers, and plugs used for assembly.
Lists parts for the ignition system, fuel scale, and control knobs.
Attaches wheels to the axle and frame, securing them with hubcaps.
Joins the left and right frame halves using bolts and washers, ensuring alignment.
Adds front panel and caster frame to the partially assembled frame.
Connects frame sections using frame connectors and bolts for rigidity.
Firmly inserts casters into the designated slots on the frame legs.
Positions the cooking box onto the frame and secures it with bolts and nuts.
Checks burner alignment with valves and frame for proper gas flow and ignition.
Hooks bracket onto the manifold and secures the cooking box to the frame brace.
Attaches the tank panel assembly to the frame brace using a bolt and nut.
Mounts the fuel scale assembly onto the tank panel using wing nuts.
Secures the igniter through the frame brace, tightening the lock nut.
Sets the fuel scale to 'E' with an empty tank for accurate gas level readings.
Guides on safely filling the LP tank, recommending authorized dealers and weight filling.
Confirms all burner control knobs are in the OFF position before connecting the LP tank.
Attaches the LP tank to the fuel scale and secures the connection with the tank lock.
Uses a soap and water solution to check all gas connections for leaks by observing bubbles.
Emphasizes avoiding open flames and reiterates the procedure for leak detection and verification.
Places Flavorizer Bars and cooking grates into their designated positions within the cooking box.
Mounts the bottom tray, catch pan holder, catch pan, and drip pan for grease management.
Secures the lid to the barbecue body using hinge pins and cotters.
Attaches the control panel, tool holders, and burner control knobs to the barbecue frame.
Connects the swing table assembly to the barbecue frame, ensuring proper function.
Completes installation of work tables, trays, warming rack, thermometer, and tubing plugs.
Explains the function and use of the Crossover Ignition System for lighting the front burner.
Step-by-step instructions for lighting the barbecue using the ignition system.
Procedure for safely turning off the gas supply and extinguishing all burners.
Highlights critical safety warnings for manual lighting, including lid position and gas clearing.
Provides a sequence of actions for lighting the barbecue manually with a match.
Details burner settings for different cooking styles and preheating requirements.
Covers handling grease, checking the bottom tray, and periodic cleaning of components.
Provides instructions for safe storage, disconnection, and checks before periods of nonuse.
Guides on safely disconnecting the LP tank and the process for refilling it.
Details the steps for securely connecting a refilled LP tank to the barbecue.
Connects the hose to the tank valve and ensures regulator is properly attached and routed.
Applies soap and water solution to connections to identify leaks by observing bubble formation.
Provides essential safety advice for handling LP gas, including refueling and tank maintenance.
Specifies DOT certification, size, and construction standards for LP gas tanks.
Includes hose inspection, burner checks, and gas fitting leak tests.
Advises inspecting guards for obstructions and proper fit to prevent burner issues.
Explains the purpose of guards and recommends cleaning to prevent burner problems.
Illustrates correct flame patterns and details procedures for cleaning burner tubes.
Initiates the process for replacing main burners, starting with safety and control panel removal.
Details steps for removing Spider Stopper Guards, manifold, and burner assemblies.
Guides on reinstalling burners and ensuring proper alignment with valve orifices.
Focuses on correctly reseating guards, ensuring a tight fit and proper seam alignment.
Addresses issues with the ignition system, checking wires, button, and igniter security.
Diagnoses problems related to yellow flames, gas odors, flickering flames, and low heat output.
Troubleshoots ignition failures, low flame, excessive flare-ups, and temperature inconsistencies.
Addresses erratic burner flames and the appearance of baked-on grease on the lid.
Visual guide with numbered parts for easy identification of barbecue components.
Provides a comprehensive list of all parts with numbers for ordering and reference.
Instructions for ordering replacement parts and a warning about using authorized parts.
Provides customer service contact information and encourages feedback.
| Type | Gas Grill |
|---|---|
| Burners | 3 |
| Burner Material | Stainless Steel |
| Ignition | Electronic |
| Cooking Area | 507 square inches |
| BTU Main Burners | 36, 000 |
| Grate Material | Cast iron |
| Fuel Type | Liquid Propane |
| Material | Porcelain-enameled |