11
BURNER TUBE CLEANING
OR REPLACEMENT
Confirm that Grill Is Off and Cool
A) Check that the regulator control knob is turned off by
pushing it in and turning it counterclockwise to the off
position.
B) Check that the burner control knob is turned off by
pushing it in and turning it clockwise to the off ( )
position.
C) Disconnect the LPG cartridge.
D) Remove the lid.
E) Remove cooking grate.
Remove Control / Valve Assembly
You will need: A 7/16" nut driver.
A) Remove the nuts that hold the control / valve
assembly to the cookbox(1).
B) Carefully pull the control / valve assembly away from
cookbox(2).
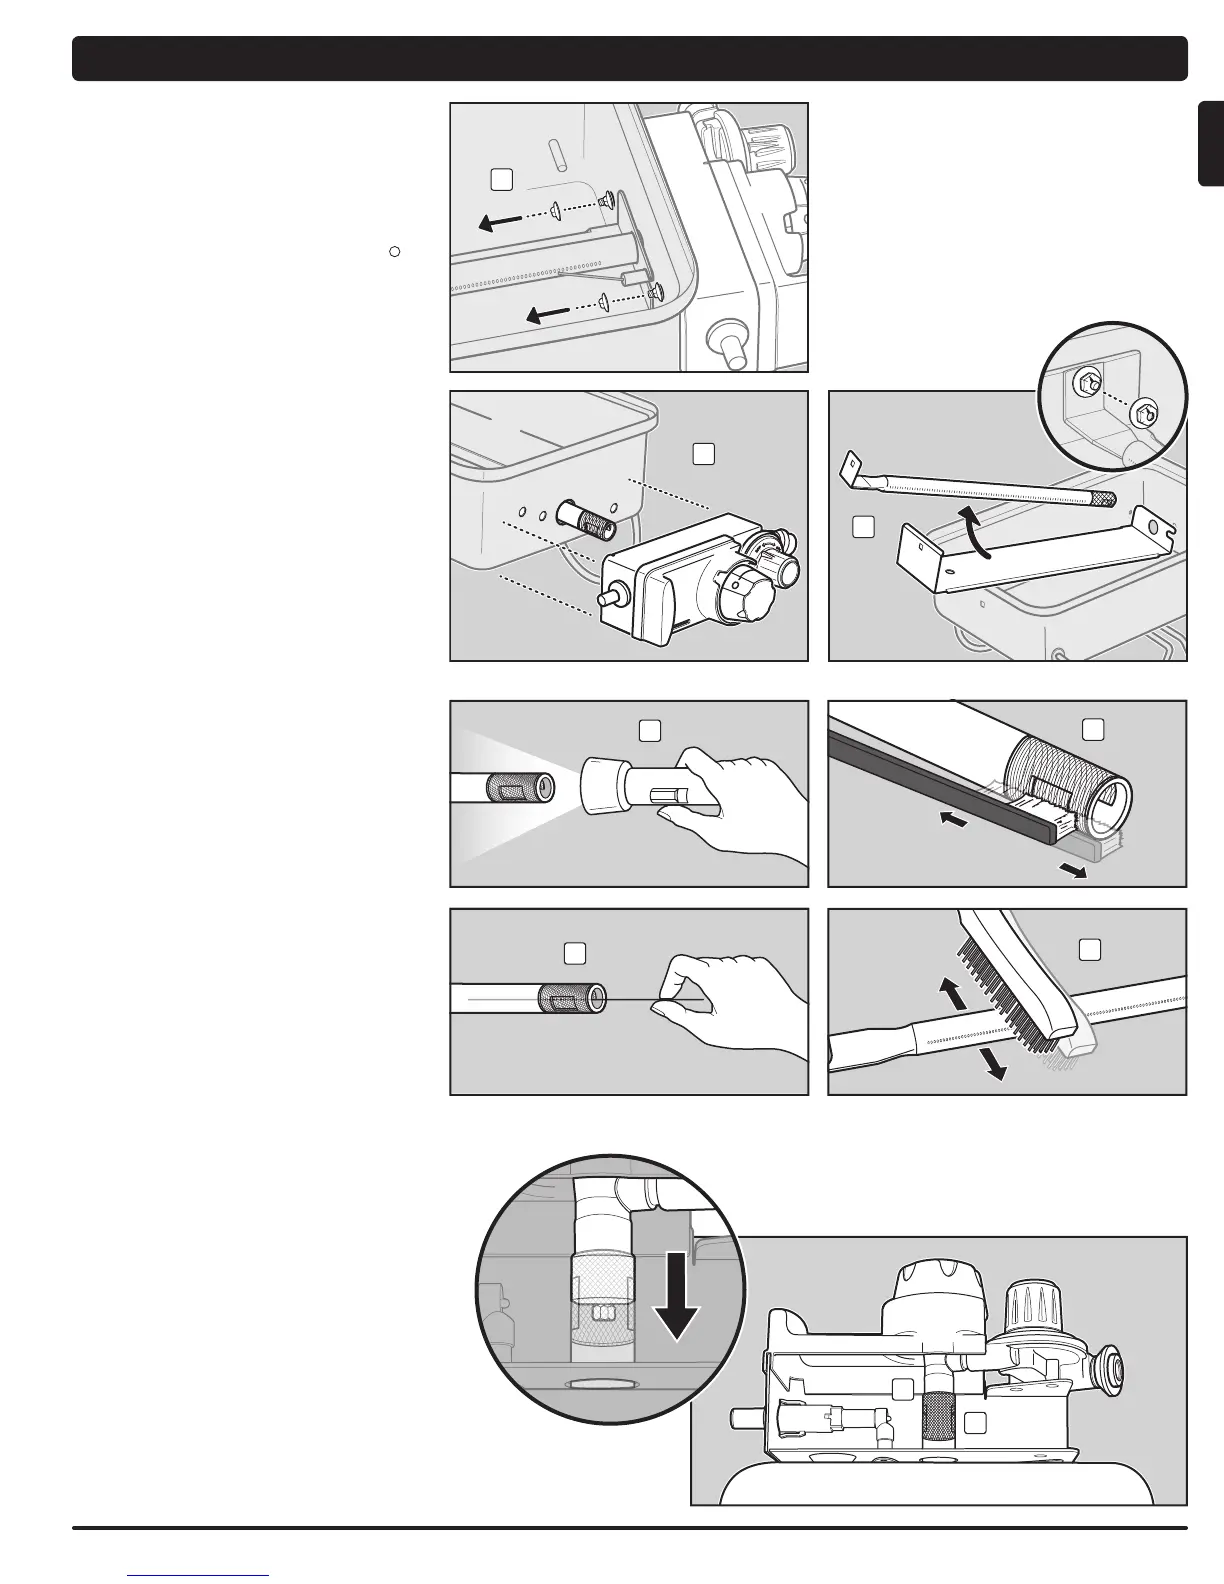
Remove Burner Tube
You will need: A 7/16" nut driver.
A) Remove the nut and screw that hold the burner
tube and heat shield to the cookbox. Carefully pull
the burner tube and heat shield out and away from
cookbox(3).
Clean Burner Tube
You will need: A flashlight, a wire (a straightened-out coat
hanger), a suitable stainless steel bristle brush, and a soft
bristle brush (toothbrush).
A) Look inside the burner tube with a flashlight(4).
B) Clean any debris or blockage from the inside of the
burner tube with the wire(5).
C) Check spider/insect screen at the end of the burner
tube and clean it using the soft bristle brush(6).
m CAUTION: Do not clean the spider/insect
screen with hard or sharp tools. Do not
dislodge the spider/insect screen or
enlarge the screen openings.
D) Use the stainless steel bristle brush to clean the
outside of the burner tube. This is done to make sure
all burner ports (openings) running along the length
of the tube are fully open(7).
m CAUTION: Do not enlarge the burner
ports when cleaning.
Reinstall Burner Tube
You will need: A 7/16" nut driver.
A) Carefully slide the burner tube and heat shield back
through the hole in the right side of cookbox.
B) Reinstall screw and nut that secure the heat shield
and burner tube to the cookbox.
Reinstall Control / Valve Assembly
You will need: A 7/16" nut driver.
A) Reinstall the control / valve assembly to the cookbox.
m CAUTION: The burner tube opening (8)
must be positioned properly over the
valve orifice (9). (View from underside of
grill).
B) Reinstall the nuts that hold the control / valve
assembly to the cookbox.
m WARNING: You should check for gas
leaks every time you disconnect and
reconnect a gas fitting.
C) Verify that the tip of the igniter electrode is adjusted to
the proper distance from the holes in the burner tube.
Refer to “MAINTAINING THE PUSH BUTTON IGNITION
SYSTEM” for proper positioning.
D) Reinstall cooking grate.
E) Reinstall the lid.
F) Reinstall the LPG cartridge
1
2
3
ANNUAL MAINTENANCE
4
5
6
7
8
9
 Loading...