EasyManua.ls Logo

Weber Q - User Manual

Weber Q
28 pages
Print Icon
To Next Page IconTo Next Page
Loading...
52218
8/01/13
WARNING: FOR OUTDOOR USE ONLY.
ADVERTENCIA: SÓLO PARA USARSE AL AIRE LIBRE.
MISE EN GARDE : POUR UNE UTILISATION EN
EXTERIEUR UNIQUEMENT.
CARRO CHARIOT
CART

Other manuals for Weber Q

Questions and Answers

  • C
    Christina LopezJul 28, 2025
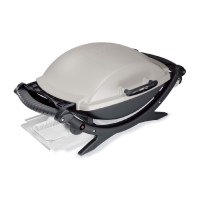
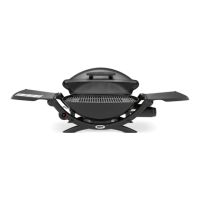
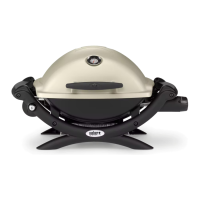
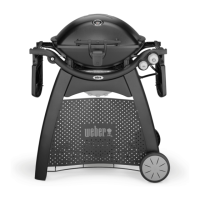
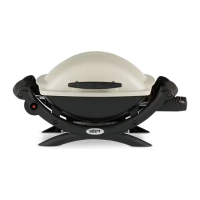
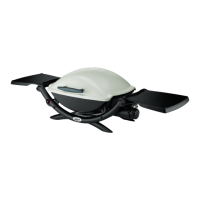
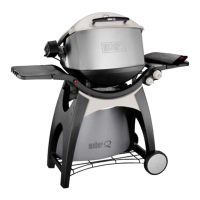
    What to do if Weber Q Grill burner does not light or flame is low?
    • J
      Jamie CarterJul 29, 2025
      Several factors can cause this. First, check if the LP fuel is low or empty and refill the LP cylinder if needed. Next, inspect the fuel hose for bends or kinks and straighten it. If the Left burner lights with a match, check the Crossover® ignition system.
  • M
    Marissa WolfAug 3, 2025
    How to stop flare-ups on Weber Q Grill?
    • J
      John RodriguezAug 3, 2025
      Flare-ups can occur if the barbecue isn't preheated correctly or if the cooking grate is dirty. Ensure all burners are on high for 10 to 15 minutes for preheating. Also, thoroughly clean the cooking grate.
  • B
    Brian WashingtonAug 9, 2025
    Why is the Weber Q burner flame pattern erratic?
    • M
      Mrs. Beverly LutzAug 9, 2025
      An erratic burner flame pattern, low flame, or flames not running the whole length of the burner tube indicates that the burner may be dirty. Clean the burner following the Maintenance instructions.
  • R
    Rita ReynoldsAug 14, 2025
    Why does the inside of my Weber Q lid look like it's peeling?
    • L
      Laura AlvarezAug 15, 2025
      The lid is cast aluminum, not paint, so it cannot peel. The peeling appearance is baked-on grease that has turned to carbon and is flaking off. This is not a defect; clean the lid thoroughly.
  • D
    Daniel McdonaldAug 21, 2025
    How to fix yellow or orange flame on Weber Grill burner?
    • S
      Shawn FryAug 21, 2025
      Clean the Spider / Insect Screen. See Section “Annual Maintenance”.

Summary

Cart Introduction and Warnings

Outdoor Use Only Warning

Mandatory warning specifying that the cart is for outdoor usage only.

General Safety and Operational Warnings

Danger Statement

Statement detailing severe risks from not following manual instructions, including injury or property damage.

Replacement Parts Requirement

Mandatory use of genuine Weber-Stephen replacement parts for all repairs or replacements.

Assembly Safety Precautions

Emphasis on careful adherence to assembly instructions to prevent potential hazards.

Operating and Setup Precautions

Guidelines for safe operation, stable setup on level surfaces, and intended use with Weber Q grill.

Advanced Gas and California Safety Warnings

Gas Handling and Operation Safety

Precautions for gas connections, burner operation, leak detection, and fuel type compatibility.

California Specific Chemical Warnings

Information on chemicals in combustion byproducts and brass material, as per California regulations.

Exploded View and Parts Identification

Exploded View Diagram

Diagram illustrating all cart components with numerical labels for identification.

Parts List and Descriptions

Component Identification List

List of all parts with their corresponding numbers and names in English, Spanish, and French.

Component Visuals

Parts Group Illustrations

Visual representations of grouped parts, aiding in identification and preparation for assembly.

Assembly Instructions: Wheels

Step 1 & 2: Attaching Wheels

Instructions for attaching the cart wheels and related components.

Assembly Instructions: Bottom Rack

Step 2 (cont.) & 3: Bottom Rack Assembly

Instructions for assembling the bottom rack and related supporting elements.

Assembly Instructions: Frame

Step 4 & 5: Assembling Frame Structure

Instructions for connecting the main frame components and structural braces.

Assembly Instructions: Side Panels

Step 6: Attaching Side Panels

Instructions for securely attaching the decorative perforated side panels to the cart frame.

Assembly Instructions: Final Steps

Step 7 & 8: Final Assembly and Grill Placement

Final assembly steps, including attaching the grill and ensuring secure placement.

Assembly Instructions: Tank Installation

Step 9: Securing the Propane Tank

Instructions on how to correctly place and secure the propane tank to the cart.

LP Tank Installation and Gas Safety

Important LP Tank Information

Critical safety information regarding LP tank storage, usage, and general precautions.

Installing the LP Tank

Step-by-step guide for installing the LP tank correctly onto the cart's designated rest.

LP Tank Connections and Handling

Connecting Hose to LP Tank

Procedure for safely connecting the gas hose to the LP tank valve, hand-tightening only.

Removing LP Tank for Refilling

Steps for safely closing the valve, unscrewing the coupling, and removing the LP tank.

Filling the LP Gas Tank

Recommendations for safe and proper LP gas tank filling by authorized dealers.

Gas Leak Detection Procedures

Checking for Gas Leaks

Method for checking gas connections for leaks using a soap and water solution.

Troubleshooting Common Issues

Weber Q Specifications

General IconGeneral
TypePortable Gas Grill
Main Burners1
Lid MaterialCast aluminum
BTU-per-hour Input8, 500 BTU
Grate MaterialCast iron
Fuel TypePropane
Total Cooking Area280 square inches

Videos

How to remove the burner on a Weber Q BBQ for cleaning

Related product manuals