11
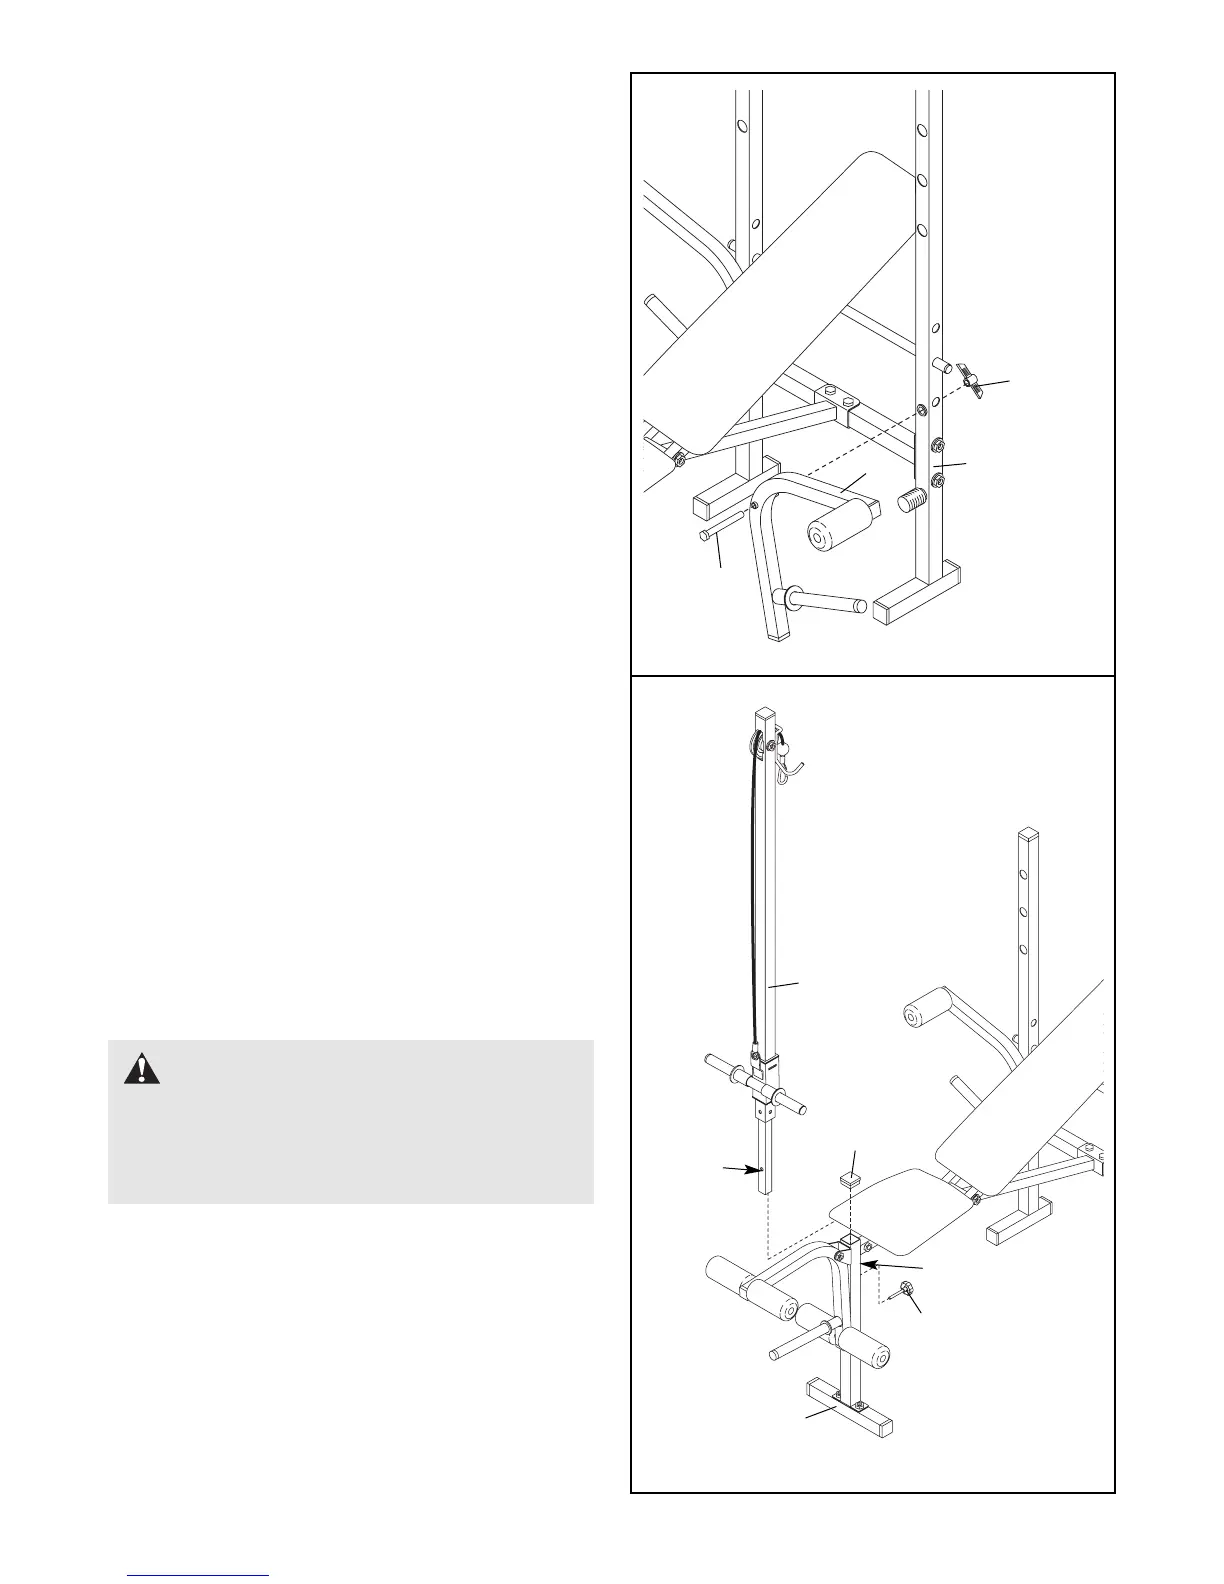
REMOVING AND ATTACHING THE FLY ARMS
Some exercises are easier to perform if the Fly Arms
(25) are removed from the weight bench. To remove
the Fly Arms, remove the Butterfly Knob (13) and the
M10 x 115mm Bolt (19) from each Fly Arm and
Upright (1). Place the Fly Arms in a safe place.
To re-attach the Fly Arms (25), align the holes in the
Fly Arms with the holes in the Uprights (1). Insert the
M10 x 115mm Bolts (19) through the Fly Arms and
Uprights. Tighten the Butterfly Knobs (13) onto the
Bolts.
19
13
25
1
ATTACHING THE LAT TOWER
For some exercises, the Lat Tower (40) must be
attached to the weight bench. To do this, remove the
38mm Square Inner Cap (21) from the Front Leg (8).
Insert the Lat Tower into the Front Leg and align the
indicated hole in the Lat Tower with the adjustment
hole in the Front Leg. Secure the Lat Tower with the
Adjustment Knob (31).
Note: When the Lat Tower (40) is not being used,
it should be stored away from the weight bench,
and the 38mm Square Inner Cap (21) should be
inserted into the Front Leg (8).
40
Hole
Adjustment
Hole
21
8
31
WARNING:
When you are
using the Lat Tower (40), place a barbell
(not included) with the same amount of
weight on the weight rests to balance the
bench.
 Loading...