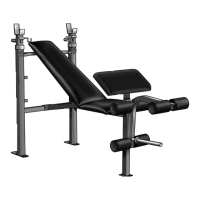
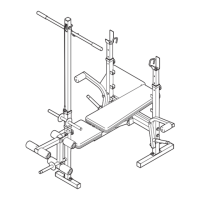
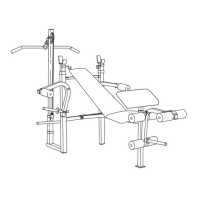
10. Attach the Right Barbell Hook (32) to the right
Upright (1) with an M8 Zinc Washer (35) and an
M
8 Zinc Nylon Locknut (36). D
o not overtighten
the Nylon Locknut; the Barbell Hook must
p
ivot easily.
Attach the Left Barbell Hook (33) to the left
Upright (1) with an M8 Zinc Washer (35) and an
M8 Zinc Nylon Locknut (36). Do not overtighten
the Nylon Locknut; the Barbell Hook must
pivot freely.
11. Attach a Bumper (45) to the left Upright (1) with a
Wing Knob (47). Press a Bumper Cover (46) onto
the Bumper.
Repeat this step for the other side of the
weight bench.
12. Identify the Left Fly Arm (40), which has a welded
pivot tube on the indicated side. Attach the Left
Fly Arm to the left Upright (1) with an M10 x
125mm Bolt (51), an M10 Washer (26), and an
M10 Nylon Locknut (25).
Insert a Short Pad Tube (44) into the Left Fly Arm
(40). Slide a Small Foam Pad (43) onto the Short
Pad Tube, and press a 19mm x 1mm Round
Inner Cap (53) into the Short Pad Tube. Then,
slide a Spacer (42) onto the Left Fly Arm.
Repeat this step for the other side of the
weight bench.
13. Attach the Curl Pad (48) to the Curl Post (49) with
two M6 x 16mm Screws (21).
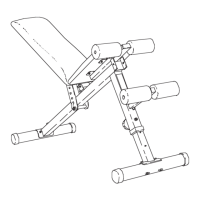
14. Make sure that all parts are properly tightened
before you use the weight bench. The use of
all remaining parts will be explained in
ADJUSTMENTS, starting on page 10.
9
36
3
5
36
35
33
32
10
11
12
13
47
1
45
25
44
26
51
Pivot Tube
40
43
42
1
53
48
49
21
46