9
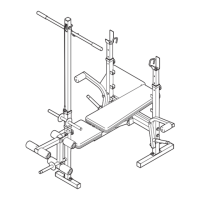
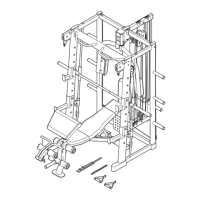
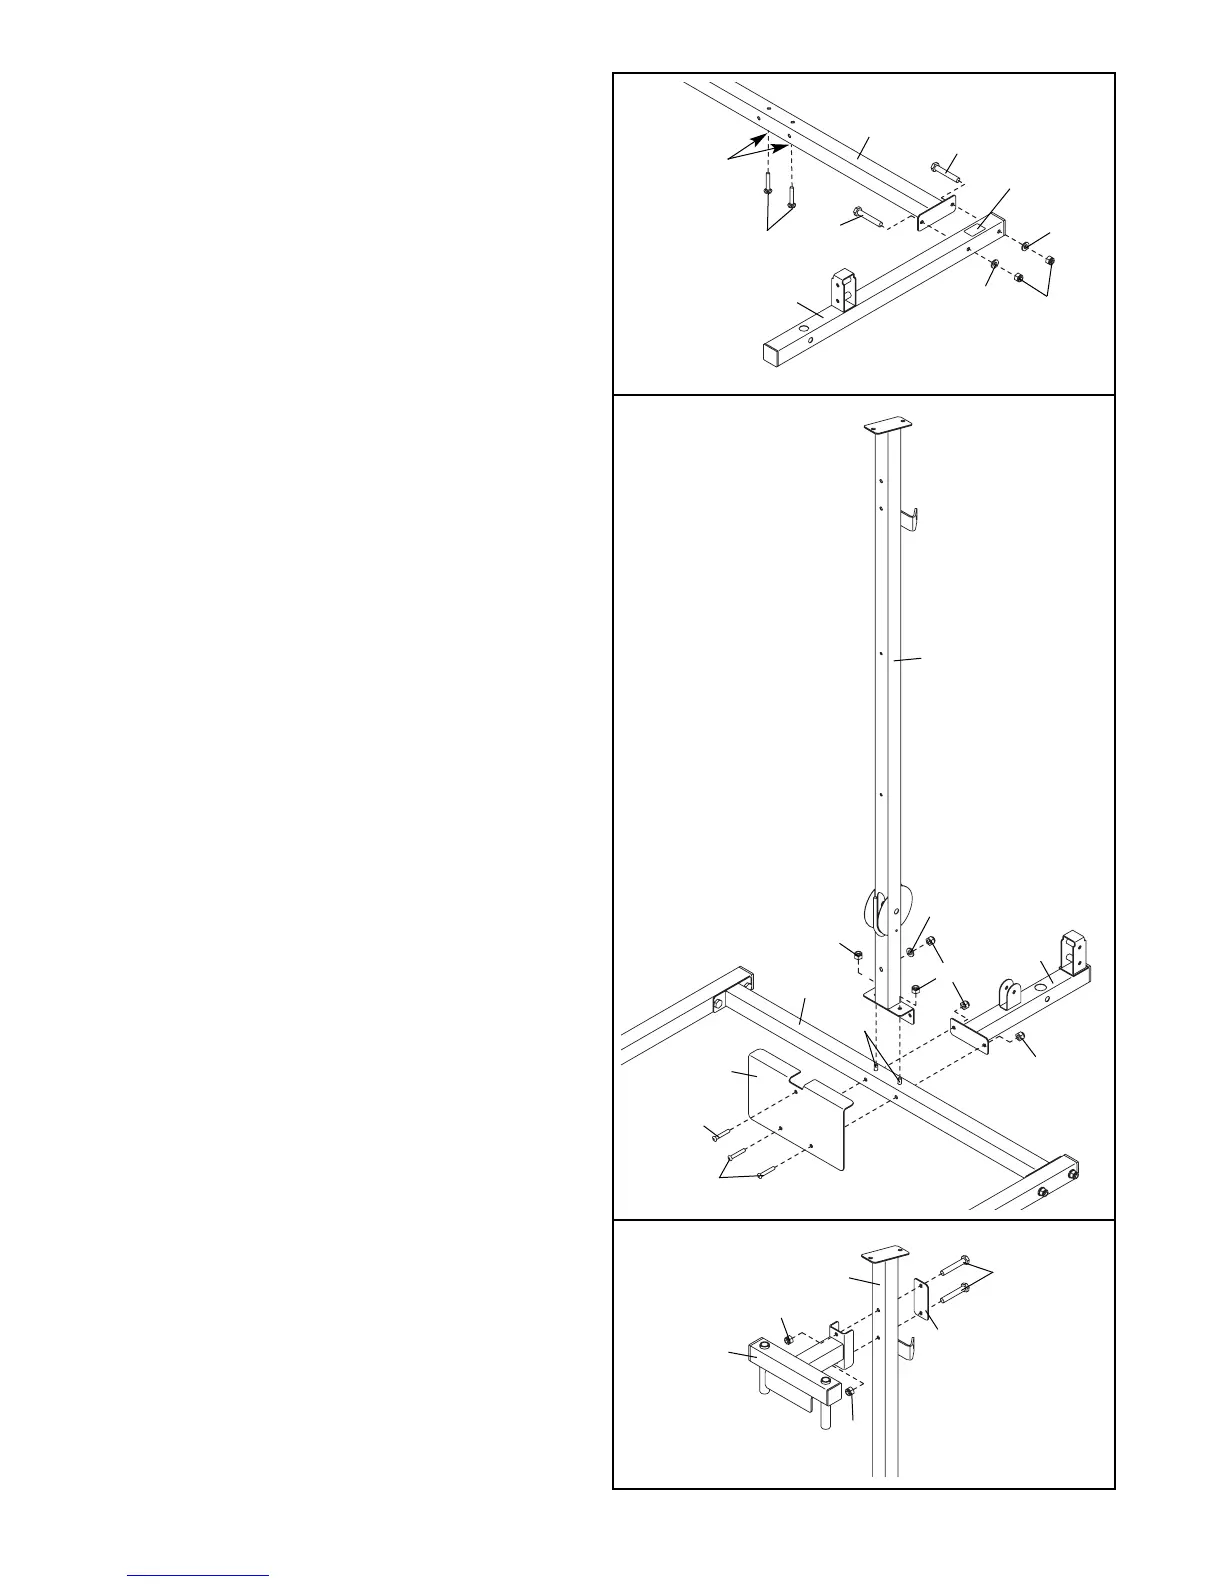
10. Orient the Center Base (24) so that the indented
holes are downward. Insert two M10 x 62mm
Carriage Bolts (97) up through the Center Base.
Locate the Side Base (51) that has a warning
decal. Orient the Side Base as shown and
attach it to the Center Base (24) with two M10 x
68mm Bolts (85), two M10 Washers (83), and
two M10 Nylon Locknuts (80). Do not tighten
the Nylon Locknuts yet.
Attach the other Side Base (51) in the same
way.
12. Attach the Butterfly Frame (32) to the Center
Upright (26) with two M10 x 68mm bolts (85),
the Plate (41), and two M10 Nylon Locknuts
(80).
11. Attach the Center Upright (26) to the Center
Base (24) with two M10 x 62mm Carriage Bolts
(97) and two M10 Nylon Locknuts (80). Do not
tighten the Nylon Locknuts yet.
Attach the Foot Plate (46), the Center Upright
(26), and the Rear Base (25) to the Center
Base (24) with two M10 x 75mm Bolts (39) and
two M10 Nylon Locknuts (80). Do not tighten
the Nylon Locknuts yet.
Attach the Foot Plate (46) to the Center Upright
(26) with an M10 x 68mm Bolt (85), an M10
Washer (83), and an M10 Nylon Locknut (80).
24
85
85
51
10
11
80
83
83
26
39
25
85
24
80
80
80
97
97
12
83
80
80
26
46
32
85
41
Indented
Holes
Warning
Decal
 Loading...