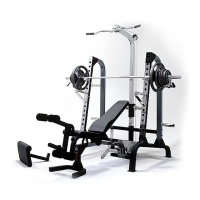
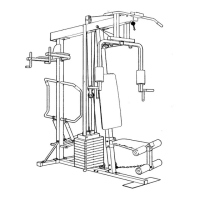
13. Press a 2” Square Inner Cap (36) into the front of
the Leg Lever (37). Attach both Leg Lever Brackets
(30) to the Leg Lever with two 5/16” x 2 3/4” Bolts
(29), four 5/16” Washers (20), and two 5/16” Nylon
Locknuts (1).
Attach the Leg Lever Bumper (65) to the Leg Lever
(37) with the #8 x 3/4” Self-tapping Screw (66).
14. Attach the Leg Lever Brackets (30) to the Front Leg
(31) with a 5/16” x 3” Bolt (69) and a 5/16” Nylon
Locknut (1).
Press 3/4” Round Inner Caps (35) into the ends of
both Short Pad Tubes (34). Insert both Short Pad
Tubes into the holes in the Leg Lever (37). Slide
5 3/4” Foam Pads (33) onto the ends of the Short
Pad Tubes.
15. Attach a 5/16” Washer (20) and the 3/4” Spacer
(19) to the bracket on the Leg Lever (37) with a
5/16” x 1 1/2” Bolt (21) and a 5/16” Nylon Locknut
(1). Note: The Bolt must be inserted through the
indicated side of the bracket on the Leg Lever. The
Bolt should also be inserted through the indicated
hole in the bracket.
Attach the end of the Long Cable (18) with the s-
hook to the 3/4” Spacer (19).
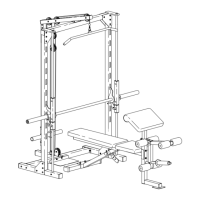
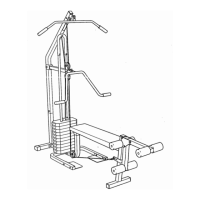
16. See the inset drawing. Insert a 1/4” x 2 1/2” Carriage
Bolt (39) through the centre hole of a Backrest
Bracket (26). Attach the Backrest Bracket to the
Backrest (27) with two 1/4” x 1/2” Screws (25).
Attach the other Backrest Bracket (26) to the
Backrest (27) in the same manner.
Attach the Backrest (27) to the Backrest Frame (28)
by inserting the 1/4” x 2 1/2” Carriage Bolts (39)
through the holes in the Backrest Frame. The long
end of the Backrest must be on the side shown.
Tighten a 1/4” Nylon Locknut (60) with a 1/4”
Fender Washer (64) onto each Carriage Bolt.
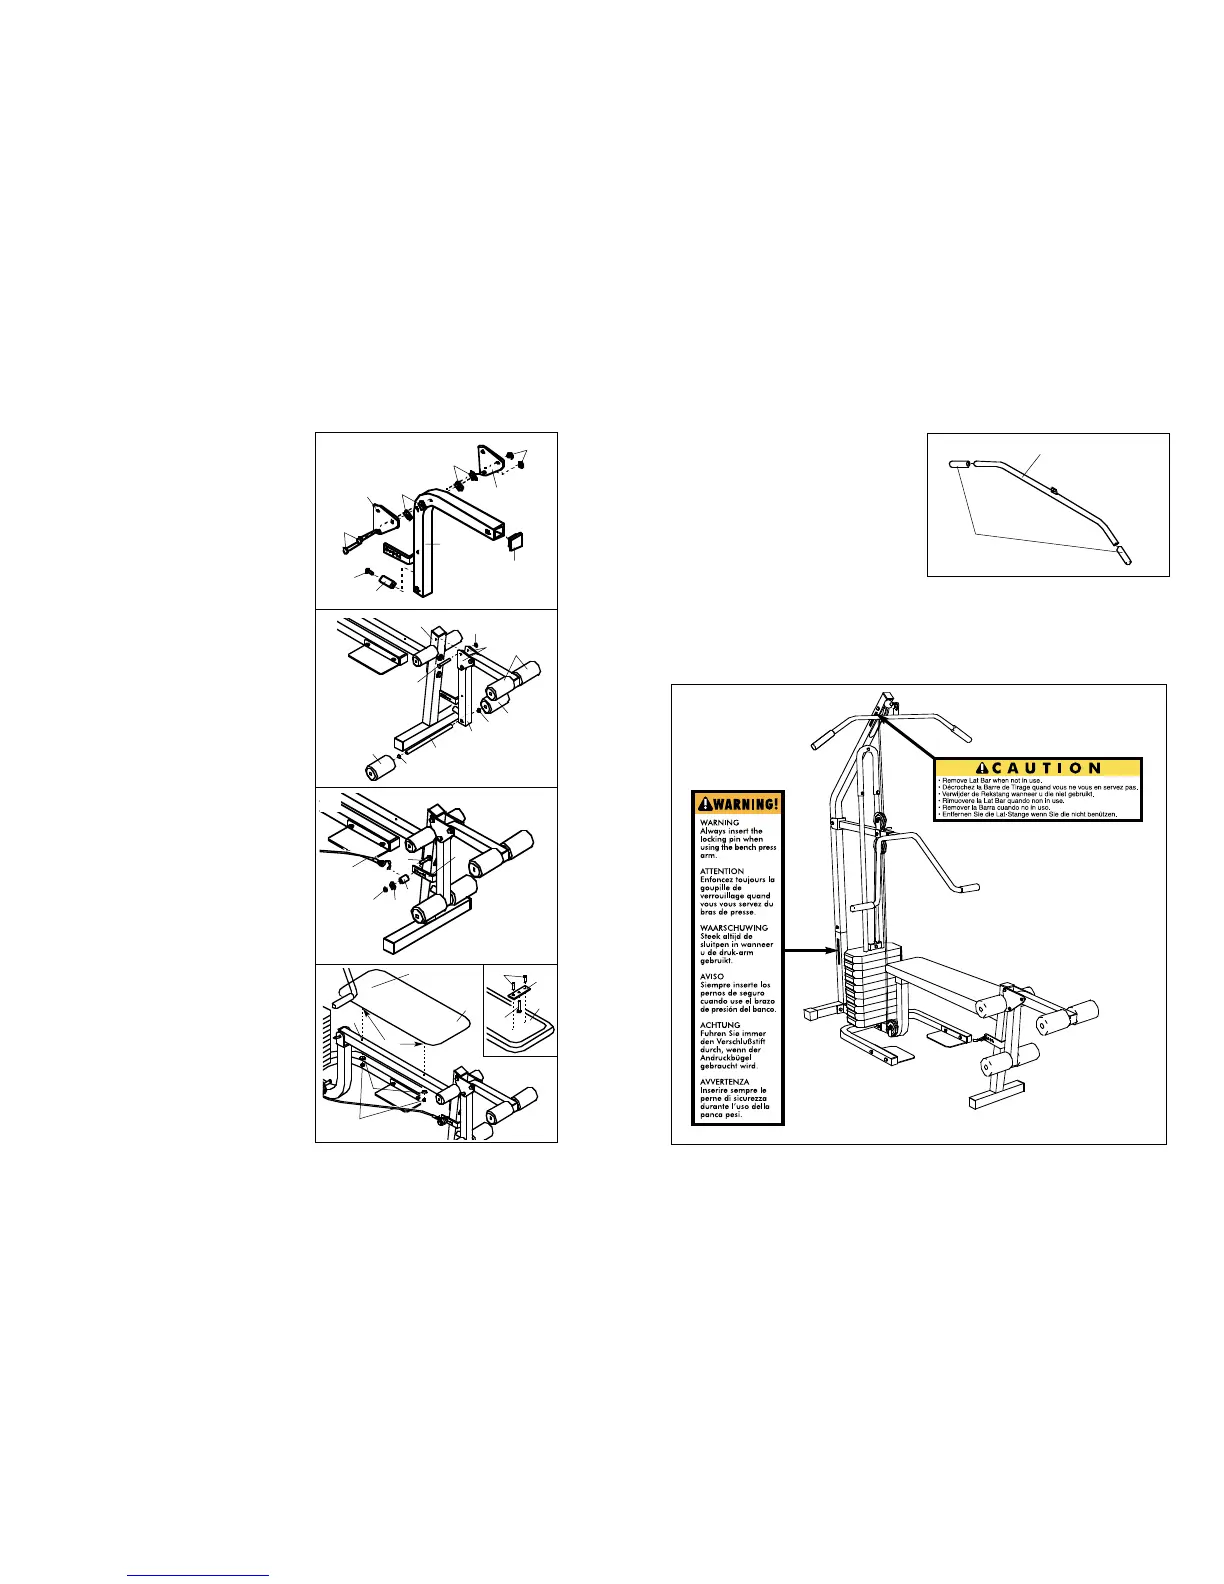
17. Wet the ends of the Lat Bar (24) with soapy water.
Slide a Handgrip (6) onto each end of the Lat Bar.
15
16
13
20
20
30
1
30
29
65
66
37
36
30
33
33
33
35
18
21
27
Long End
28
64
19
37
20
1
35
34
37
31
1
17
24
6
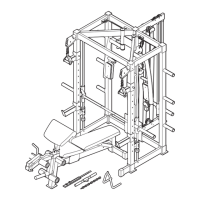
18. Make sure that all parts are properly tightened. The use of all remaining parts will be explained in ADJUST-
MENT, beginning on page 10 of this manual.
14
69—Lubricate
25
27
26
39
60
8
9
19. The decals shown below have been placed on your home gym system. If one of the decals is miss-
ing, or if it is not legible, please call our Customer Service Department to order a free replacement
decal (see ORDERING REPLACEMENT PARTS on the back cover of this manual). Apply the decal in
the location shown.
19
39
 Loading...