6
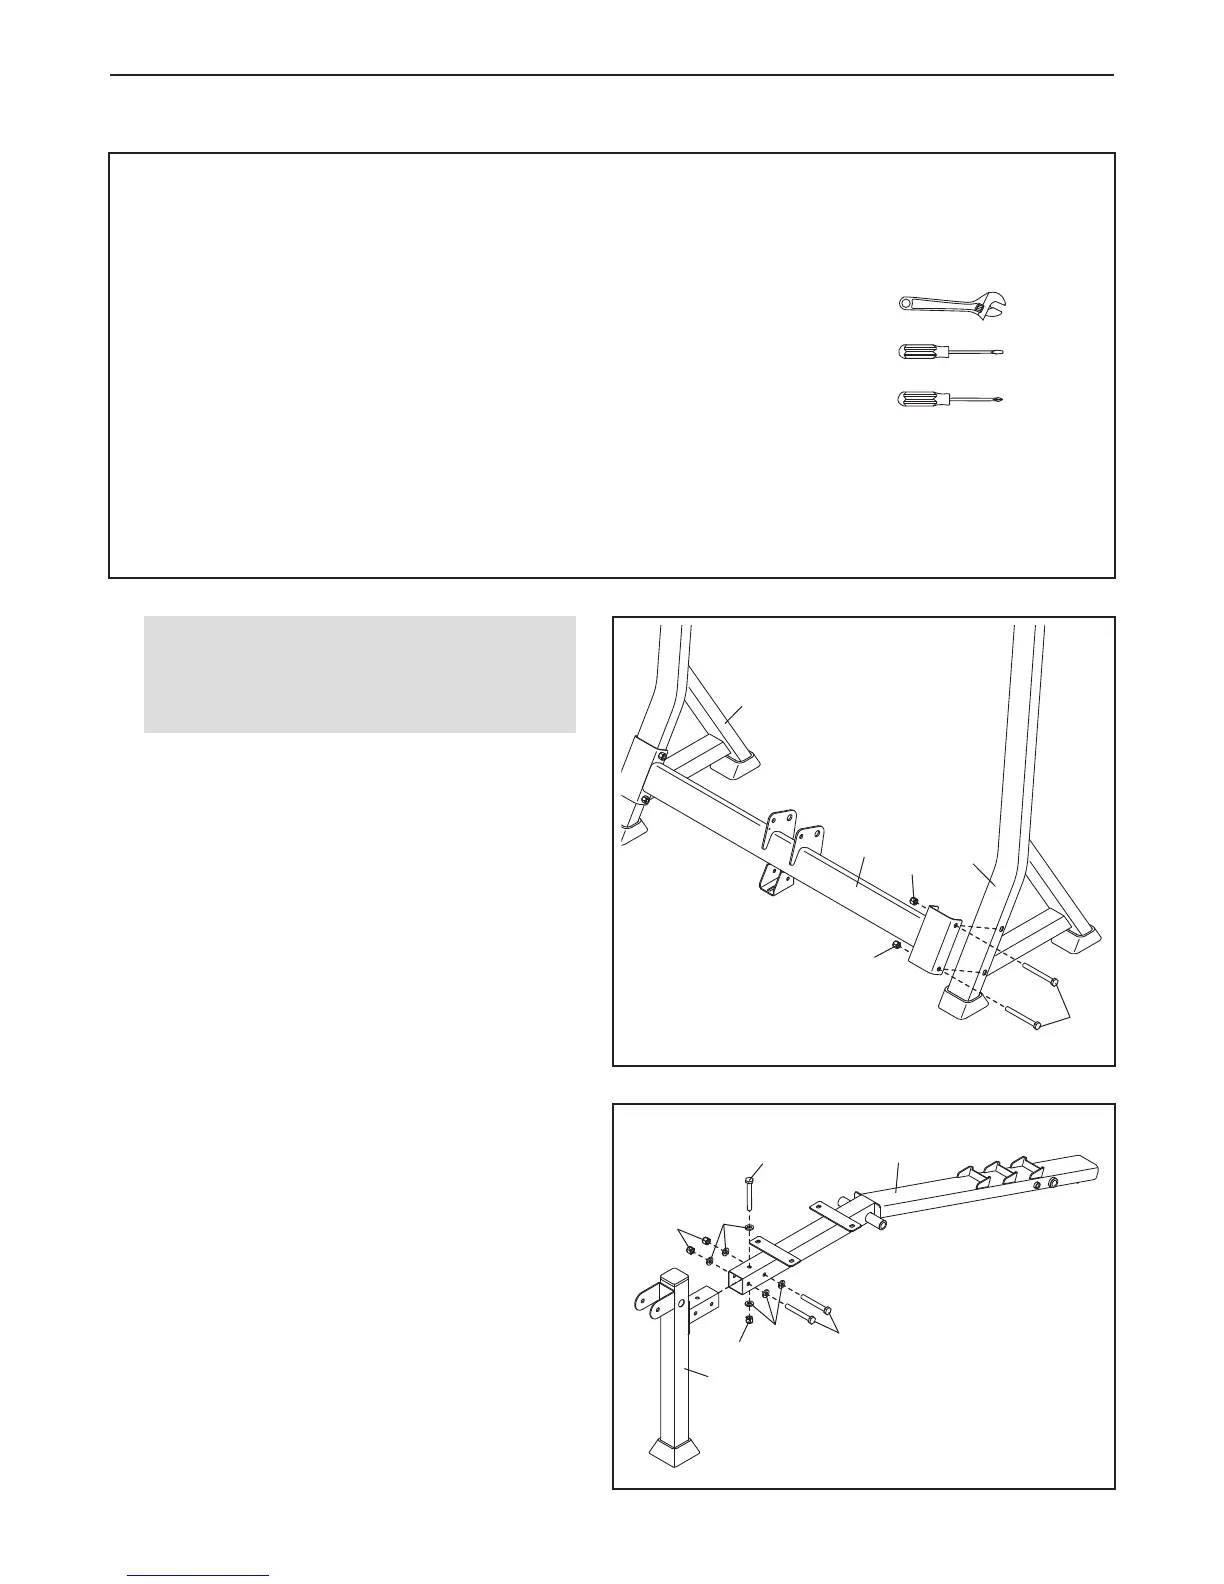
1.
Orient the Crossbar (5) and an Upright (1) as
shown.
Attach the Crossbar (5) to the Upright (1) with
two M10 x 100mm Bolts (39) and two M10
Locknuts (38). Do not tighten the Locknuts
yet.
Attach the Crossbar (5) to the other Upright
(1) in the same way.
39
38
38
5
1
1
ASSEMBLY
• To hire an authorized service technician to
assemble the weight bench in your home, call
1-800-445-2480.
• Assembly requires two persons.
• Because of its size and weight, assemble the
weight bench in the location where it will be
used. Make sure that there is enough clear-
ance to walk around the weight bench as you
assemble it.
• Place all parts in a cleared area and remove
the packing materials. Do not dispose of the
packing materials until you complete all
assembly steps.
• To identify small parts, see page 5.
• The following tools (not included) may be
r
equired for assembly:
two adjustable wrenches
one standard screwdriver
one Phillips screwdriver
Assembly will be more convenient if you have a
socket set, a set of open-end or closed-end
wrenches, or a set of ratchet wrenches.
To make assembly easier, read the
assembly tips in the box above before
you begin.
2. Orient the Front Leg (10) and the Main Frame
(7) as shown.
Attach the Front Leg (10) to the Main Frame (7)
with three M8 x 60mm Bolts (35), six M8
Washers (30), and three M8 Locknuts (32). Do
not tighten the Locknuts yet.
2
1
7
10
35
35
30
30
32
32
 Loading...