12
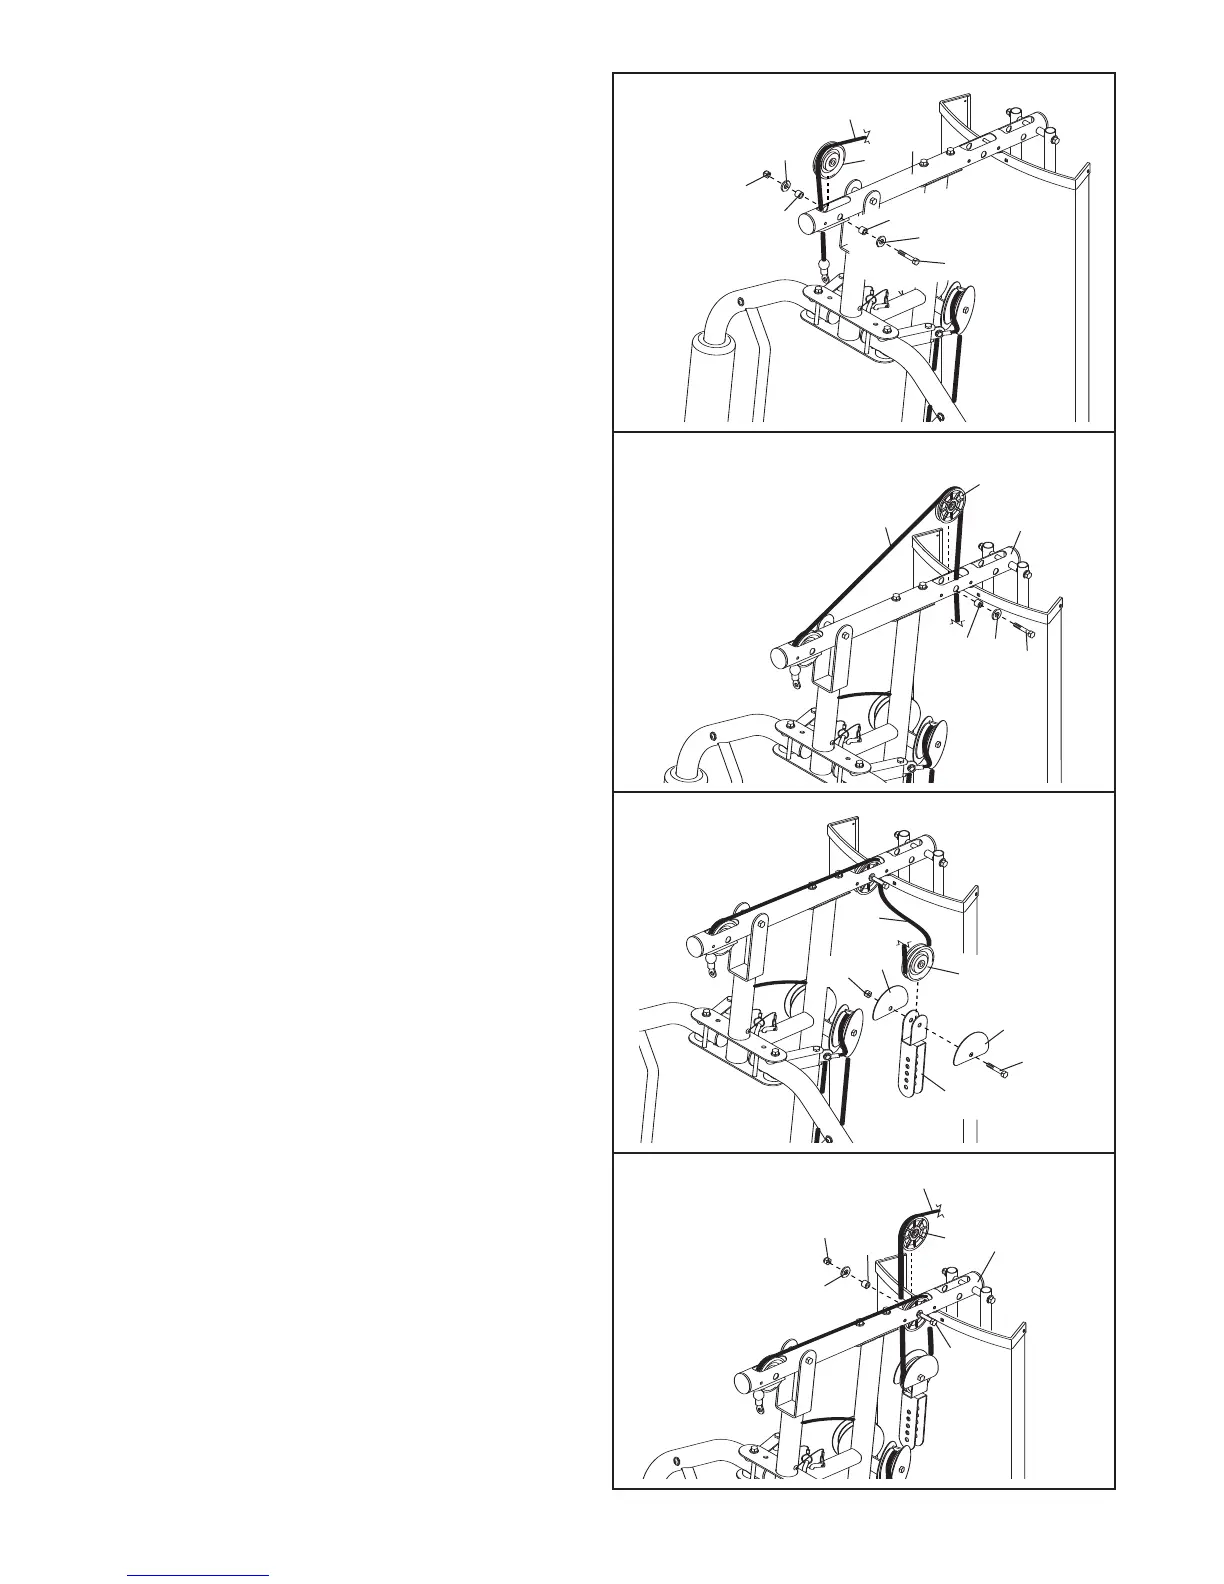
18. Identify the High Cable (55). Route the Cable
up through the Top Frame (4) and over a 90mm
P
ulley (48). Attach the Pulley inside of the Top
Frame with an M10 x 78mm Button Bolt (71),
t
wo M10 Washers (57), two 19mm Spacers
(33), and an M10 Nylon Locknut (56).
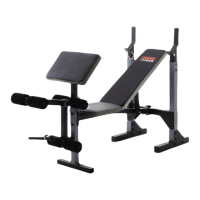
20. Wrap the High Cable (55) under a 90mm Pulley
(48). Attach the Pulley and two Half Guards
(43) at the upper hole in the Adjustable “U”-
bracket (45) with an M10 x 45mm Button Bolt
(81) and an M10 Nylon Locknut (56). Make
sure that the Half Guards are on the outside
of the Adjustable “U”-bracket.
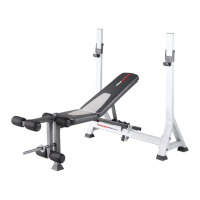
21. Route the High Cable (55) up through the Top
Frame (4) and over a 90mm Thin Pulley (47).
Attach the Thin Pulley inside of the Top Frame
with the M10 x 78mm Button Bolt (71) used in
step 19, a 19mm Spacer (33), an M10 Washer
(57), and an M10 Nylon Locknut (56).
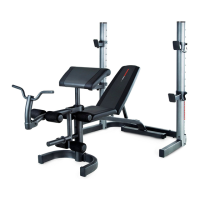
19. Route the High Cable (55) over a 90mm Thin
Pulley (47) and down through the Top Frame
(4). Attach the Thin Pulley inside of the Top
Frame with an M10 x 78mm Button Bolt (71), an
M10 Washer (57), and a 19mm Spacer (33).
Make sure that the Thin Pulley does not fall
out of the Top Frame while you complete
steps 19 and 20.
18
19
20
21
5
6
4
5
5
33
3
3
57
57
48
71
4
55
33
57
47
71
81
56
48
55
43
43
45
55
47
71
4
33
57
56