EN EN
92
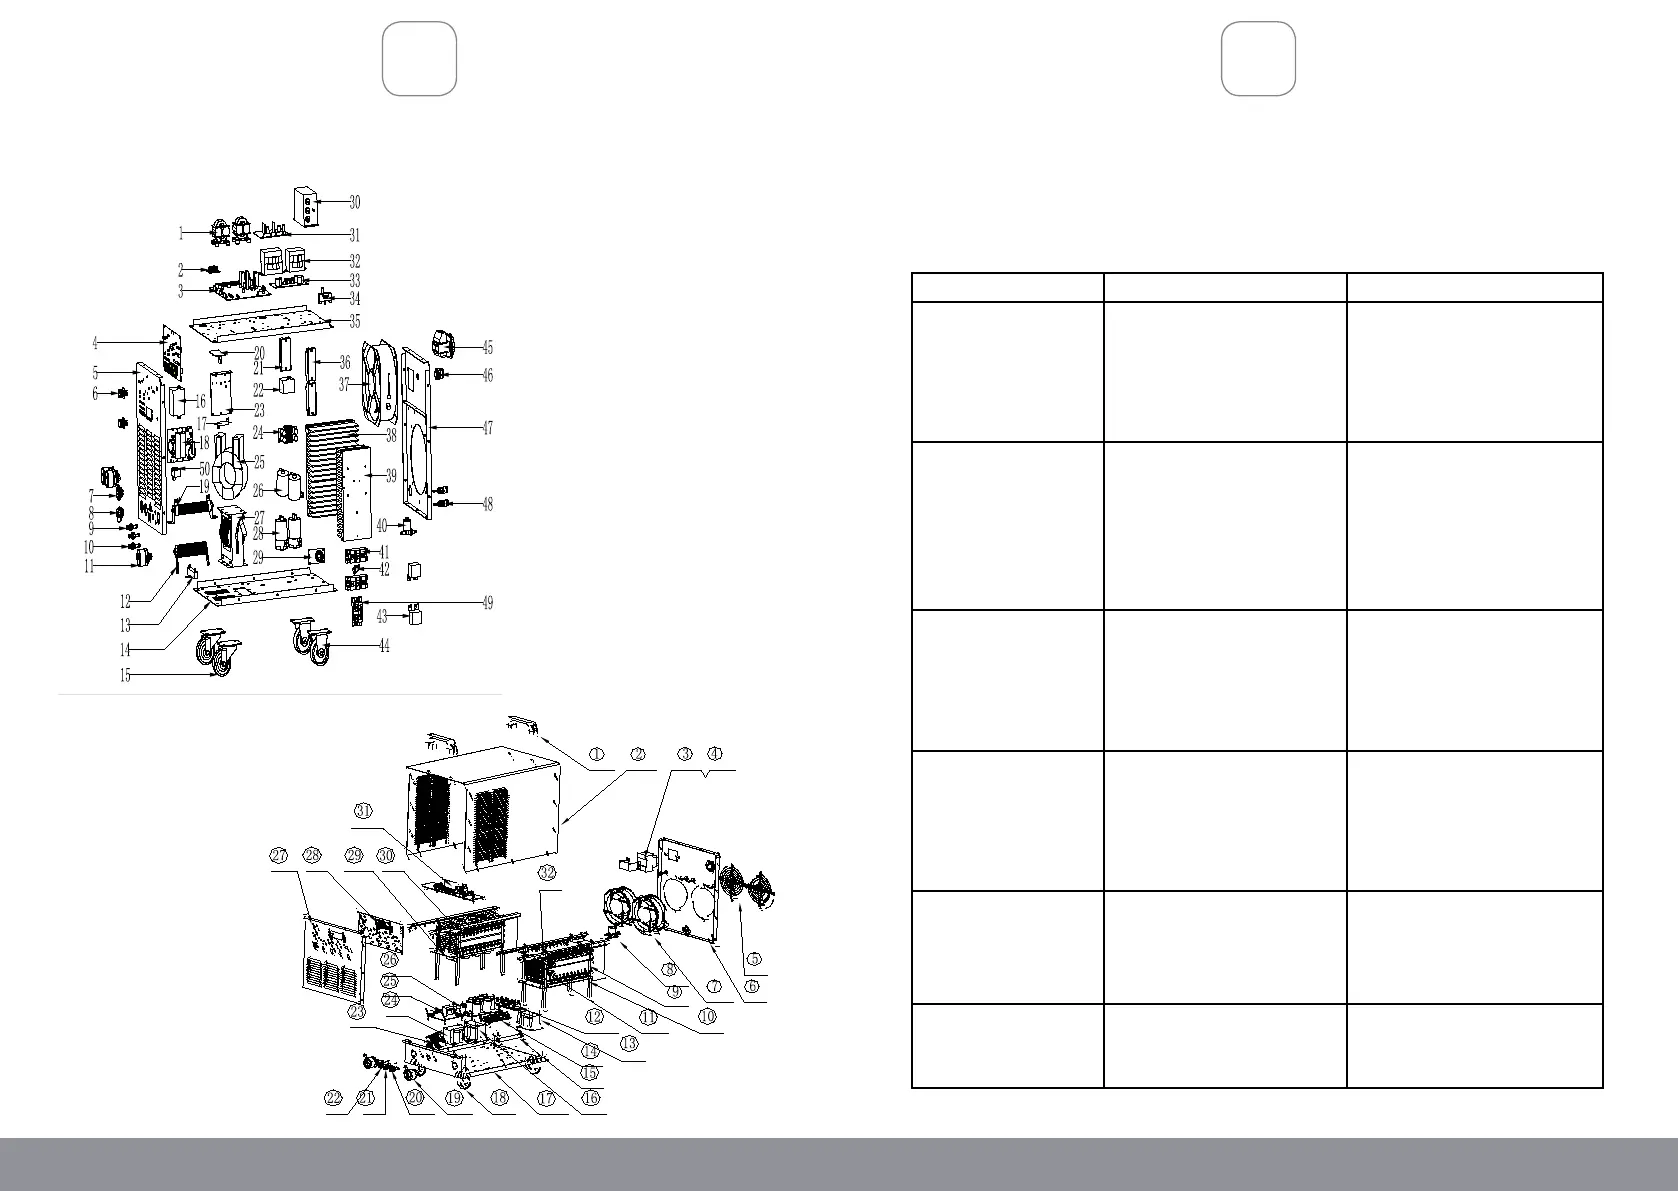
DIAGRAM (ALPHA 335)
ASSEMBLY DIAGRAM
ENTRIX 315 (reference only):
TROUBLESHOOTING
IMPORTANT!
Be CERTAIN to shut off the welder, and disconnect it from power and air before
adjusting, cleaning, or repairing the unit. A technician should discharge all capacitors
before performing and internal procedures.
Problem Possible Causes Likely Solutions
Tool will not start 1. No power at outlet.
2. Cord not connected.
3. Line voltage incorrect.
1. Check power at outlet.
2. Check that cord is plugged in.
3. Make sure the welder is
plugged into a 230V electrical
outlet
No weld output with
ready light on
1. Weld cable loose.
2. Bad work clamp to
workpiece connection.
1. Tighten weld cable connection
at welder
2. Make sure the area where
the clamp is attached is clean,
exposed metal; free of dirt,
paint and oil.
No weld output; high
temperature light on
1. Welder overheated.
2. Duty cycle or amps too high.
3. Airow is blocked.
1. Allow unit to cool with the
fan on.
2. Reduce duty cycle or amps.
3. Clean vents and fan out with
compressed air.
Erratic or improper arc
or welding output
1. Bad weld connections.
2. Polarity incorrect.
3. Workpiece painted or dirty.
4. Ceramic Nozzle obstructed
by welding spatter.
1. Clean and tighten weld
connections.
2. Connect polarity correctly.
3. Clean workpiece thoroughly.
4. Clean or replace nozzle.
Fan not operating 1. Fan blocked/dirty.
2. Fan broken.
1. Remove obstruction and clean
with compressed air.
2. Have the fan replaced by a
qualied service technician.
Main Supply Fuse shuts
off frequently
Circuit Breaker rating is too
low.
nstall a circuit breaker rated for
greater than 20 Amps.
93