26
IOM-224 MODEL: INLOOP™ ACE REV: A 13839 West Bellfort Street, Sugar Land, TX 77498 welker.com Service Department 281.491.2331
Reassembly
Top Cap
61. Return the adjustment screw with jam nuts and thread seal to the top cap, and then screw the adjustment screw down
to expose the unthreaded portion of the adjustment screw (Figure 17).
62. Install the adjustment piston to the adjustment screw. Ensure that the setscrew hole in the adjustment piston aligns with
the pin hole in the adjustment screw.
63. Apply medium strength thread-locking fluid to the setscrew, and then tighten the setscrew to secure the adjustment
piston to the adjustment screw.
Motor Housing
64. Liberally lubricate inside the motor housing.
Welker recommends a silicone-based lubricant, such as Molykote® 111, for use with this unit.
65. Insert the actuation piston assembly into the motor housing, and then use a rubber mallet to gently tap the piston
assembly down into the motor housing.
66. Install the top cap to the motor housing. Align the actuation port on the top cap with the actuation port on the motor
housing, and then push the top cap down. Note that aligning the actuation ports will also bring the cap screw holes into
alignment.
67. Apply Never-Seez® to the cap screws.
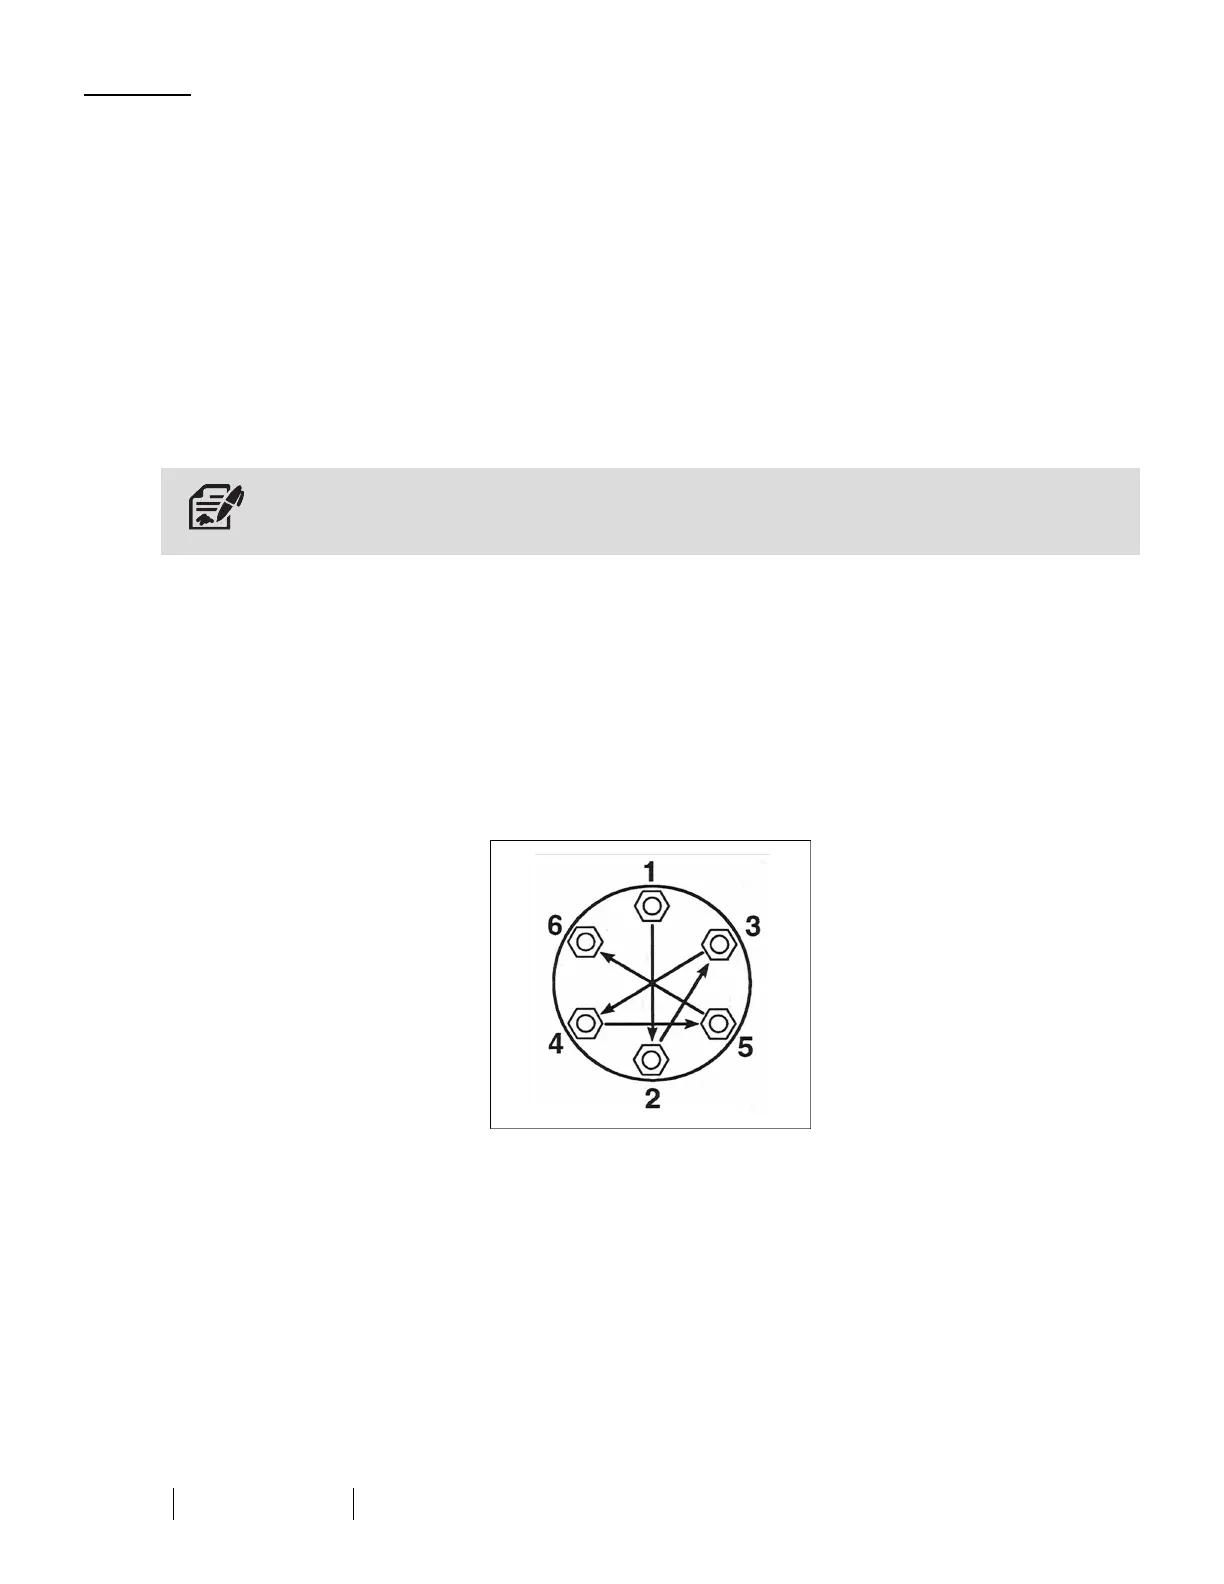
68.
Following a cross-bolting sequence, install the cap screws to the top cap and tighten to 6.3 ft•lb (Figure 19).
Figure 19: Cross-Bolting Sequence