12 WellSoft Owner’s Manual 4/7/2017
Installation
The overflow line drains away excess water should the cabinet fill with too
much water or the appliance malfunction. (see Figure 5)
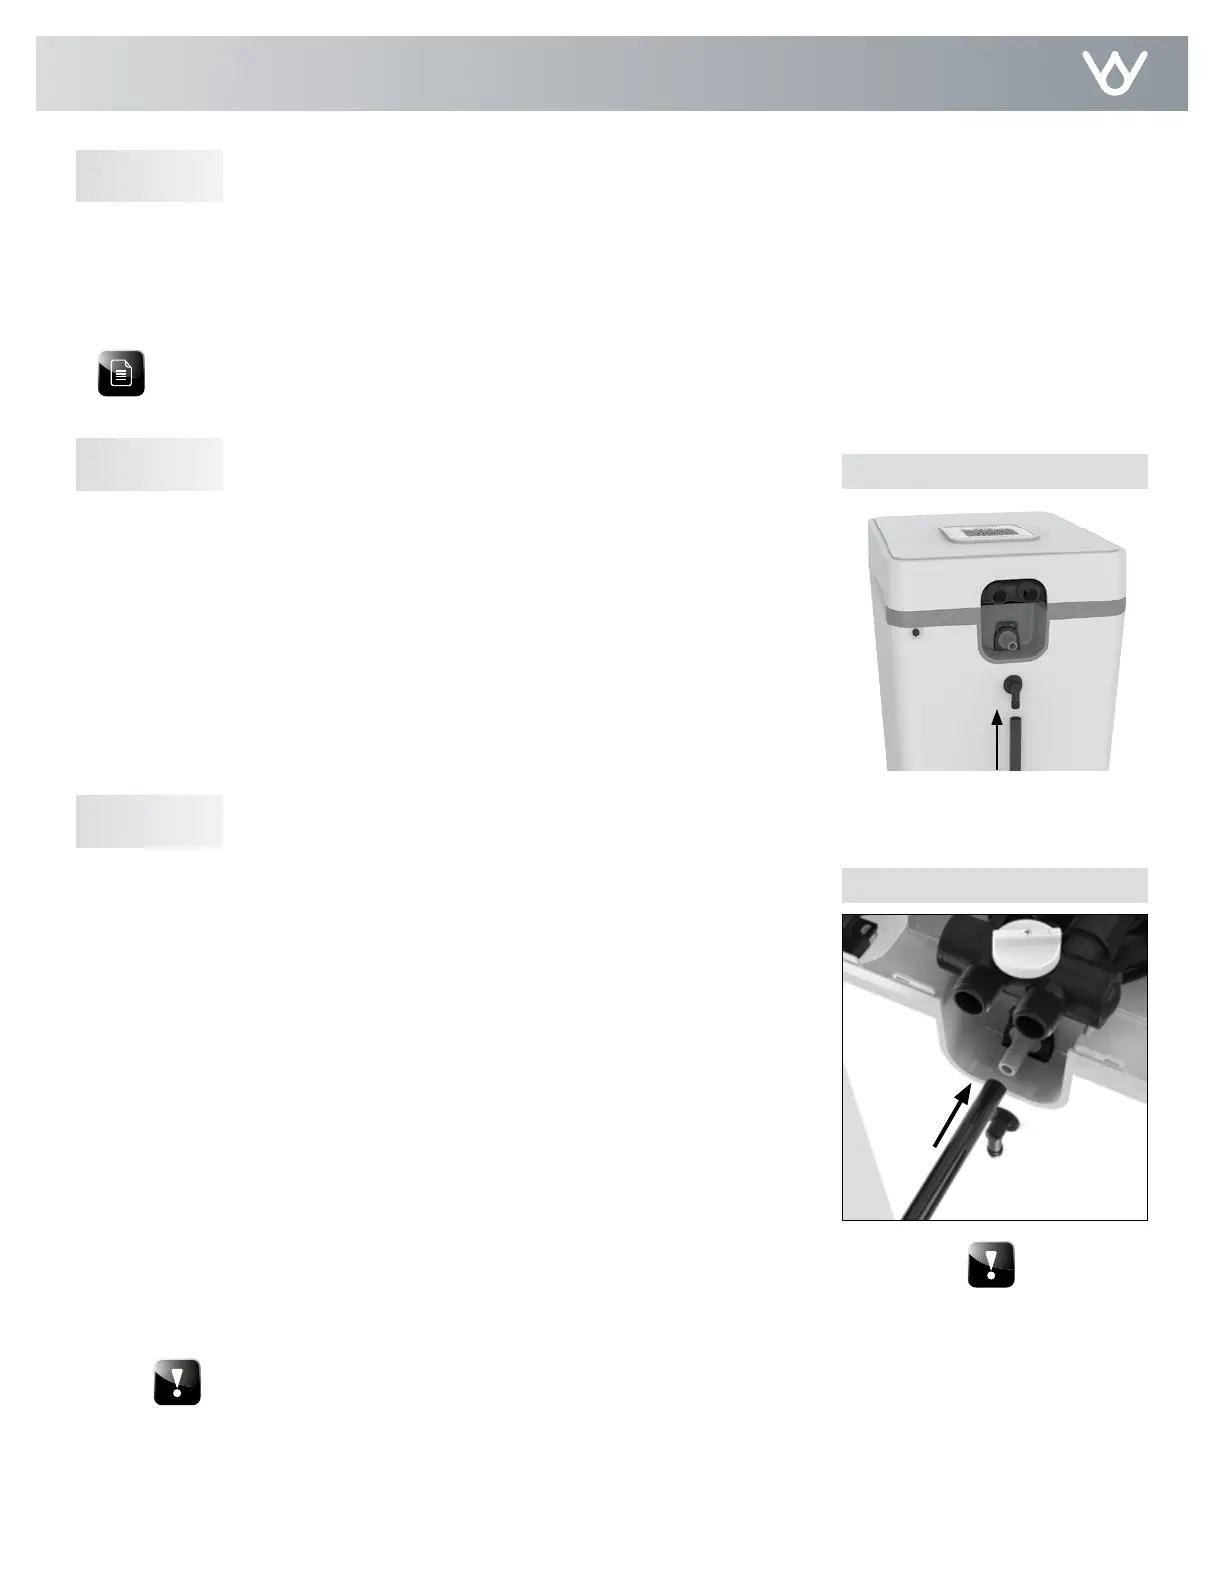
A. Check that the overflow elbow is in the down position.
B. Connect 1/2-inch I.D. tubing (size cannot be reduced) between the overflow
fitting and a floor drain, laundry tub, or other suitable waste receptor. This
tubing is not supplied with the appliance. Ensure that the overflow line
ends at a drain that is at least 3 inches (8 cm) lower than the bottom of
the overflow fitting. Maintain a minimum 2-inch (5 cm) air gap between
the overflow line and the flood level rim of the waste receptor to prevent
back-siphoning. The gravity line cannot be run overhead.
Connect Gravity Overflow ConnectionStep 6
The drain line carries away the backwash water as part of the
regeneration cycle.
A. Connect the drain line to the drain end cap (see Figure 6) with a
minimum 5/8-inch I.D. tubing (supplied). The size cannot be reduced.
Note: Using Teflon tape or plumber’s putty, screw the threaded drain
fitting into the drain end cap.
B. Route the drain line to a floor drain, laundry tub, or other suitable
waste receptor. Maintain a minimum 2-inch (5 cm) air gap between
the drain line and the flood level rim of the waste receptor to prevent
back siphoning. This drain line should make the shortest run to the
suitable drain.
C. The drain line may be elevated up to 8 feet (2.4 m) from the
discharge on the appliance as long as the water pressure in your
system is 40 psi (2.8 bar) or more.
D. If the drain line is 25 feet (7.6 m) or longer, increase the drain line
to 3/4-inch I.D. The end of the drain line must be equal to or lower
in height than the control valve. Caution: The drain line must not be
kinked, crimped, or restricted in any way.
Connect Drain LineStep 7
Figure 5: Gravity Overflow Elbow
Figure 6: Connect Drain Line
Warning: Keep the drain line
being kinked, crimped, or
restricted in any way.
Warning: The drain line may require a hose clamp to
hold drain line in place.
Gravity
Overflow
Connection
Connect Water LinesStep 5
Note: (see Optional Plumbing Procedures) for information on copper fittings and joining plastic pipe.
Connect water lines in compliance with all state and local, building, plumbing, and electrical codes. The Wellsoft
valve connection fittings on the back of the unit are 1” NPT. They can be connected to your home’s plumbing
supply with a variety of connectors / fittings (sold separately). You can plumb your softener to plastic PVC/CPVC,
PEX, or copper. If using copper fittings do not allow solder torch to melt the plastic threads on the valve.