4/7/2017 WellSoft Owner’s Manual 13
Installation
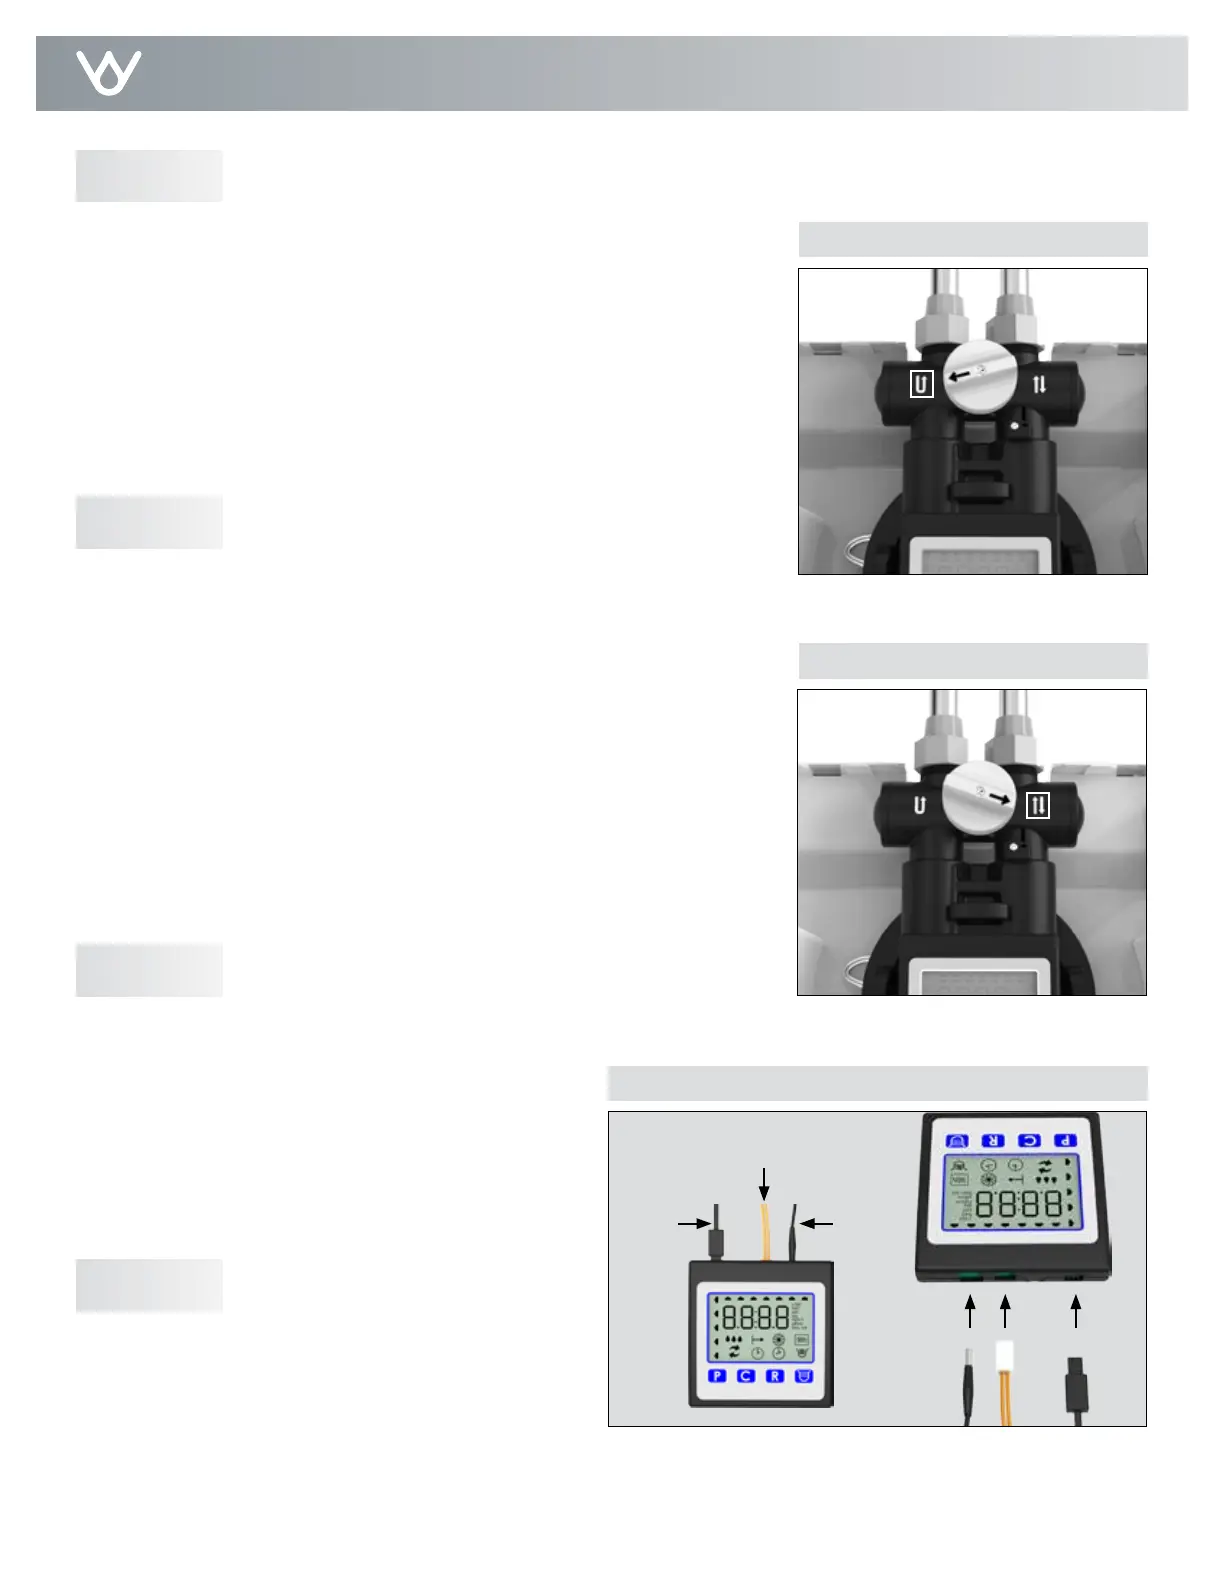
Figure 7: Bypass Position
Figure 8: Service Position
Figure 9: Connect Power
A. Close all faucets.
B. Check all lines and connections for leaks. If leaks are found:
1. Turn off the main water supply.
2. Open a cold water faucet to depressurize the lines.
3. Close the faucet to eliminate any siphoning action.
4. Repair all leaks.
5. Turn on the water supply.
6. Place the bypass in the Service position to slowly fill the
media tank. (see Figure 8)
7. Open a cold water faucet to purge air out of the media tank.
8. Close the faucet and recheck for leaks.
Check for LeaksStep 9
A. Place the appliance in the Bypass position. (see Figure 7)
B. Turn on the main water supply.
C. Open the nearest cold water faucet to flush the plumbing of
any excess soldering flux, air, or any other foreign material.
D. Return the appliance to Service position. Note: To prevent
untreated water from entering your home, avoid using water
inside your home when the appliance is in Bypass position.
Remember to return the appliance to Service position when
you have finished using untreated water.
Flush LinesStep 8
A. Make sure the sensor wire and motor
wire are connected then plug the
transformer power cord to the back of
the controller. (see Figure 9)
B. Plug the transformer into an
appropriate outlet.
C. Ensure that the outlet selected is not
operated by an On/Off switch.
A. Program the appliance controller before moving
to step 12. (see Setting The Controller)
Plug in the Transformer
Set Up the Controller
Step 10
Step 11
Bypass Position
Service Position
Sensor
Wire
Motor
Wire
Power
Cord