ASSEMBLY & ADJUSTMENTS
ADJUSTING THE DEPTH OF DRIVE
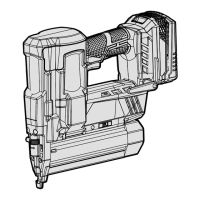
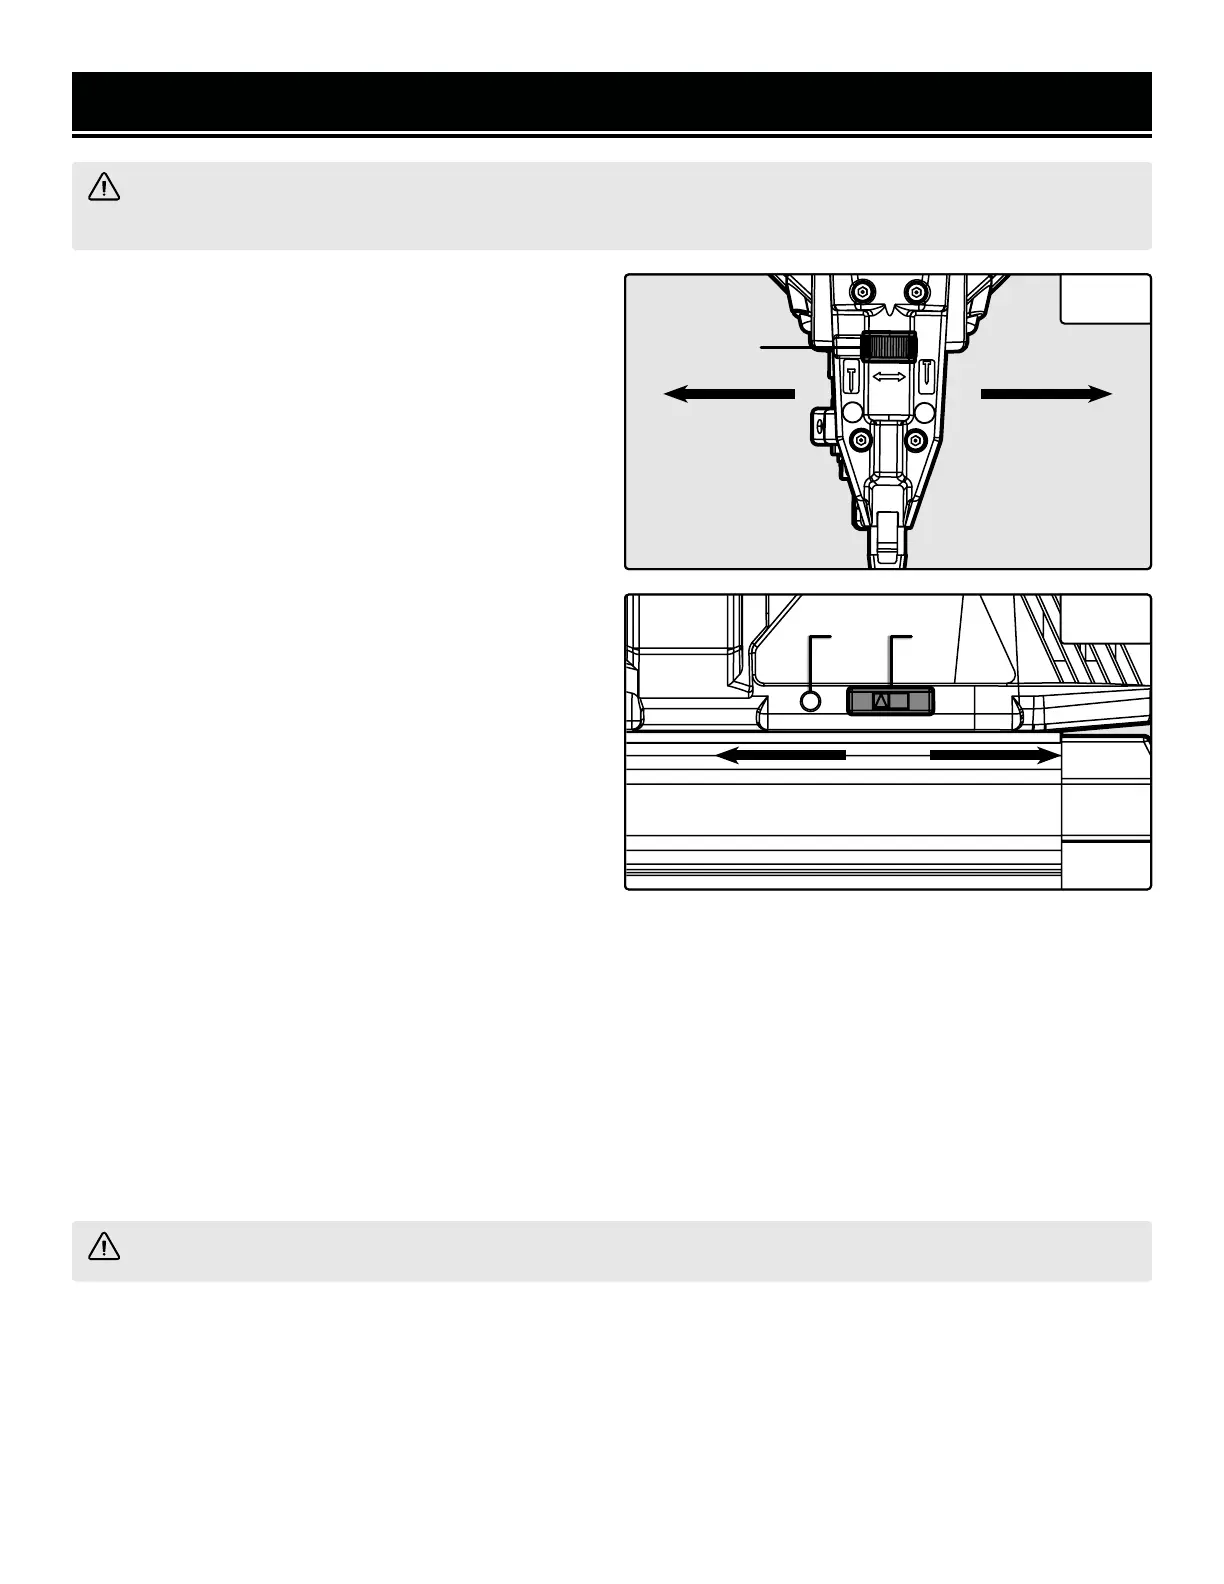
To adjust the depth of drive of the nail, use the depth
adjustment wheel (Fig. 4 - 1) on top of the tool’s nose.
Experiment on a piece of scrap wood to find the proper
depth for your workpiece.
• To increase the depth of drive: Rotate the depth ad-
justment wheel to the LEFT.
• To decrease the depth of drive: Rotate the depth ad-
justment wheel to the RIGHT.
SETTING THE DRIVING MODE
Your nailer has two driving modes: single-sequential and
bump-fire. Single-sequential mode required the trigger
to be pulled each time a nail is driven. Bump-fire mode
allows the nailer to automatically fire if the trigger is de-
pressed with the nose of the nailer pushed against the
workpiece.
Single-Sequential:
1. Push the drive mode switch (Fig. 5 - 1) to the RIGHT
to select single-sequential mode.
2. Press the firing contact pin against the workpiece.
3. Pull the trigger button. A fastener is fired.
Fig. 4
WARNING! To avoid injury from accidental startups, make sure that the tool is OFF and the battery is re-
moved when assembling the tool or when making any adjustments.
Fig. 5
WARNING! Always be aware of which drive mode the nailer is in before beginning operation.
1
Increase
Drive Depth
Decrease
Drive Depth
Single-SequentialSingle-Sequential
ModeMode
Single-Sequential
Mode
Bump-FireBump-Fire
ModeMode
Bump-Fire
Mode
12
2
1
4. Remove the firing contact pin from the workpiece. Re-position the tool. Repeat steps 2 - 4.
Bump-Fire
1. Push the drive mode switch (Fig. 5 - 1) to the LEFT to select bump-fire mode.
2. Pull the trigger button.
3. Press the firing contact pin against the workpiece. A fastener is fired.
4. Remove the firing contact pin from the workpiece. Re-position the tool. Repeat steps 2 - 4.
LED INDICATOR
The LED indicator (Fig. 5 - 2) on the side of the nailer helps to indicate the status of the tool.
LED Red Flashing - Jammed. Clear any jammed fasteners. See page 13.
LED Red Solid - Low battery. Recharge the battery.
LED Green Flashing - Overheating. The nailer has overheated and needs to cool down before continuing operation.
LED Green Solid - Empty magazine. Fasteners need to be loaded into the magazine before beginning operation,
otherwise the nailer will dry fire, possibly causing damage to the tool.
 Loading...