OPERATION
FIRING FASTENERS
1. Check that the fasteners have been loaded into the
magazine and that the magazine is securely locked in
place.
2. Attach the battery to the battery terminal on the nailer.
3. Test the driving depth on a scrap piece of wood. If
the fasteners penetrate too deeply, decrease the firing
depth. If the fasteners penetrate too shallowly, increase
the firing depth.
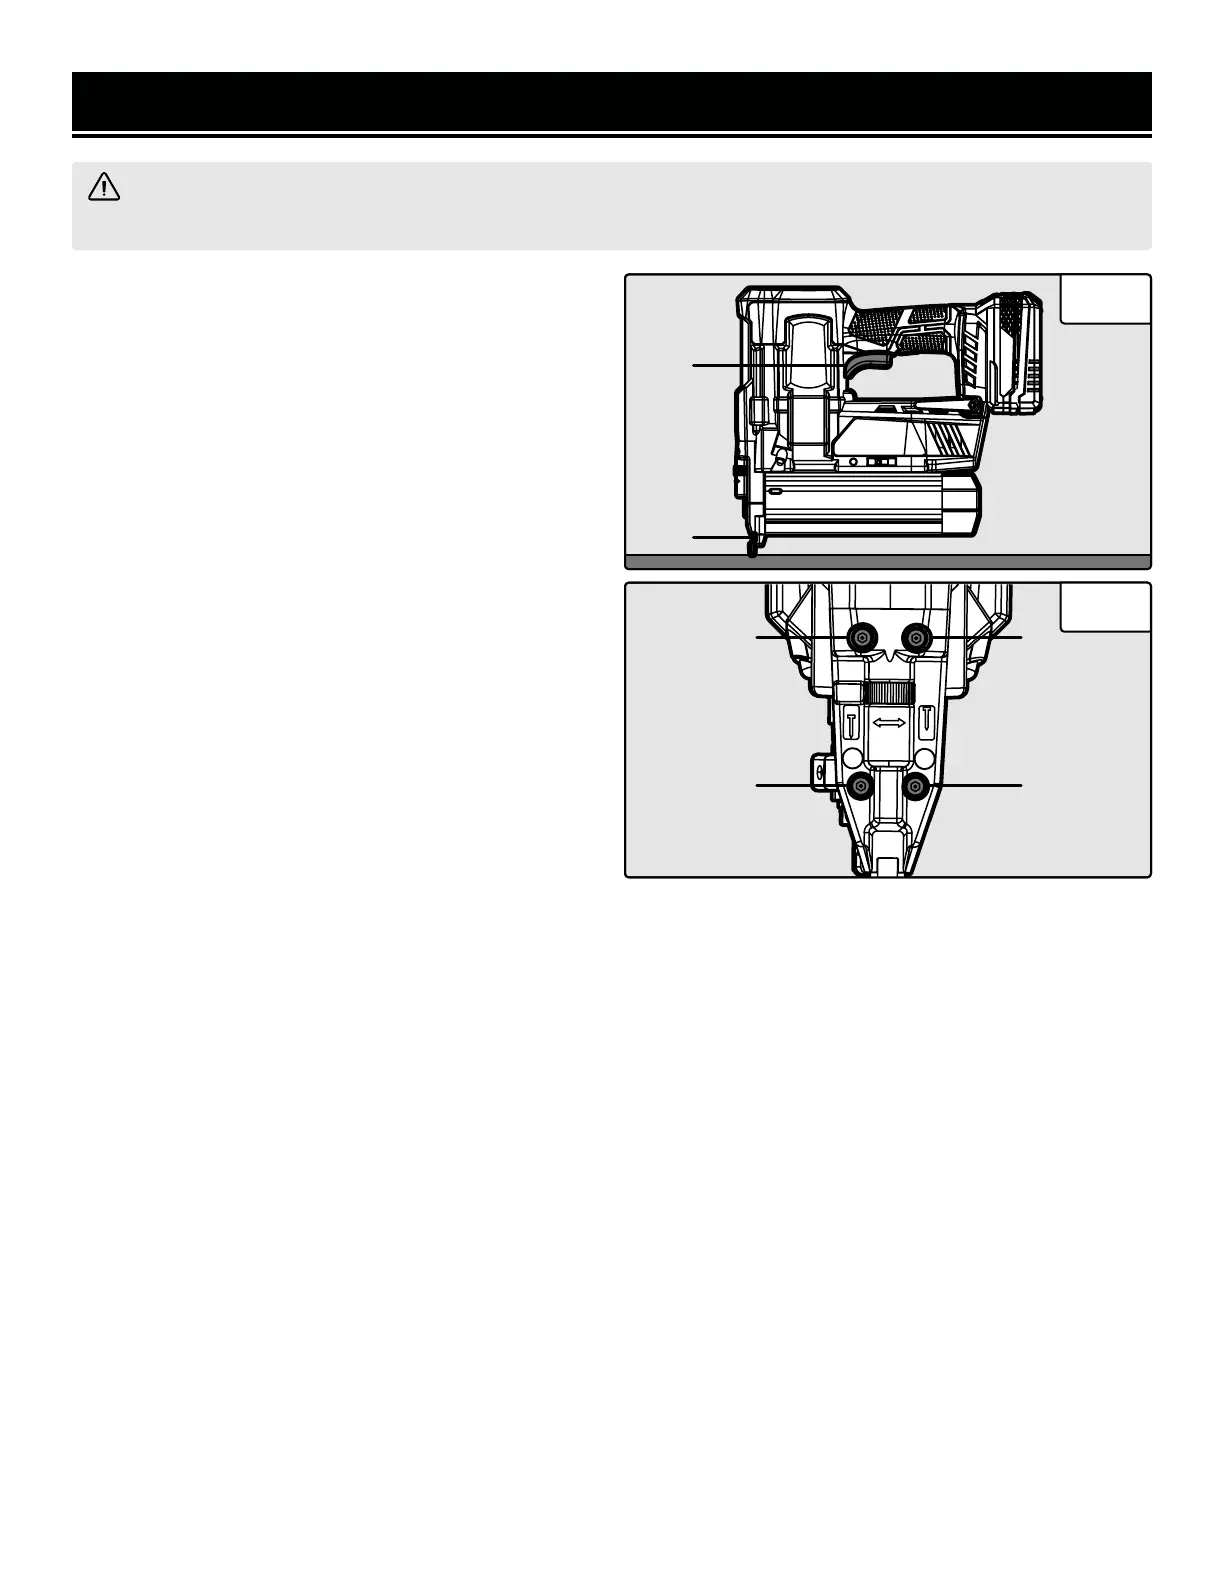
4. Hold the nailer upright on the workpiece and posi-
tion the no-mar tip (Fig. 6 - 1) where the fastener will be
driven.
5. Carefully press down and pull the trigger (Fig. 6 - 2)
to drive a fastener.
6. Release the trigger, lift the tool off the workpiece and
reposition it where the next fastener will be driven. Re-
peat step 5 to drive another fastener.
7. After operation, turn the tool OFF and remove the
battery. Remove all fasteners from the nailer. Store the
nailer in a safe and secure location, out of reach from
children.
Fig. 6
WARNING! Using this type of tool can be dangerous. To reduce the risk of injury, always wear proper eye
and hearing protection when operating this tool. Stay alert and keep proper balance at all times.
Fig. 7
CLEARING JAMMED FASTENERS
1. Make sure that the nailer is OFF and the battery is removed from the battery terminal before performing any
maintenance.
2. Unlock the magazine latch and pull back on the magazine cover.
3. Remove all of the fasteners from the magazine.
4. Use the included hex wrench to loosen the four screws (Fig. 7 - 1) on the nose of the nailer and remove the nose
cover.
5. Use a flat-head screwdriver (not included) to remove the jammed fastener. Push the drive blade back into place.
6. Reinstall the nose cover. Make sure the nose cover is secure before beginning operation.
7. Reload the clip of nails into the magazine. Push the magazine cover forward until it clicks shut. Make sure it is
locked in place and the magazine latch is secure before beginning operation.
8. Test the nailer on a scrap piece of wood before returning to your workpiece.
1
2
1 1
1 1
13
 Loading...