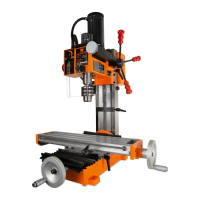
115mm
180mm
8
0mm
3
0
0mm
4
9
0mm
410mm
10mm4x
ASSEMBLY & PREPARATION
WARNING: To prevent injury from accidental operation, make sure the tool is switched OFF and un-
plugged from the power source before assembling the tool or making any adjustments.
Fig. 1
Fig. 2
10
CLEANING THE SURFACES
Your tool comes protected with a layer of heavy-duty anti-rust coating. Remove the protective coating from sur-
faces using a soft cloth, moistened with kerosene (do not use cellulose-based solvents such as paint thinner or
lacquer thinner, as these will damage the painted surfaces). Apply a light layer of good-quality machine oil onto the
machine’s surfaces to protect from rust and corrosion.
MOUNTING TO A BENCHTOP
For safe operation, the machine must be securely
mounted onto a flat, secure workbench. Place the
workbench away from direct sunlight, high moisture
or dust.
Position the machine on the benchtop and leave
enough space around the machine for table travel.
For unrestricted handwheel operation, make sure
the cross feed and longitudinal feed handwheels ex-
tend out beyond the edge of the benchtop. Square
the machine to the benchtop using a precision level.
Drill four 10 mm-diameter mounting holes on the
benchtop (same size as the machine’s mounting
hole). Mount the machine using four M10 bolts and
INSTALLING THE HANDLES
Install the two handles (Fig. 2 - 1) onto the longitudinal
feed handwheel and cross feed handwheel. Fully tighten
the handles.
PREPARING VISES TO SECURE WORKPIECE
A vise (not included) is a crucial attachment to hold your
workpiece in place when using the milling machine. You
can purchase a milling vise or quick vise that is suitable
for your workpiece and milling operation.
nuts (mounting hardware not included).
TIP: Your milling machine is compatible with the
WEN 6588 Multipurpose Planer Stand, available
at wenproducts.com. Forget measuring and drilling
holes on your workbench, simply mount your ma-
chine onto the mobile stand with pre-drilled holes,
and transport your machine around the workshop
with ease.
1
You may also use clamping kits to hold the workpieces to the machine’s worktable. Follow the instructions with your
accessory for proper installation and operation.

 Loading...