15
OPERATION
TO SHAPE THE OUTSIDE OF THE BOWL (FIG. X)
Odd shaped burls, crotches and other irregular shaped blanks require special preparation before mounting in a
chuck or onto a face plate. Remove the bark, if there is any from what appears to be the center of the top of the
workpiece. Drive the spur center into the top of the workpiece with a mallet or a dead blow hammer. Slip the
spur center into the headstock taper and bring the tailstock with a live center into position. Lock the tailstock to
the bed and advance the quill in order to seat the cut center into the workpiece. Tighten the quill locking handle.
Turn the workpiece by hand to ensure proper clearance. Start the lathe at the lowest speed and bring it up to the
proper speed for the size of the work being turned. If the machine starts to vibrate, lower the speed until the vibra-
tion stops. Rough out the outside of the bowl with the bowl gouge, holding the handle of the tool firmly against
your hip.
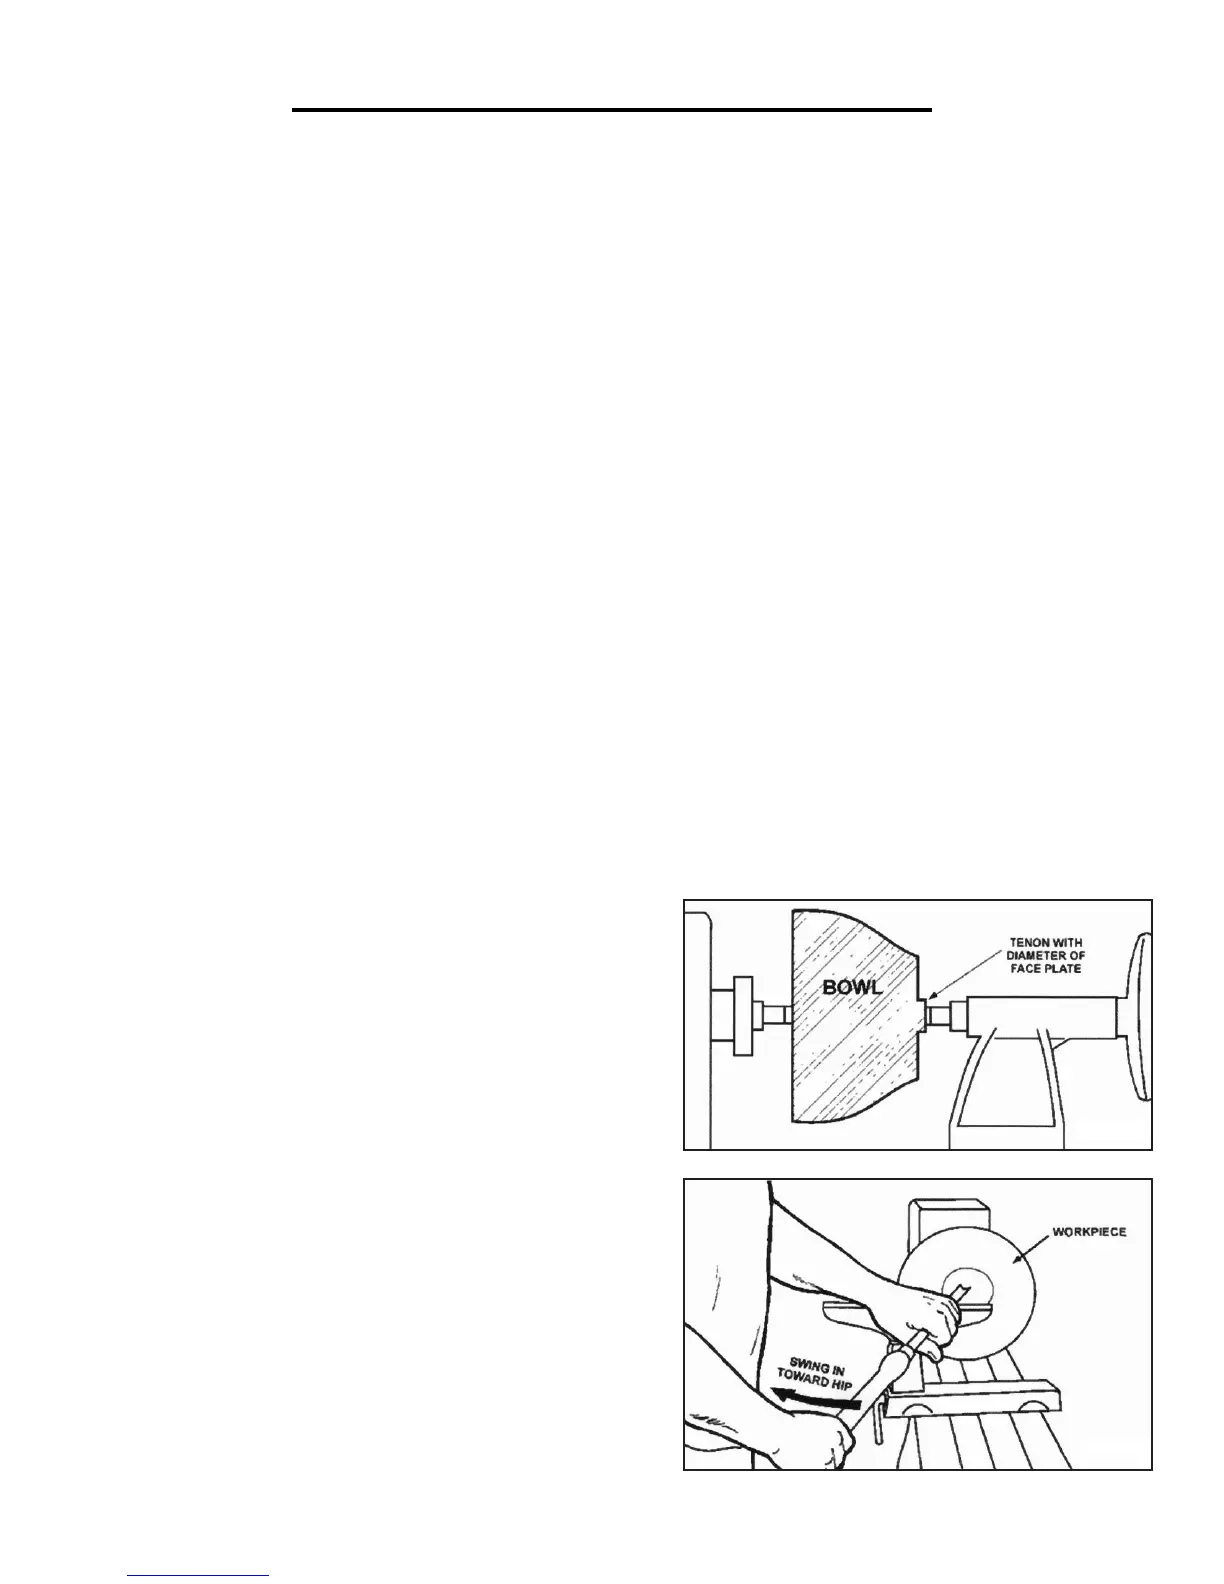
As the bowl takes shape, work on the bottom (tailstock end) to accommodate attaching a face plate. Turn a short
tenon to the size of the hole in the face plate. This will allow centering the workpiece when the face plate is at-
tached. NOTE: If you plan to use a chuck, turn a tenon of the appropriate length and diameter to fit your chuck.
Stop the lathe and remove the workpiece. Attach the face plate or chuck. Finish turning the outside of the bowl
with a bowl gouge. Leave additional material at the base of the bowl for support while turning the interior. This
will be removed later.
TO SHAPE THE INSIDE OF THE BOWL (FIG. Y)
Stop the lathe and move the tailstock away. Adjust the tool rest in front of the bowl just below the centerline at a
right angle to the lathe’s turning axis. Rotate the workpiece by hand to check for clearance.
Start by lightly shearing across the top of the workpiece from rim to center. Place a bowl gouge on the tool rest at
the center of the workpiece with the flute facing the top of the bowl. The tool handle should be level and pointed
toward the four o’clock position.
Use the left hand to control the cutting edge of the gouge,
while the right hand swings the tool handle around towards
your body. The flute should start out facing the top of the
workpiece, rotating it upwards as it moves deeper into the
bowl to maintain a clean and even curve. As the tool goes
deeper into the bowl, progressively work outwards towards
the rim of the bowl. It may be necessary to turn the tool rest
into the piece as you get deeper into the bowl. NOTE: Try to
make one light continuous movement from the rim to the bot-
tom of the bowl to ensure a clean, sweeping curve through the
piece. Should there be a few small ridges left, a light cut with a
large domed scraper can even out the surface.
Develop the preferred wall thickness at the rim and maintain
it as you work deeper into the bowl (once the piece is thin
toward the bottom, you cannot make it thinner at the rim).
When the interior is finished, move the tool rest back to the
exterior to re-define the bottom of the bowl. Work the tight
area around the face plate or the chuck with a bowl gouge.
Begin the separation with a parting tool, but do not cut all the
way through.
Fig. X
Fig. Y
 Loading...