10
ASSEMBLY AND ADJUSTMENTS
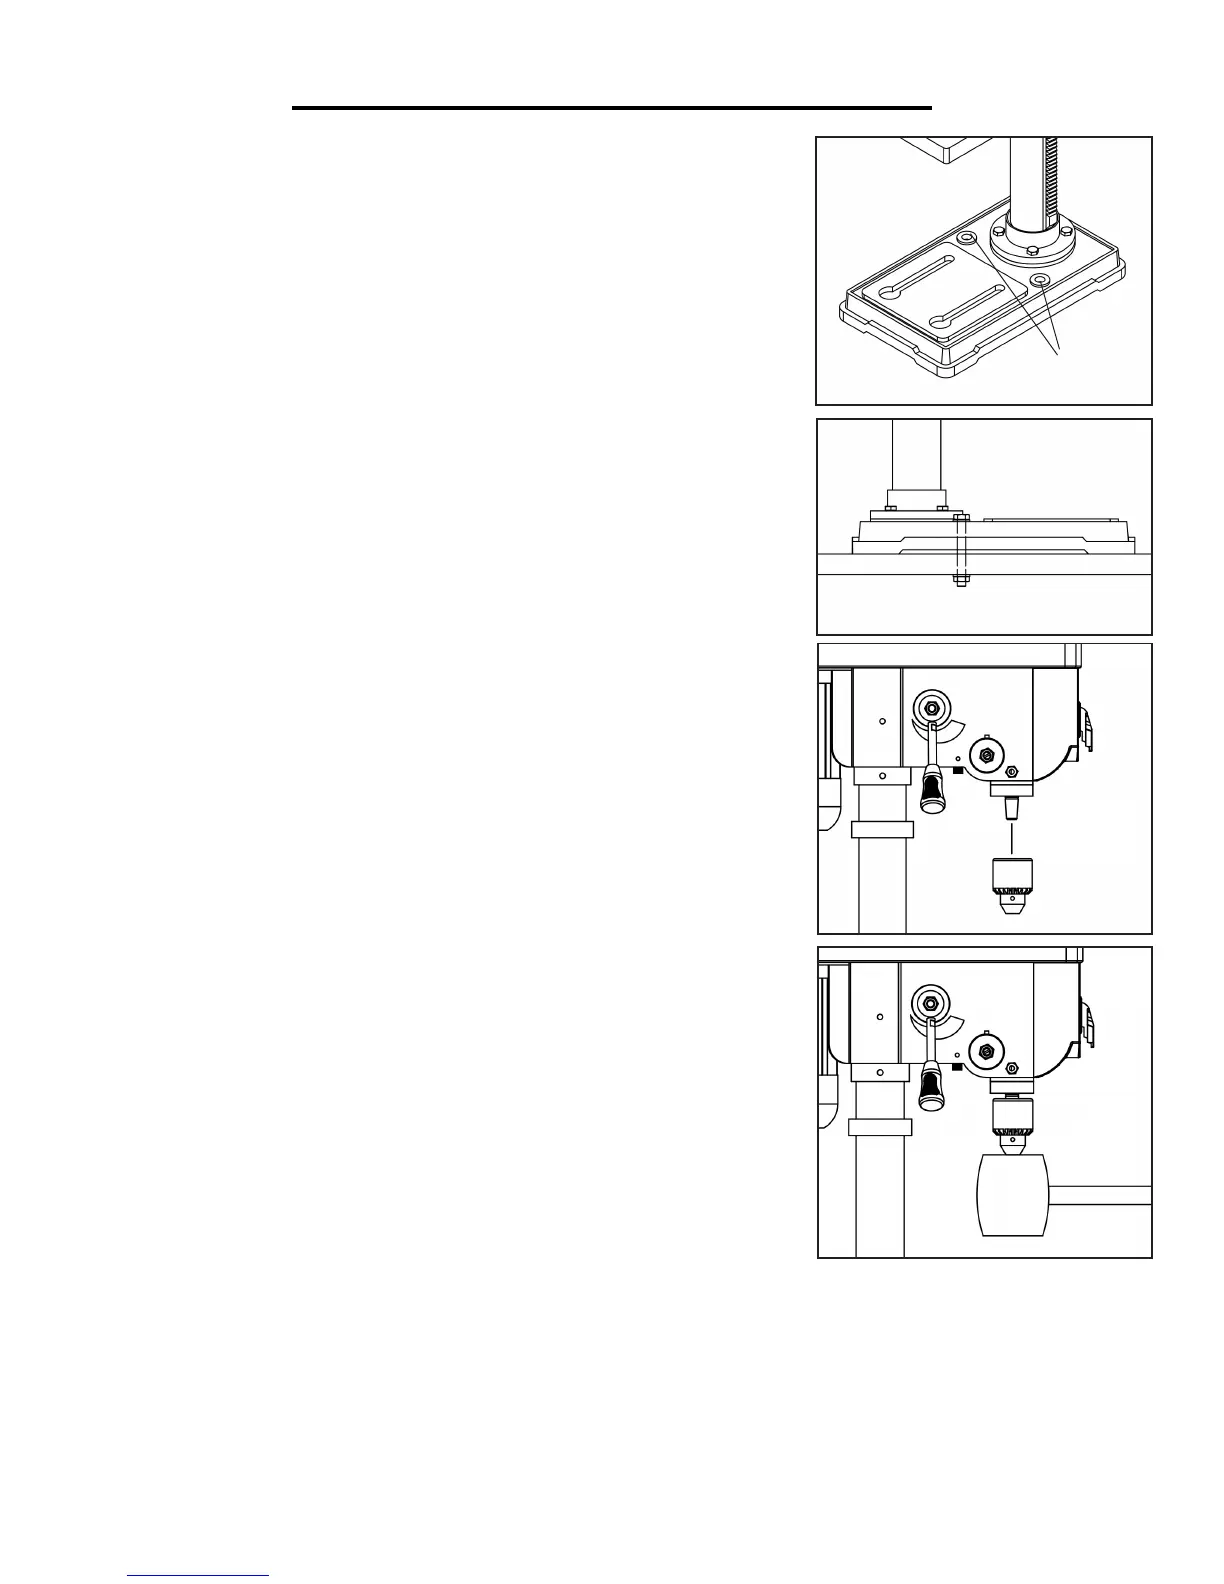
MOUNT THE DRILL PRESS
The drill press must be securely fastened through the mounting holes (Fig. J
- 1, Fig. K) to a stand or workbench with heavy-duty fasteners. This will pre-
vent the drill press from tipping over, sliding, or walking during operation.
IMPORTANT: If the stand or workbench has a tendency to move during
operation, fasten the workbench securely to the floor.
INSTALL THE CHUCK
1. Inspect and clean the taper hole in the chuck and the chuck arbor.
Remove all grease, coatings, and particles from the chuck and chuck arbor
surfaces with a clean cloth.
2. Open the chuck jaws by manually turning the chuck barrel clockwise.
Make sure the jaws are completely recessed inside the chuck.
3. Seat the chuck on the chuck arbor by placing a block of wood (not includ-
ed) under the chuck and tapping it with a hammer (not included). Alterna-
tively, tap the chuck with a rubber mallet (not included) (Fig. L, Fig. M).
CAUTION: To avoid damaging the chuck, make sure the jaws are com-
pletely recessed into the chuck. Do not use a metal hammer to drive the
chuck into the spindle.
REMOVE THE CHUCK
1. Turn the feed handles to lower the chuck to the lowest position.
2. Place a ball joint separator above the chuck and tap it lightly with a ham-
mer to cause the chuck to drop from the spindle.
Note: To avoid possible damage to the drill or chuck, be prepared to catch
the chuck as it falls.
Fig. J
1
Fig. K
Fig. L
Fig. M

 Loading...


