ASSEMBLY & ADJUSTMENTS
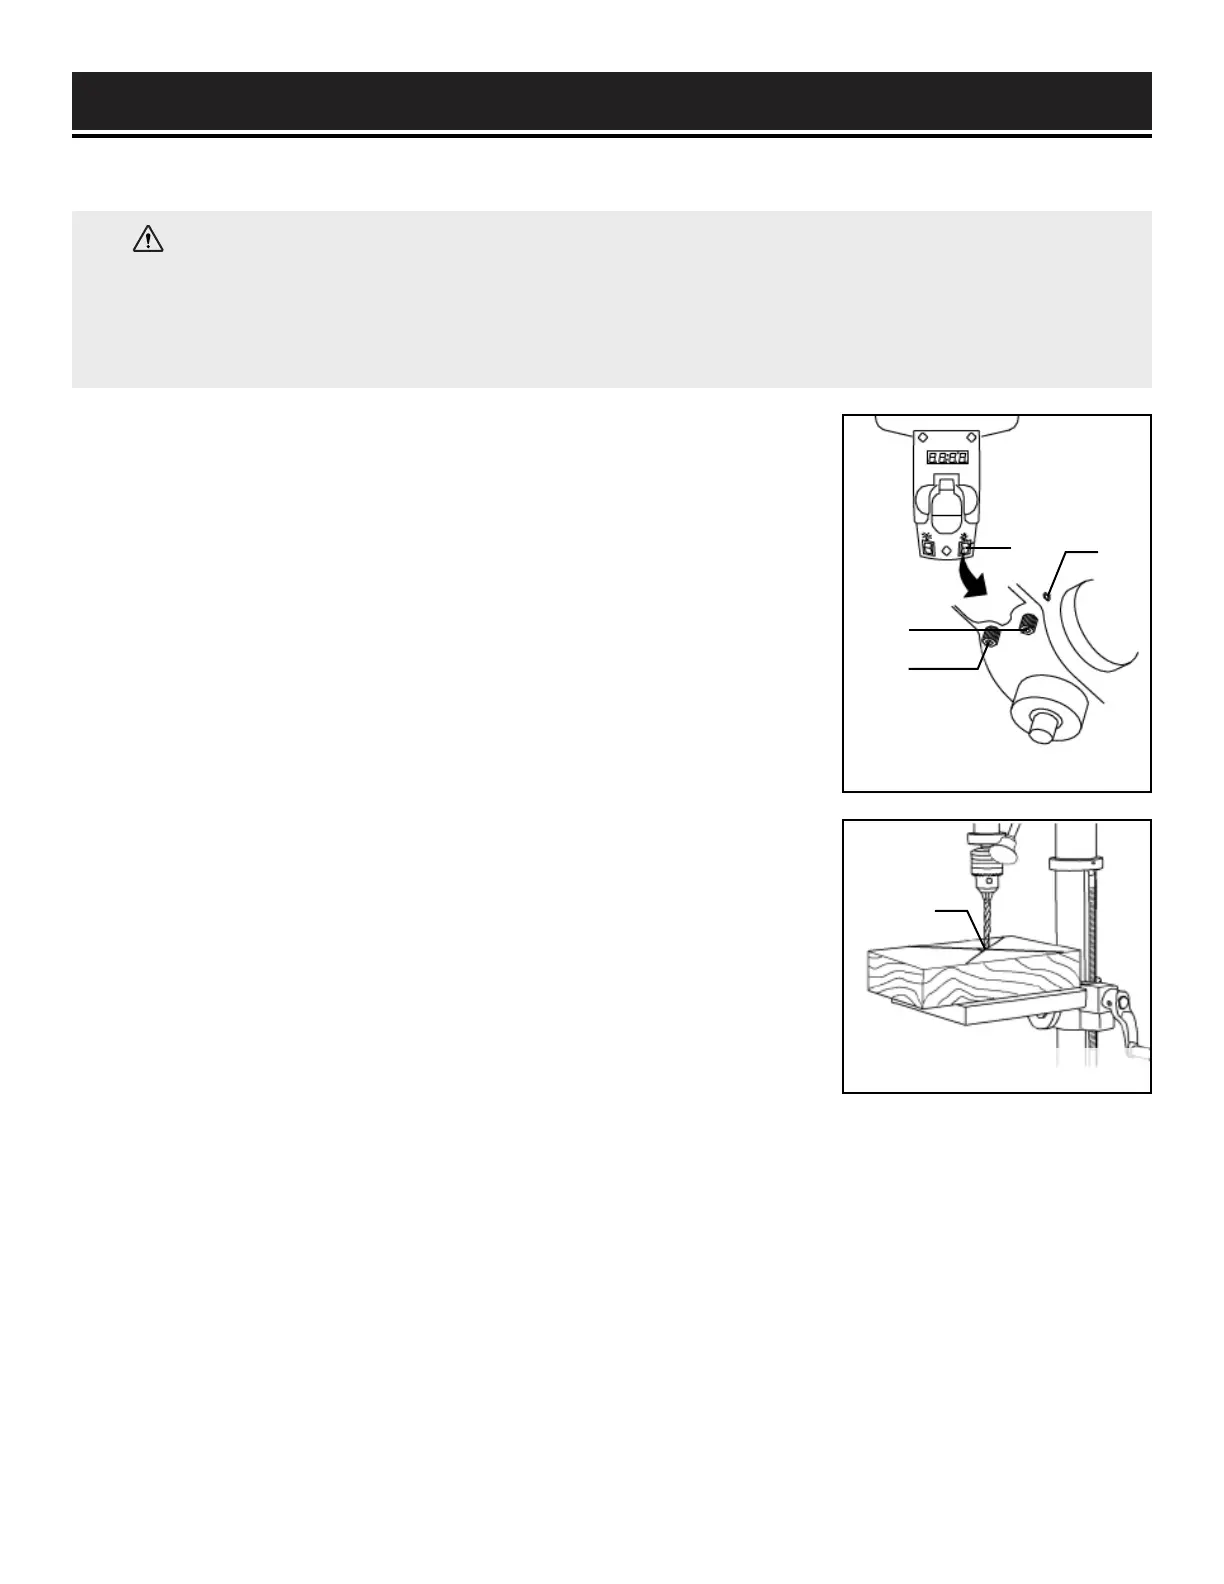
ADJUSTING THE LASER (FIG. 15 & 16)
1. Place a workpiece on the table.
2. Turn the laser switch (Fig. 15 - 1) to the ON position.
3. Lower the drill bit to meet the workpiece (Fig. 16 - 2). The two laser
lines should cross where the drill meets the workpiece.
4. If the laser needs to be adjusted:
a. Using the included 3 mm hex key, turn the laser adjustment set
screws (Fig. 15 - 3) counterclockwise. There is one of each side
of the head.
b. Rotate the laser light housing (Fig. 15 - 4) until the two laser
lines intersect where the drill meets the workpiece.
5. Re-tighten the adjustment set screws (Fig. 15 - 3).
Fig. 15
Fig. 16
16
1
3
4
4
2
WARNING: Do not stare directly at the laser beam. Observe all safety rules.
• Never aim the beam at a person or an object other than the workpiece.
• Always make sure the laser beam is aimed at a workpiece that does not have reflective surfaces, as
the laser beam could reflect into your eyes or the eyes of others.

 Loading...


