1010
ASSEMBLY
WORK LIGHT
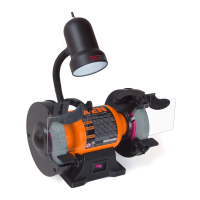
The bench grinder is provided with a flexible work light to assist in visibility of the workpiece. The bench grinder
is NOT provided with a light bulb for the flexible work light. To reduce the risk of fire, use a 120V 40W (or less)
track light bulb, type R20, medium base or equivalent (not included). DO NOT use a light bulb that extends past
the end of the light housing.
CAUTION: The flexible work light housing will remain hot for a few minutes after turning it OFF. Avoid contact
with housing until it cools.
MOUNTING TO THE WORK SURFACE
The bench grinder should be firmly attached to a reliable work surface using mounting hardware (not included)
through the base of the grinder’s mounting holes. This will prevent the bench grinder from vibration, walking or
tipping during operation.
NOTE: This bench grinder is compatible with the WEN 4288 Cast Iron Bench Grinder Pedestal Stand.
1. Prepare 1/4 in. bolts, flat washers, lock washers and hex nuts (not included). The bolt length should be 1-1/2 in.
longer than the thickness of the workbench.
2. Locate and mark the holes where the grinder is to be mounted onto the work surface.
NOTE: If mounting to a work bench, drill four 3/8 in. diameter holes through the workbench.
3. Place the bench grinder onto the workbench, aligning holes in base with holes in the workbench.
4. Insert four 1/4 in. diameter bolts and washers and attach with nuts securely.
WARNING: Always make sure your bench grinder is securely mounted to a workbench. Failure to do
so could result in an accident resulting in possible serious personal injury.
OPERATION
CAUTION: Keep all bystanders a safe distance away from the tool
BASIC OPERATION
1. Your bench grinder has a medium wheel (60 grit) for medium material removal and general purpose grinding,
and a coarse wheel (36 grit) for fast material removal.
2. To operate the bench grinder, always wear safety glasses and turn the tool on while standing at the side and not
in front of the grinder. Allow it to reach full speed before grinding.
3. Hold the work piece firmly against the tool rest. Hold very small pieces with pliers or other suitable clamps.
4. Feed the work piece smoothly and evenly into the grinding wheel.
5. Move the work piece slowly and avoid jamming the work piece against the wheel. If the wheel tends to slow
down from excessive force, you should occasionally release the pressure to let the wheel return to full speed.
6. Grind only on the face of the grinding wheel and never the side of it.

 Loading...