ASSEMBLY & ADJUSTMENTS
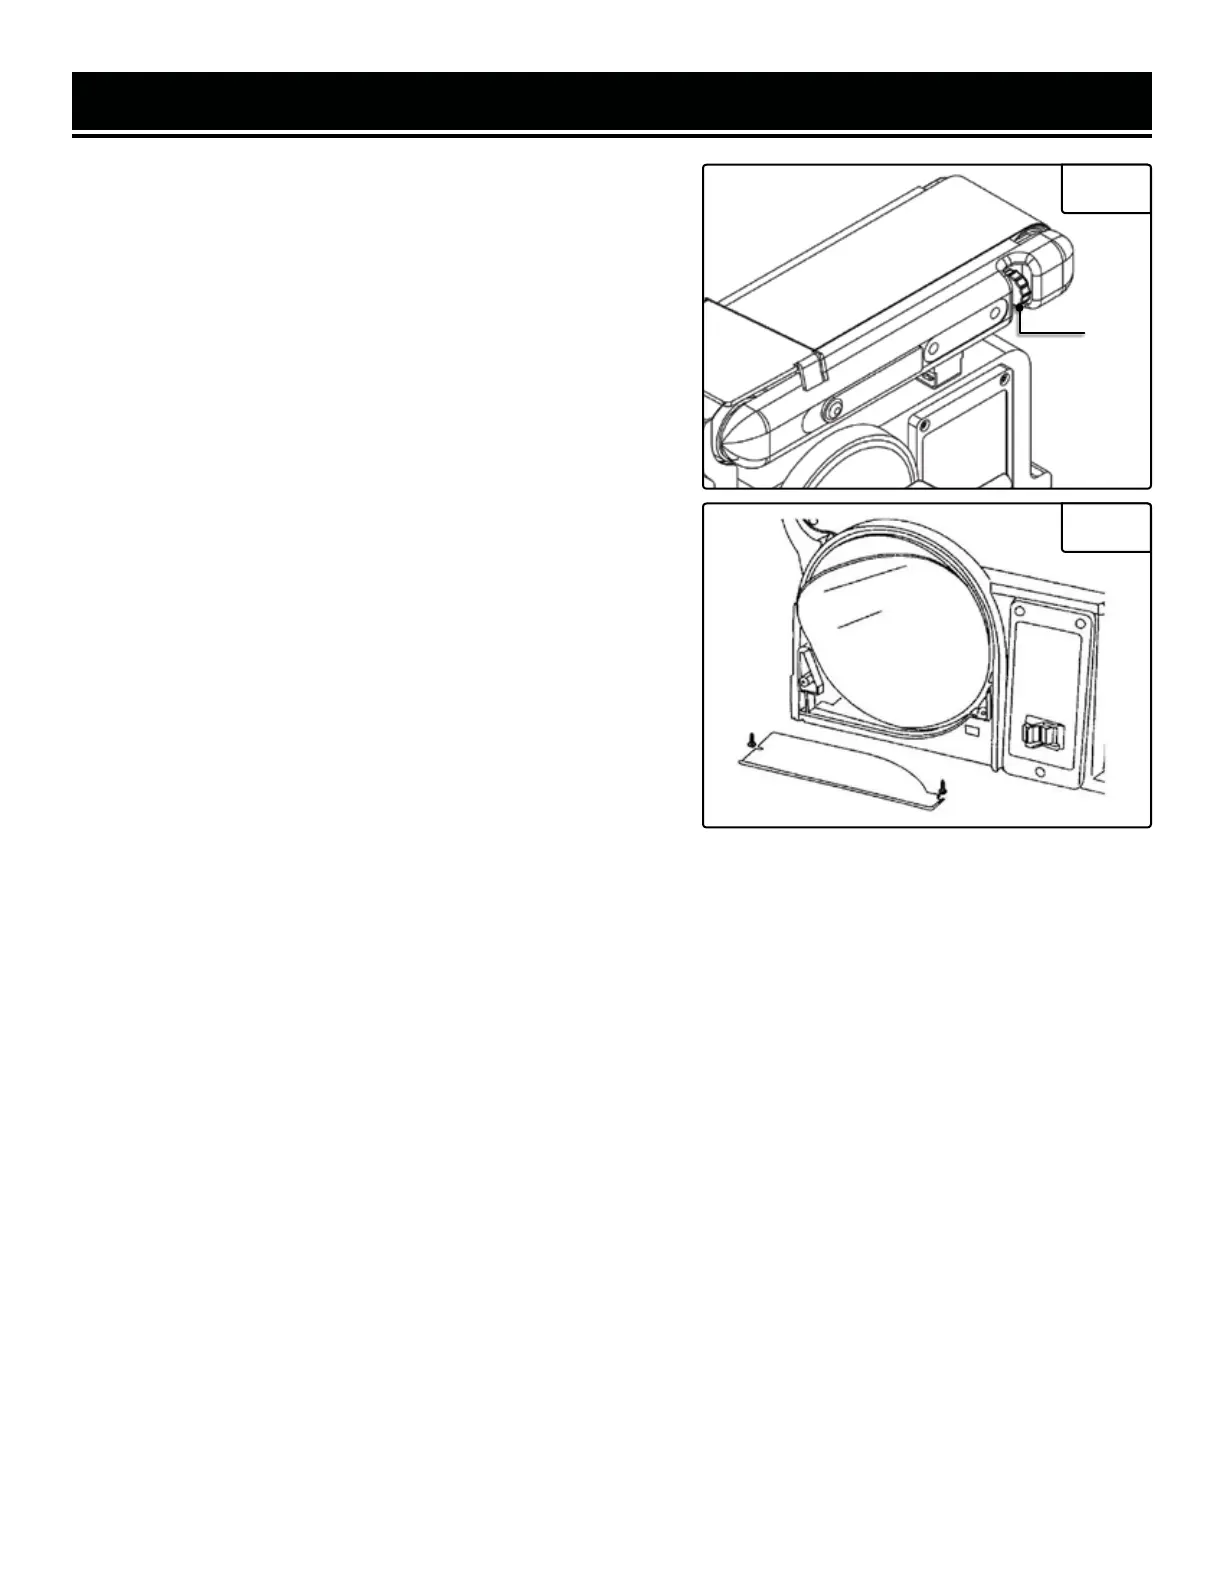
SANDING BELT TRACKING ADJUSTMENT
1. Plug in the power cord.
2. Turn the switch ON and OFF to make sure the sanding belt is
correctly centered and not sliding off the idler and drive roller
drums.
a. If the sanding belt moves toward the disc, slightly turn the
tracking knob (Fig. 8 - 1) counterclockwise.
b. If the sanding belt moves away from the disc, slightly turn the
tracking knob clockwise.
3. Turn the switch ON and OFF again; readjust the tracking knob
if necessary.
CHANGE SANDING BELT BED POSITION
The sanding bed can be used in the horizontal or vertical posi-
tions or any angle in between. To use in the vertical position, do
the following:
1. Loosen the bed locking screw with hex key, move the bed to
the desired vertical position.
Fig. 8
Fig. 9
1
2. Tighten the locking screw when at desired position.
DUST PORT OPERATION
The dust port can be easily connected to a large diameter shop vacuum hose.
Sanding operations are inherently dusty. To help minimize the amount of dust that escapes into the surrounding
air, this sander is equipped with a 2-1/4” dust chute that can be easily connected to a dust-collection system. It is
strongly recommended that users employ a dust-collection system when using this belt & disc sander.
Use of a mask or respirator is still recommended even when a dust-collection system is in use.
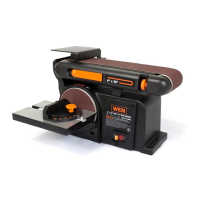
INSTALL A NEW SANDING DISC (FIG. 9)
1. Remove the two screws from the sanding disc guard and remove the guard.
2. Remove the used sanding disc. A heat gun may come in handy to remove old discs. Your friends at WEN offer
several models, available for purchase at wenproducts.com.
3. Wipe the sanding disc plate clean.
4. Peel the backing from the new sanding disc, align the disc with the plate and press the sanding disc firmly on to
the plate.
5. Reinstall the disc guard and tighten the screws.
12