MAINTENANCE
Before using, check to make sure parts are not damaged, missing, or worn. Check
for alignment of moving parts, binding of moving parts, improper mounting, or any
other conditions that may affect the sander operation. If any of these conditions ex-
ist, do not use the sander until parts are replaced or the sander is properly repaired.
Frequently blow or vacuum dust from all sanding parts and motor housing.
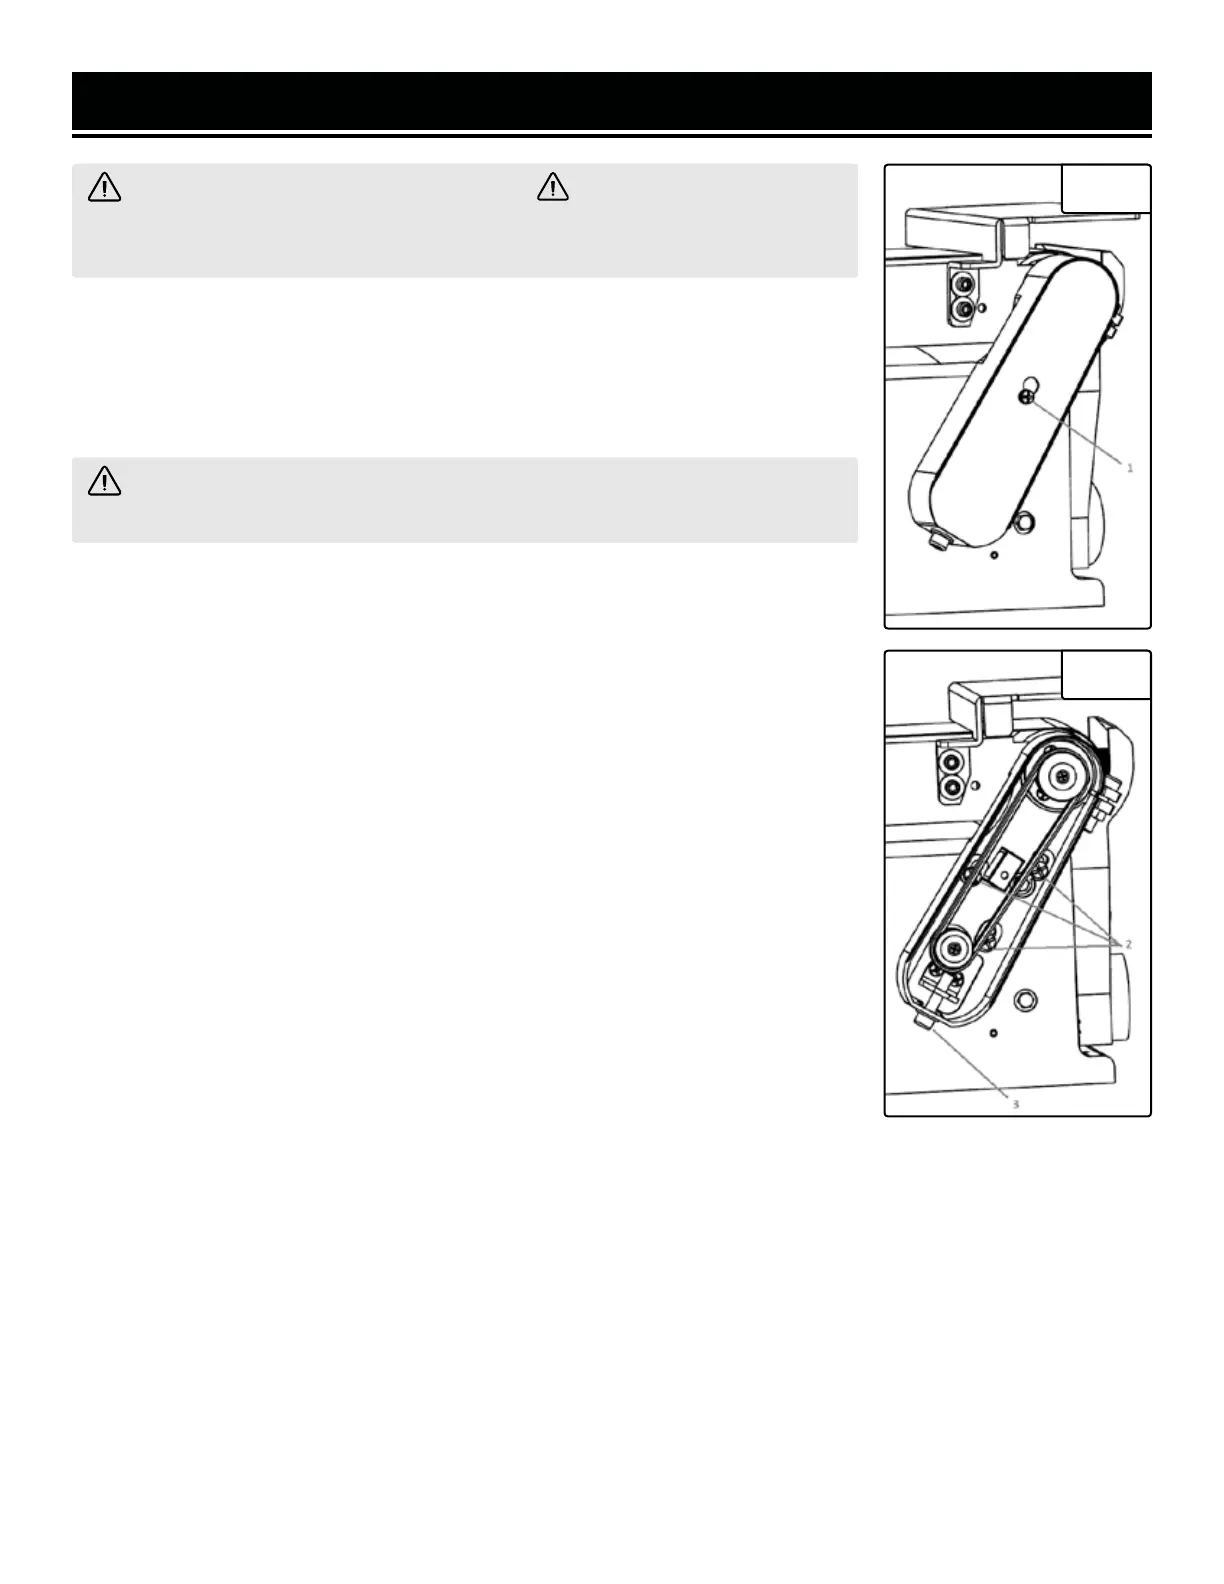
Fig. 19
WARNING! For your own safety, turn the switch OFF and remove the
plug from the electrical outlet before adjusting or performing maintenance or
lubrication work on the belt / disc sander.
WARNING! Any attempt to repair or replace electrical parts on this tool may
be hazardous. Repairs should be done by a qualified service technician.
LUBRICATION
Ball bearings are grease packed at the factory and require no further lubrication. Use
a spray lubricant on all moving table parts to ensure smooth operation.
ADJUST THE DRIVE BELT
1. Loosen the screw (1) securing the drive belt housing cover to the drive belt hous-
ing. Lift the cover up and over the screw and remove it.
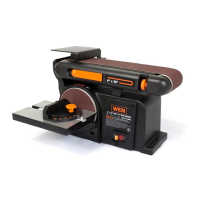
2. Using a Phillips screwdriver (not included), loosen the 3 screws (2) securing the
drive belt housing to the sander body.
3. Using the included hex wrench, loosen (turn counterclockwise) the hex screw (3)
at the bottom of the drive belt housing. This will release the tension on the drive belt
and allow you to perform adjustments or install a new drive belt.
4. Re-seat the belt on the pulleys, making sure the belt is properly seated in the
grooves of both pulleys.
5. Re-tighten the belt by tightening (turning clockwise) the hex screw at the bottom
of the drive belt housing.
Fig. 20
6. Tighten all 3 screws (2).
7. Test belt tension by squeezing both sides of the belt. If properly adjusted, the belt should “give” between 1/8–
1/4 inch (3–6 mm). Make sure that the belt grooves are properly seated in the pulleys.
8. Carefully reinstall the drive belt housing cover. Tighten the screw.
NOTE: Excessive tightness on the pulley belt will cause increased noise and motor overload. Premature failure will
occur if belt is too loose.
16