EasyManua.ls Logo

Wen JT3062

Wen JT3062
24 pages
To Next Page IconTo Next Page
Loading...
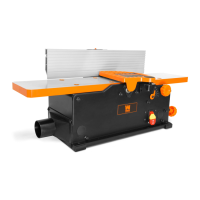
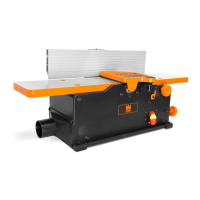
6-INCH TWO-BLADE
BENCHTOP JOINTER
Instruction Manual
IMPORTANT: Your new tool has been engineered and manufactured to WEN’s highest standards for dependability,
ease of operation, and operator safety. When properly cared for, this product will supply you years of rugged,
trouble-free performance. Pay close attention to the rules for safe operation, warnings, and cautions. If you use
your tool properly and for its intended purpose, you will enjoy years of safe, reliable service.
NEED HELP? CONTACT US!
Have product questions? Need technical support? Please feel free to contact us:
TECHSUPPORT@WENPRODUCTS.COM1-800-232-1195 (M-F 8AM-5PM CST)
For replacement parts and the most up-to-date instruction manuals, visit WENPRODUCTS.COM
MODEL JT3062
Questions and Answers:

Wen JT3062 Specifications

General IconGeneral
BrandWen
ModelJT3062
CategoryPower Tool
LanguageEnglish

Summary

Introduction to the WEN Benchtop Jointer

Jointer Specifications

Details about motor, speed, cutting width/depth, table size, fence, dust port, and weight.

General Safety Rules for Power Tools

Work Area Safety Guidelines

Keep area clean, avoid explosive atmospheres, keep bystanders away.

Electrical Safety Precautions

Use proper plugs, avoid grounded surfaces, avoid rain/wet, cord care, GFCI use.

Personal Safety Measures

Stay alert, use PPE, prevent unintentional starting, proper balance, dress code.

Power Tool Use and Care

Do not force tool, check switch, unplug for adjustments, store safely, maintain tool, keep sharp.

Servicing Your Power Tool

Use qualified personnel and identical replacement parts.

California Proposition 65 Warning

Warning about chemicals in dust, advice on ventilation and PPE.

Jointer Safety Warnings and Precautions

Tool Purpose and Misuse

Designed for flat surfaces on wood; misuse can cause injury.

Machine Mounting Requirements

Mount jointer securely on a flat, stable surface.

Personal Safety Gear and Attire

Wear safety glasses, hearing protection, dust mask; avoid loose clothing/jewelry.

Electric Cord Safety

Keep cords away from heat, oil, sharp edges, and moving parts.

Tool and Accessories Inspection

Check for damage/missing parts, ensure correct adjustments and tight connections.

Jointer Accessories Usage

Use sharp, undamaged accessories; align blades properly.

Workpiece Preparation and Requirements

Check workpiece for knots, nails, obstructions that can cause risk.

Material Size and Cut Depth Limits

Specifies minimum material dimensions and maximum cut depth. Use push block for narrow/thin.

Prevent Accidental Starting

Ensure switch is OFF before plugging in or performing adjustments.

Support Workpiece Adequately

Adequately support workpiece and maintain control during operation.

Avoid Backing Workpiece Towards Infeed Table

Do not back workpiece towards the infeed table.

Kickback Precautions

Precautions against kickback; avoid standing in line with cutterhead rotation.

Complete Assembly and Installation

Do not operate until fully assembled and installed per instructions.

Clear Work Area Before Operation

Clear table and work area of debris before operation.

Keep Hands Away From Moving Parts

Keep hands away from all moving parts and cutting surfaces.

Cleaning Plastic Parts Safely

Use a soft damp cloth for plastic parts; do not use solvents.

Replacements and Repairs

Replace missing/damaged parts with identical WEN parts.

Electrical Information and Grounding

Grounding Instructions

Proper grounding reduces shock risk; use grounded outlets and plugs.

Extension Cord Guidelines

Use heavy-gauge cords appropriate for amperage and length to prevent voltage drop.

Unpacking and Packing List

Unpacking the Jointer

Carefully remove jointer from packaging; check all contents against packing list.

Packing List Contents

Lists included tools, accessories, and hardware bag contents.

Know Your Jointer Components

Jointer Tool Purpose

Jointer resurfaces boards, flattens workpieces, and performs other tasks.

Assembly and Adjustments

Attaching the Fence

Step-by-step instructions for attaching the fence support and sliding brackets.

Installing the Dust Chute

Instructions for attaching the dust port to the jointer body.

Adjusting the Depth of Cut

Adjust infeed table using knob; ensure lock knob is tightened. Max depth 1/8".

Beveling the Fence

Fence angle adjustment from 0° to 45° using the bevel handle.

Moving the Fence Position

Adjust fence position by loosening handle, sliding, and tightening.

Avoiding Damage to Blades

Use quality lumber, avoid dirt, knots, and deep cuts to protect blades.

Installing the Cutterhead Lock

Install cutterhead lock for blade adjustment; disengage for operation.

Operating the Jointer

Feeding a Workpiece Properly

Proper feeding technique, use push block for narrow/thin wood.

Performing Bevel and Chamfer Cuts

How to perform beveling (angled edge) and chamfering (corner removal) cuts.

Attaching a Vacuum Hose

Connect dust collection hose to dust port for dust removal.

Using the OnOff Switch

Location and operation of the ON/OFF switch, including child-safety lock.

Adjusting the Blade Height

Procedure to check and adjust blade height using a straight edge.

Maintenance and Care

Routine Inspection Before Use

Checks before each use for loose hardware, misalignment, damage, etc.

Checking for Worn Blades

How to identify dull blades and the need for replacement. Blades must be replaced as a set.

Replacing Jointer Blades

Step-by-step guide to remove and install new jointer blades.

Cleaning and Storage Procedures

Instructions for cleaning the tool after use and proper storage.

Troubleshooting Guide for Jointer Issues

Motor Does Not Start

Lists common causes and solutions for the motor failing to start.

Motor Starts Slowly or Fails to Reach Full Speed

Causes and solutions for slow motor startup or failure to reach full speed.

Motor Overheating During Operation

Causes and solutions for the motor overheating during operation.

Snipe (Gouging at End of Boards)

Causes and solutions for snipe, which is gouging at the ends of boards.

Poor Dust Extraction

Causes and solutions for inadequate dust collection.

Cutterhead Not Spinning

Cause and solution for the cutterhead failing to rotate.

Exploded View and Parts List

Exploded View Diagram

Visual diagram showing how parts of the jointer are assembled.

Detailed Parts List

Detailed list of all parts with their corresponding numbers and descriptions.

Warranty Statement

Limited Warranty for Home Use

Details the terms and conditions of the limited warranty for home use.

Sellers Obligation and Buyers Remedy

Outlines the seller's obligation and the buyer's exclusive remedy for defects.

Related product manuals