3
SYSTEM SETUP
STAND SETUP
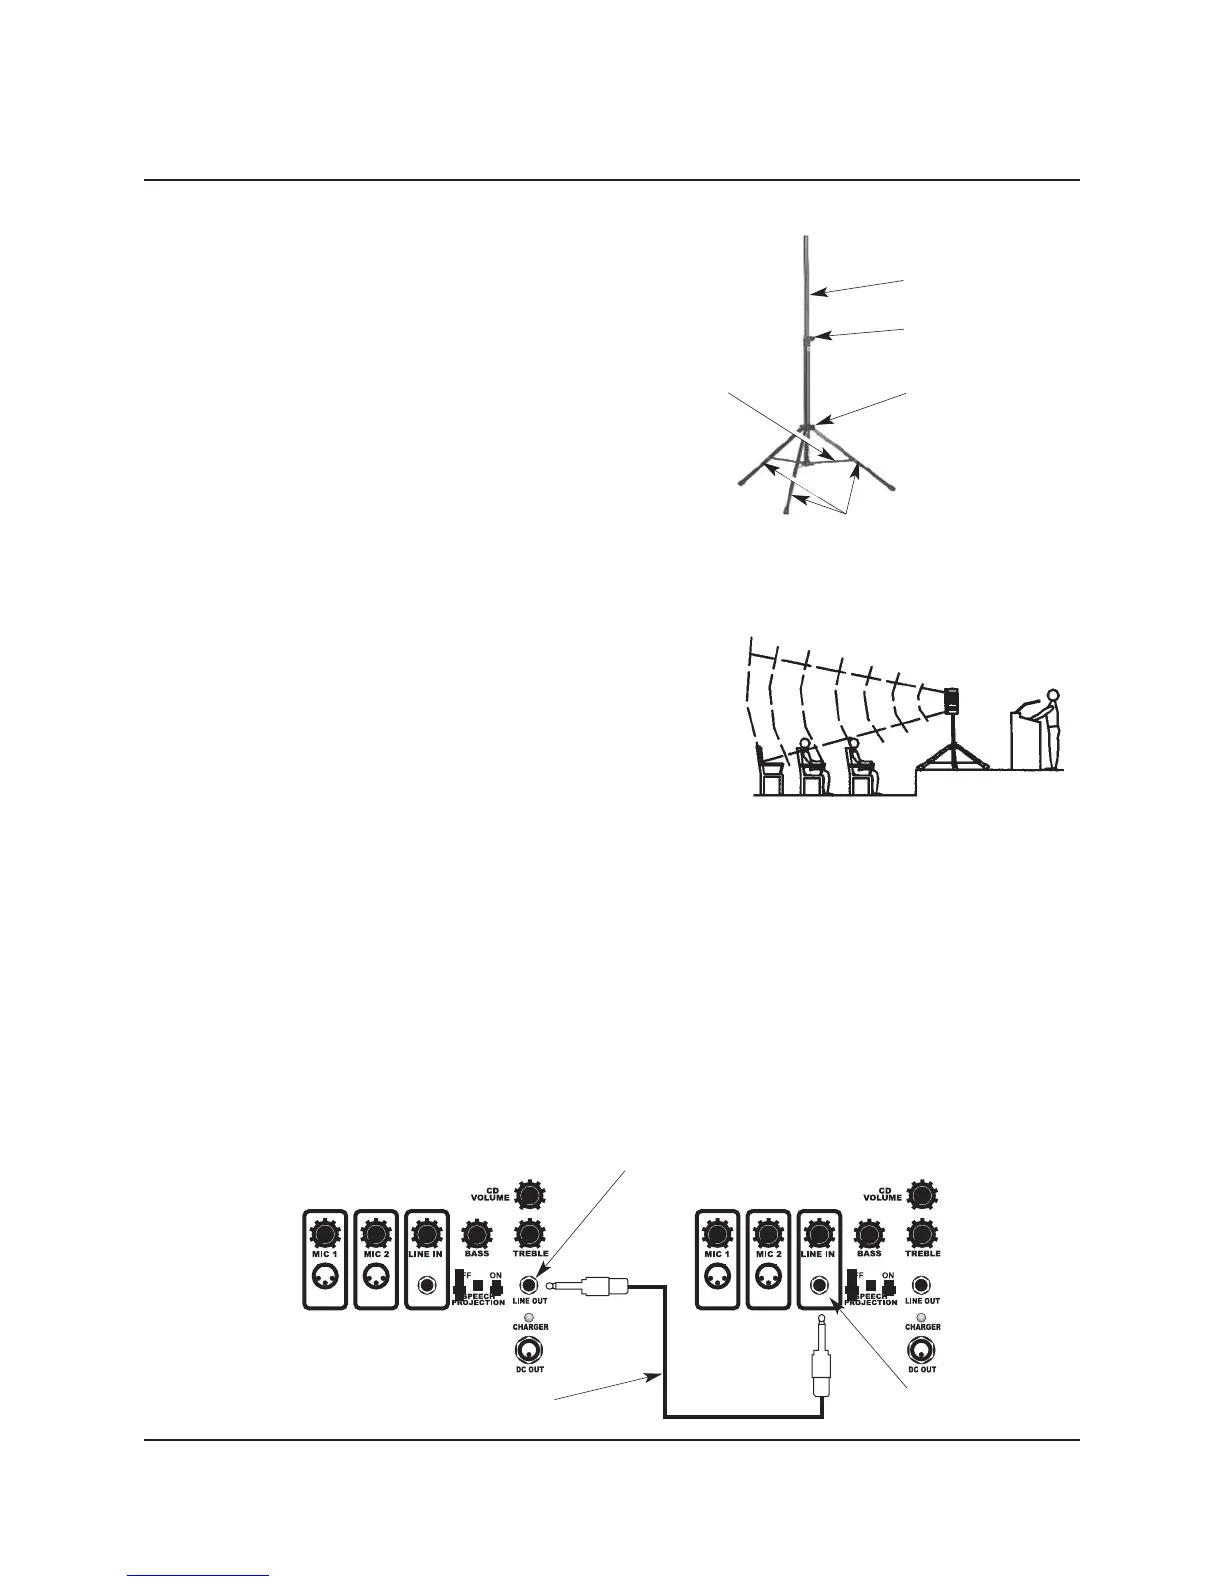
1. Set up the Stand as follows:
a. Loosen the Lower Collar Knob.
b. Separate the Stand Legs until the Support
Cross Braces are parallel with he floor.
c. Tighten the Lower Collar Knob.
d. Loosen the Upper Collar Knob, extend the
Center Post to the desired height, and
tighten the Upper Collar Knob.
e. Place the Self-contained Audio System onto
the Center Post.
Upper Collar and Knob
Lower Collar and Knob
Stand Legs
Support Cross Brace
Center Post
2. For best results, locate of the Self-contained Audio System
and Stand as follows.
a. Place the Audio System above the audience and
higher than the tallest obstruction.
b. Place the Audio System between the audience and the
presenter, with the Loudspeaker facing the audience.
c. Never place the Loudspeaker behind the presenter.
3. For single unit applications, place the Audio System and
Stand where there is the least amount of pedestrian traffic.
4. For two unit applications, place each unit along aisles just
off the centerline of the audience. Connect the systems
Audio System Stand
together as shown in the diagram below.
a. Connect the two Series 100 Audio Systems by connecting a cable from the LINE OUT on one
Audio System to the LINE IN connector on the second Audio System.
b. The second system must be powered from a 120 VAC source.
c. Turn the
LINE IN level control on the second system to maximum (fully clockwise) so that the
volume on the second system will be controlled by the first system.
Note: There may be instances when the room or outside area has large exposed walls or patios that
create multiple reflections of the original sound. In these situations, it may be necessary to
change the direction of the sound system until the sound reflections have been reduce to an
acceptable level.
Placement of Audio System Stand
First System Second System
Line Out Connector
Line In Connector
Cable with 1/4-inch Connectors